Reviews
Gallery33
- Introduction: Budget build
- Update 1: Springs & Boots
- Update 2: Breathing Easy
- Update 3: Lock and Load
- Update 4: The Dirt Locker
- Update 5: On the Pipe
- Update 6: Baby Got Back
- Update 7: Weighing Things Up
- Update 8: Muddies Muffled
- Update 9: Power Hungry
- Update 10: The Shake Down
Introduction: Budget build
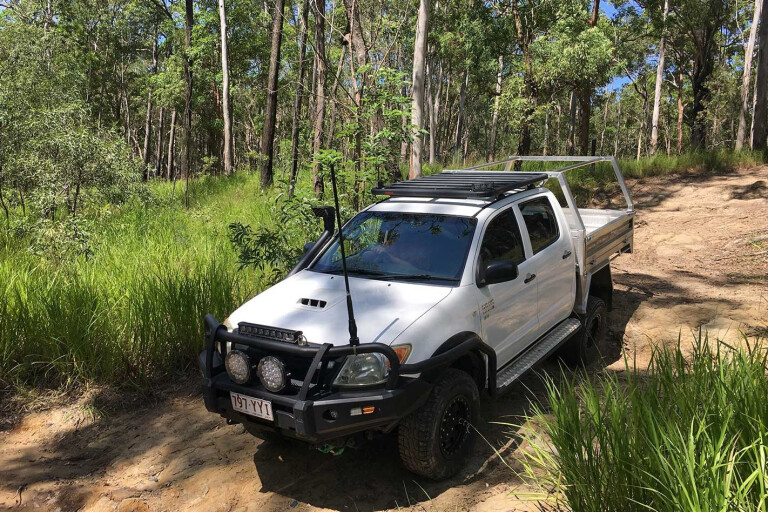
While the guys down in the Melbourne office have been playing around with their shiny new Ford Ranger, throwing every accessory possible at it to build the ultimate tourer, I thought it would be a bit of fun to see what could be achieved with a bit more of a budget-conscious build.
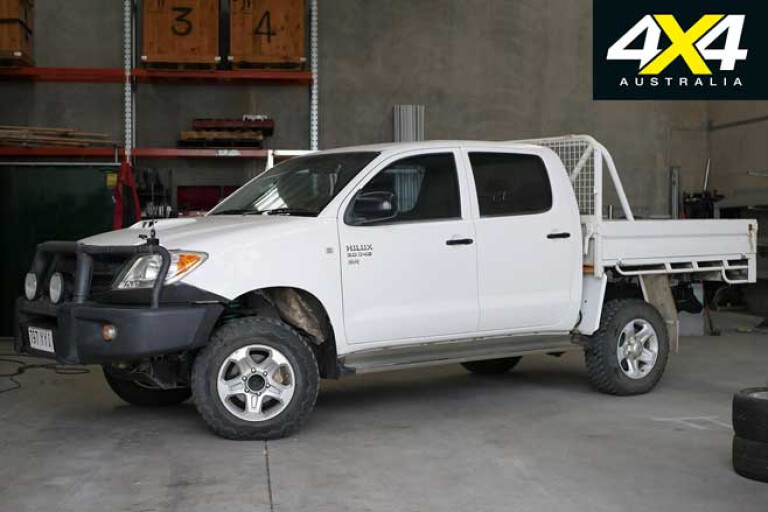
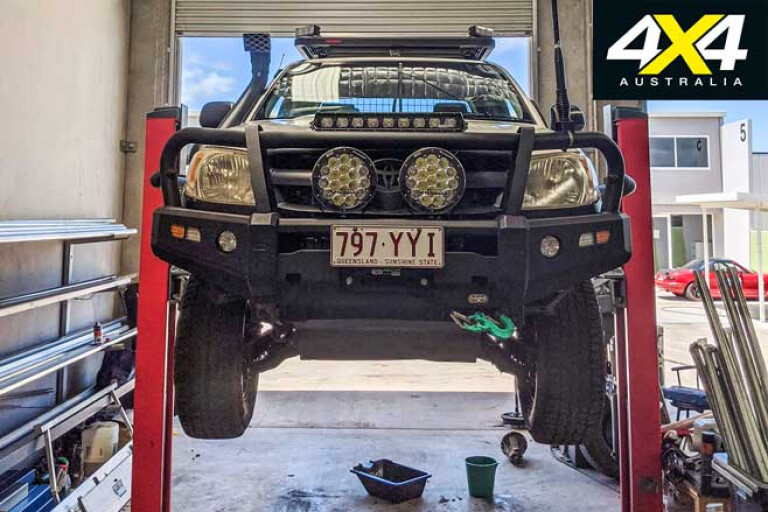
I’ve started with a tried and true Aussie favourite in the form of a KUN26 Toyota Hilux 3.0-litre turbo-diesel manual dual cab. To keep costs down, the vehicle was purchased sight-unseen from an ex-fleet auction for $10K. Admittedly, this was a bit of a risk, but fortunately once the car arrived and we gave it the once over it turned out to be a solid purchase, with a good service history and only minor cosmetic wear and tear.
33
With 150,000km showing on the odometer, the Hilux’s engine required a timing belt change, and the wheels and tyres have definitely seen better days. The Hilux ticked all the boxes when it came to starting with a good platform to build a solid tourer on, and I reckon it will give Matt’s Ranger a run for its money at a fraction of the price.
APAC 4x4 on the Sunshine Coast has graciously offered its workshop and will be helping with all the fitment and advice throughout the build, and they’ll also build a custom tray for the Hilux. The team at APAC 4x4 offer complete vehicle fit-outs, custom fabrication services and have been manufacturing high-tech systems for the defence, energy and telecommunications sectors for many years.
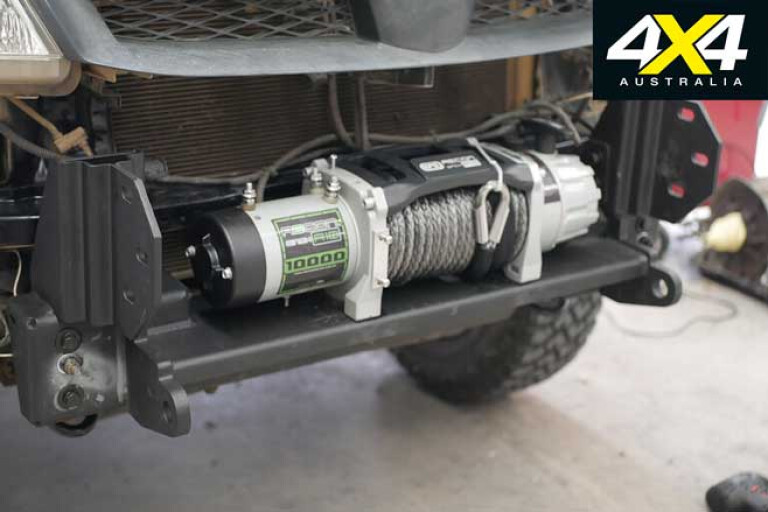
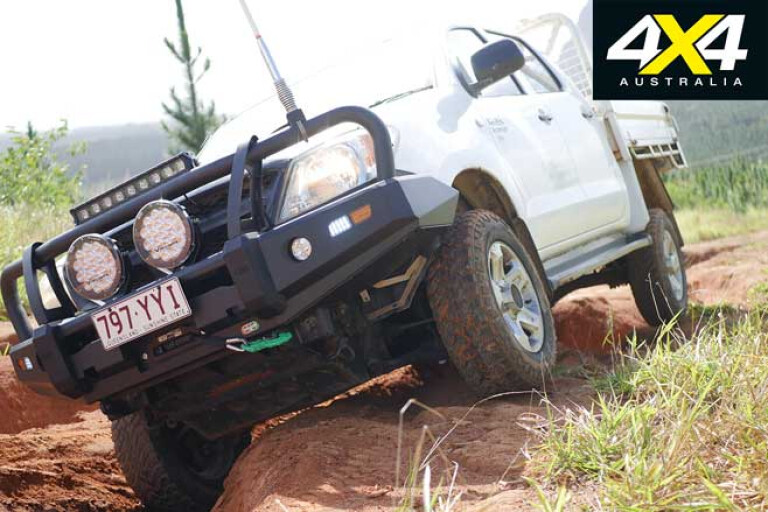
There’s a shedload of accessories available for the popular KUN26 Hilux, and we kicked things off by fitting a heap of EFS equipment including an Adventure Stockman bullbar, a 10,000lb Recon R10 winch, nine-inch Vividmax LED driving lights, and a 19-inch Vividmax LED light bar.
33
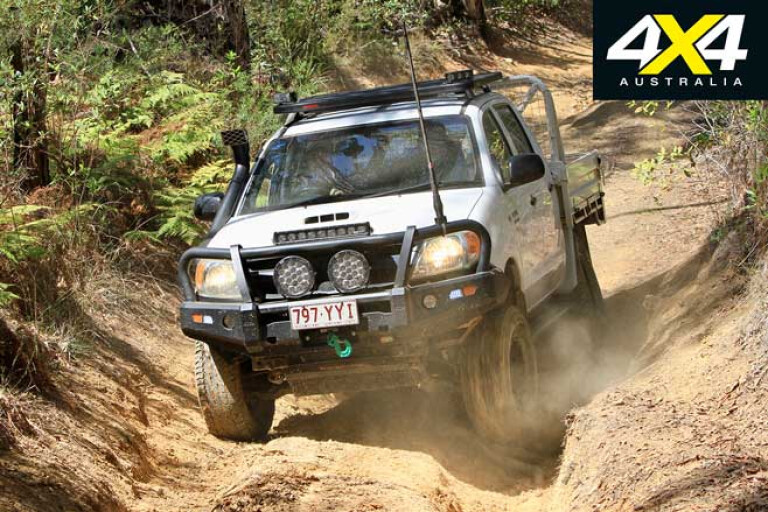
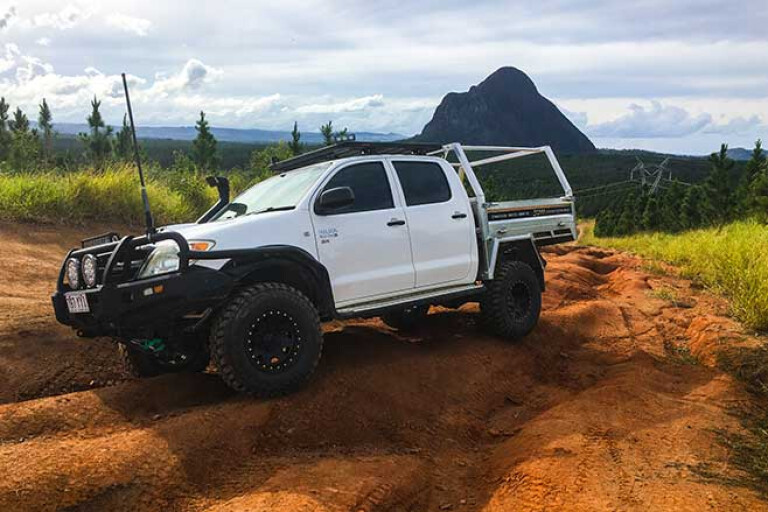
With a quick trip up to the Glasshouse Mountains to give the Hilux an off-road shakedown, it soon became clear why this model has been a staple for off-road enthusiasts for many years. The engine provides decent performance and the Hilux offers a great combination of off-road capability and on-road ride comfort.
On our example, braking performance is questionable, ground clearance is on the low side and the suspension has seen better days, and after driving a few rutted-out hills it became evident a rear locker would greatly aid off-road capability. And despite the reasonable performance on offer, the 3.0-litre turbo-diesel could always use a power upgrade.
33
There are plenty of other upgrades for the Hilux on the agenda, including a TJM suspension kit, the aforementioned APAC 4x4 custom tray, a TJM Pro Locker, a Yakima LockNLoad roof rack system, new wheels and tyres, and a performance upgrade.
MORE4x4 Shed
Current mileage: 150,000km
Date acquired: August 2019
Price: $10,000
Mileage since last update: N/A
Average fuel consumption: N/A
Update 1: Springs & Boots
Out with the old and in with the new, as Ginger the Hilux gets a much-needed suspension upgrade and fresh ‘used’ rubber.

33
After its first shakedown trip to the Glasshouse Mountains, it became clear after only a few kilometres that the Hilux’s suspension was in dire need of an upgrade.
While it wasn’t absolutely terrible on the road, there was still a noticeable amount of unwanted body roll, and the rear-end felt a little loose when cornering. The situation was similar off-road, and the suspension bottomed out a few times on bigger hits and became increasingly noisy. The service history of the car indicated the current kit had at least 100,000km on it, and upon inspection the rear shocks were found to be leaking.
There’s a laundry list of accessories you can throw at any older 4x4, but a quick and easy way to breathe new life into one is to upgrade the suspension. I opted for a tried and proven TJM XGS Series 4000 40mm suspension lift, and I’ve had experience with the XGS range before and find it to be a good all-round kit.
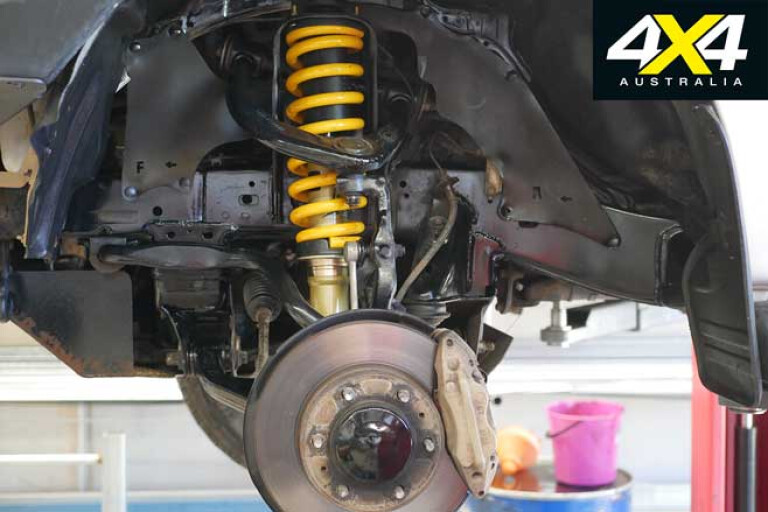
33
Running N2 charged twin-tube shocks with a 20mm larger diameter piston rod and 40mm large diameter piston, TJM claim the XGS Series 4000 delivers lower internal pressure for shock durability, faster damping response for improved body control, a smoother, more comfortable ride, and improved on-road handling and braking ability with reduced noise and vibration.
The guys from APAC 4x4 leant a hand in fitting the new kit and found the Hilux’s suspension bushes were either extremely worn or almost non-existent, so these were also replaced.
The Hilux’s 225/75 R16s had also seen better days and were definitely undersized for the type of touring planned. I found a set of 16x8 King steelies with generic 265/70 R16s on my local ‘marketplace’ for less than $800, so while the Hilux was up on the hoist for the suspension upgrade we swapped over the wheels.
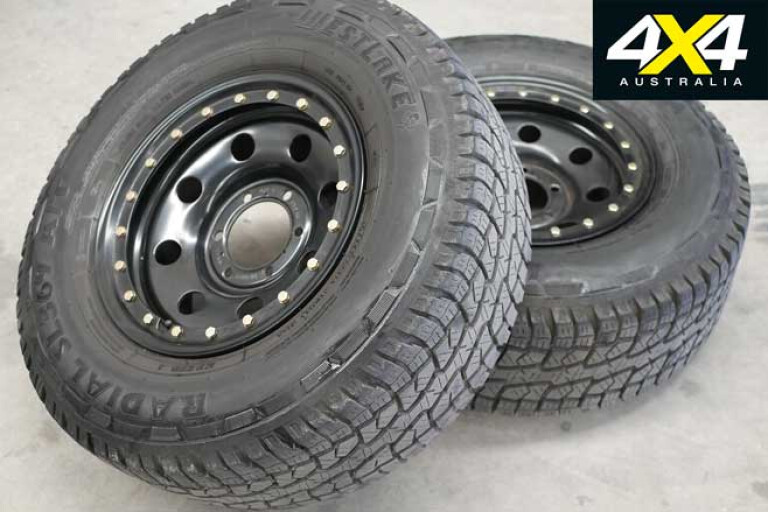
33
The vehicle looks the part now, but I’ve got my doubts on the longevity of the tyres. I will be putting a lot of thought into the correct tyre for the type of touring I have planned and will be fitting them prior to any long trips.
It was immediately evident on a quick road trip to settle in the new suspension that the ride, cornering and overall vehicle dynamics were greatly improved. I’m looking forward to putting the new XGS suspension through its paces on- and off-road and will provide a full review of the upgrade in an upcoming issue.
Current mileage: 150,000km
Mileage since last update: N/A
Average fuel consumption: N/A
Update 2: Breathing Easy
A focus on longevity and reliability are key in the most recent upgrades to ginger the Hilux.
33
When I first took the Hilux on a test drive around the block the one thing that stood out was the 3.0-litre turbo-diesel engine’s lack of grunt, and I knew that would have to be rectified at some point.
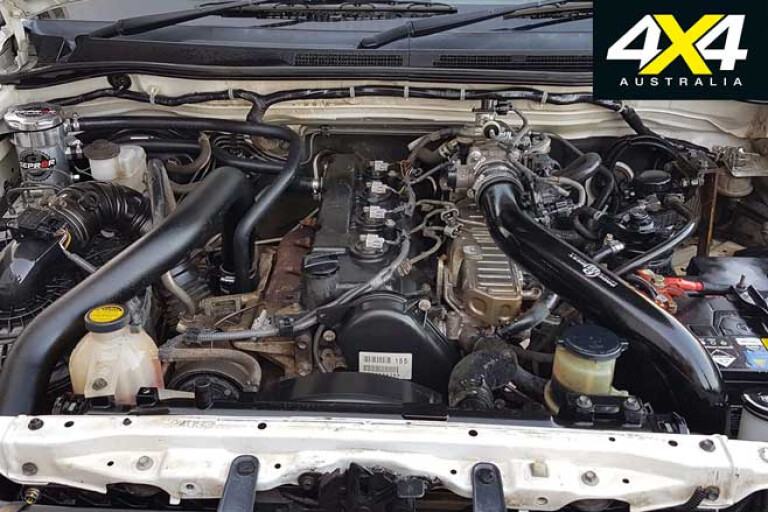
There are many go-fast bits for the Hilux – upgraded exhausts, diesel chips, turbo upgrades, throttle response units and more – but before heading down the path of trying to squeeze every bit of power out of the engine, I wanted to start with a snorkel and a catch can, and an upgrade of the intercooler. As the Hilux already has more than 150,000km on the clock, it makes sense to invest in items that will reduce the risk of further wear and premature failure, while also increasing engine efficiency.
I spoke with the guys at 4x4 Mods Australia on the Gold Coast regarding the most suitable intercooler setup for the Hilux, and they suggested a TerraTuff front-mount intercooler kit. Intercoolers are designed to increase performance and improve reliability by reducing inlet temperatures and engine running temperatures, and shifting from the factory top-mount intercooler to a front-mount intercooler increases airflow and helps with heat exchange.
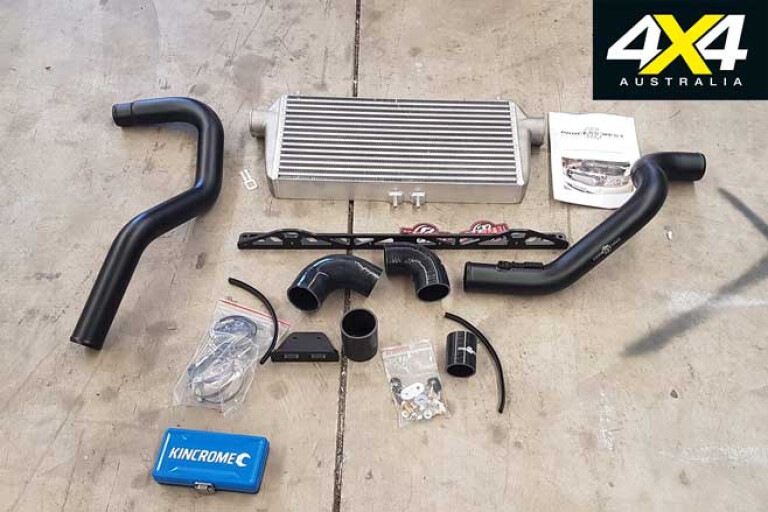
33
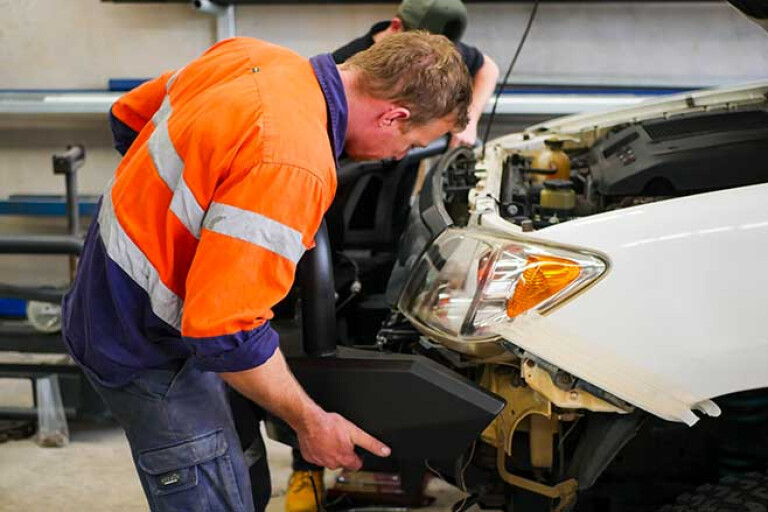
The guys at APAC 4x4 on the Sunshine Coast installed the intercooler and fitted a Sherpa snorkel at the same time. While we had the airbox out for the snorkel install, we had a good look around to see if there had been any evidence of dust making its way past the air cleaner.
Ginger is an ex-fleet vehicle, so I don’t really know how it’s been treated in the past, but thankfully there was no evidence of dust in the intake downstream from the air cleaner. While at APAC 4x4, the guys fitted a new set of brake discs, which provided a much needed and significant increase in stopping power. They also replaced a torn CV boot.
The 4x4 Mods Australia crew suggested I fit a TerraTuff SEPR8R Catch Oil Can to increase the engine’s longevity and reliability. Oil catch cans/oil air separators prevent oil from entering the intake manifold and mixing with the carbon from the EGR (exhaust gas recirculation) system, which can clog up components and increase wear and the risk of premature failure. The separator eliminates the chance of oil vapour contaminating the intake system and helps keep the internal components of the intercooler clean and working at optimum efficiency.
33
The TerraTuff SEPR8R Catch Oil Can kit is a direct bolt-in system and it looks the business with its billet alloy finish and stainless steel laser-cut brackets. At $375 it’s a relatively inexpensive investment that increases efficiency and decreases the potential for engine wear.
Since these mods I’ve put some decent highway and off-road kays on the Hilux and it has not missed a beat, performing all-day long on challenging off-road tracks, before getting back on the road for several hours of highway driving, with a steady engine temperature and no decrease in performance and reliability.
The next upgrades on my list include a rear locker and some better off-road rubber. I’m pretty happy with how it performs on the road now, so I’m starting to question whether I’ll need to make an investment in any go-fast bits.
Current mileage: 150,000km
Mileage since last update: N/A
Average fuel consumption: N/A
Update 3: Lock and Load
Ginger the hilux gets up-armoured courtesy of new side rails and side steps from efs. plus, a locknload platform lands up top.

33
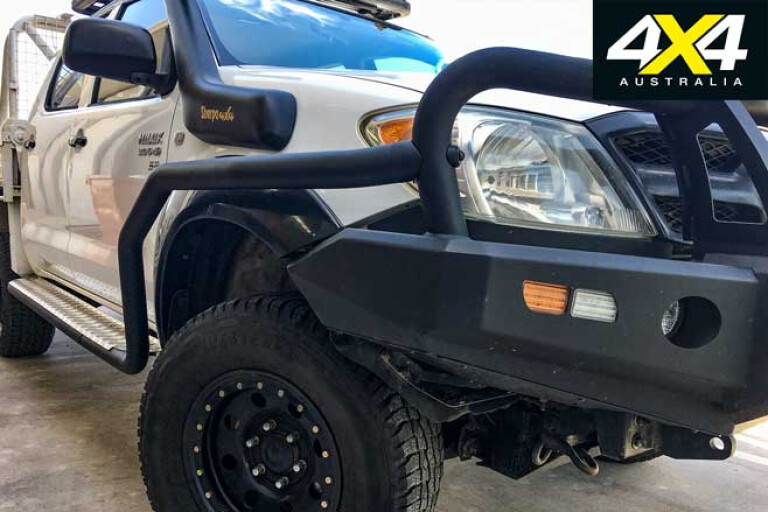
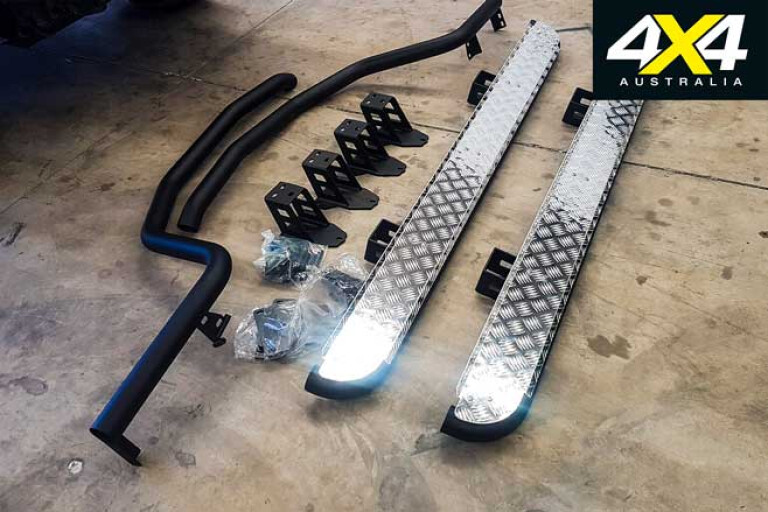
GINGER the Hilux got some much-needed side protection this week, via a new set of EFS side rails with matching side steps. Plus there are now extra storage options up top, with the addition of a Yakima LockNLoad platform.
Following a few off-road trips that resulted in bush pinstripes, as well as an altercation with a barbed-wire fence, I decided some brush bars would be a welcome accessory. When I first fitted the EFS Stockman bullbar, EFS didn’t have matching side rails or side steps available.
The EFS Adventure Series side rails were released in November this year and are just as solid and well-thought-out as the Stockman bullbar. Made from 2mm-thick steel, Black Endura coat finish and with a 63mm tube body, the side rails complement the bullbar and attach through a very neat single-point mounting and not the common clamp design seen on most other bars.
33
The Hilux’s standard side steps had seen better days when I first bought the vehicle, and they aren’t looking any better after some rocky off-road adventures, so I fitted a new set of EFS Adventure Series side steps with the side rails. Made from the same 2mm steel, 63mm tube as the bar and side rails, the side steps are a lot stronger than the Hilux’s original aluminium steps and match the entire EFS front and side protection set-up. The checker-plate top stands out a bit against the black rails, so I will eventually powdercoat these black to tone down the bling.
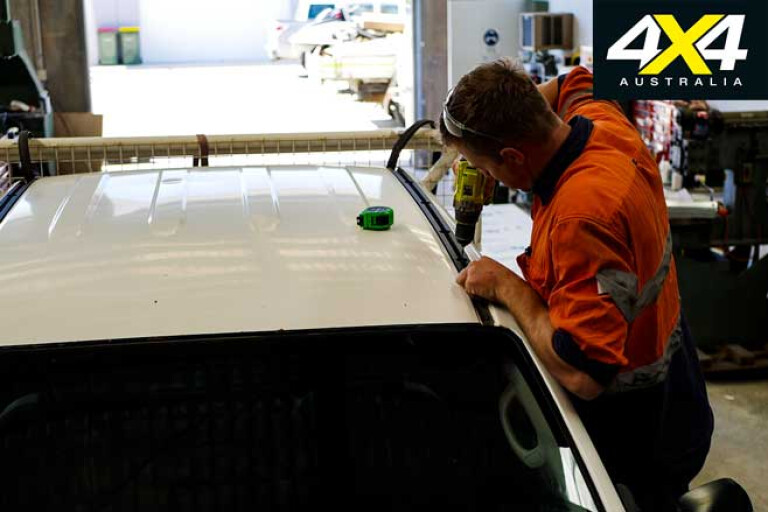
To increase load-carrying ability and versatility, I’ve added a set of Yakima LockNLoad roof racks and a LockNLoad platform on top of the Hilux. I’ve been a big fan of the Yakima range for years, as the fit, finish and innovation of its gear is at an extremely high level. Plus, the integrated bottle openers really ticked the box for me.

33
The robust LockNLoad platform is made from corrosion-resistant, powder-coated aluminium and features an additional e-coating: a process best described as a cross between plating and painting, for added strength. Unlike other racks I’ve fitted in the past with roof channel mounting points, fitment was relatively quick and easy, and it’s obvious Yakima put a lot of thought into the quality of its product and the fitment process.
The east-west orientation of the slats suits the way I prefer to tie down items, and every slat incorporates a 21mm accessory slot. The perimeter also features a top slot on all sides, for mounting accessories such as a high-lift jack, an awning and a shovel.
Aside from the build quality, one of the main reasons for choosing the Yakima LockNLoad platform was the amount of accessories available and the ease in which they are incorporated. I’m still working out exactly what I want to permanently carry up top, but it would be good to have a set of MaxTrax there full-time instead of randomly throwing them in the tray when leaving for a trip.
33
A spade mount, a quick-release awning bracket and an eyebolt kit for easy tie-down points also makes sense, leaving a decent amount of room up top for soft and light cargo like swags, chairs, tents and sporting equipment.
The Yakima platform is rated to 100kg, but you should check your vehicle’s roof load capacity, normally found in the manual (this will include the weight of your rack set-up in the total). Initial road tests show no added aero noise, but this may change when adding some permanent accessories.
The LoackNLoad is definitely not on the cheaper end of the scale when it comes to racks, but you get what you pay for. I’m looking forward to adding more accessories from the Yakima range to the platform and will be reviewing them individually in upcoming issues.
4x4 gear prices
33
EFS Adventure Side Step: $799 (each)
EFS Adventure Side Rail: $498.99 (each)
Yakima LockNLoad Crossbar: $571 (pair)
Yakima LockNLoad Platform: $1218
Current mileage: 161,000km
Mileage since last update: 11,000km
Average fuel consumption: N/A
Update 4: The Dirt Locker
Jimmy’s Hilux gets serious with a TJM Pro Locker.
33
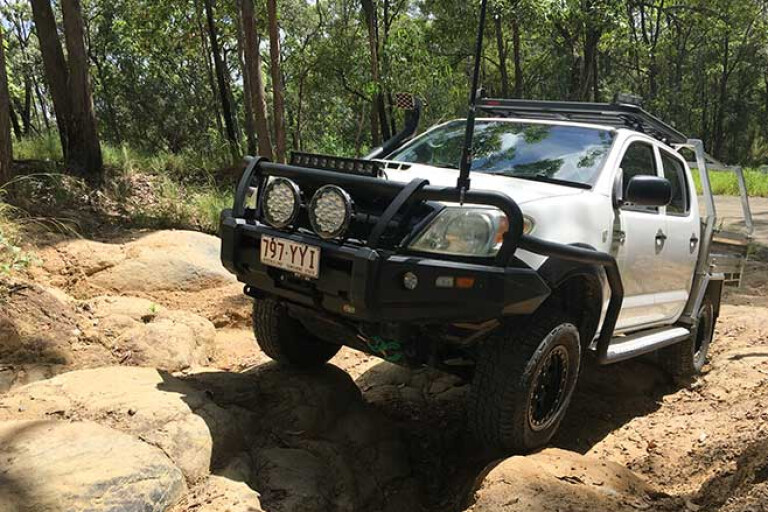
After one of our off-road trips to the Glenreagh region north-west of Coffs Harbour, it became evident on more challenging, rutted-out hill climbs just how much the Hilux and I were relying on momentum rather than utilising the torque and traction that would be available if running a locking differential.
When off-roading on uneven terrain, it is quite common to have either a front or rear wheel lose traction or even lift off the ground. When this happens the power will always take the path of least resistance and head to the tyre that is losing traction or in the air, leaving the opposite tyre, which is actually the one needing power, with limited to no power.
This is where diff locks come in handy; with a flick of an in-cabin switch you can lock the differential, forcing both wheels across an axle to rotate at the same rate to deliver equal power to each of them, but more importantly delivering power to the tyre actually planted on the ground.
33
There are a few types of lockers (mechanical, air and electrical) and all essentially perform the same task but are engaged either through mechanical means, via an air compressor or via an electromagnetic mechanism. In most cases of lost traction you will generally have at least one front wheel and one rear wheel firmly on the ground, so either a front locker or rear locker is going to add significant traction by locking either axle.
There is great campfire debate about whether a single locker should be in the front or the rear. The more weight you carry over an axle increases the traction available when locked, so if you carry significant weight in the rear this could be your best option. There is also the push/pull debate when comparing front and rear, with the belief it is easier to pull the vehicle up over challenging terrain with a front locker compared to pushing from the rear.

33
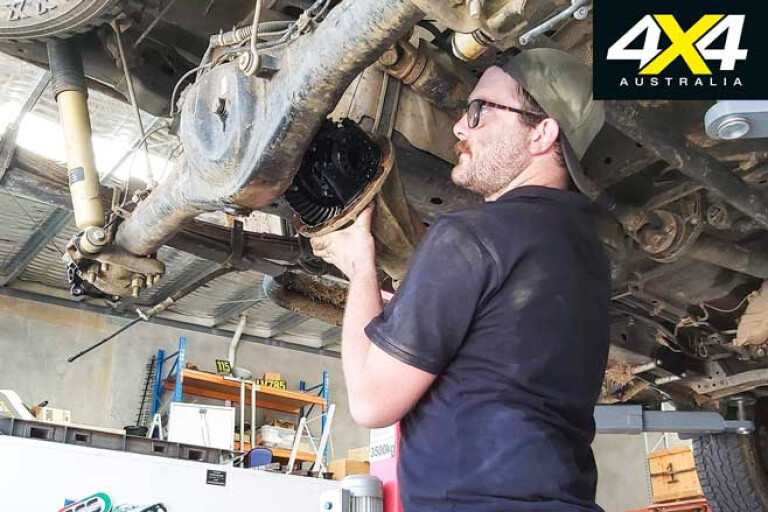
The most relevant point to this Hilux build is the stress placed on the more complicated front drivetrain when the diff is locked. As the Hilux came to me with more than 150,000km already on the clock I didn’t want to place further stress on the front diff, CV joints and steering components that I don’t have a solid history on, so I opted for a rear Pro Locker from TJM.
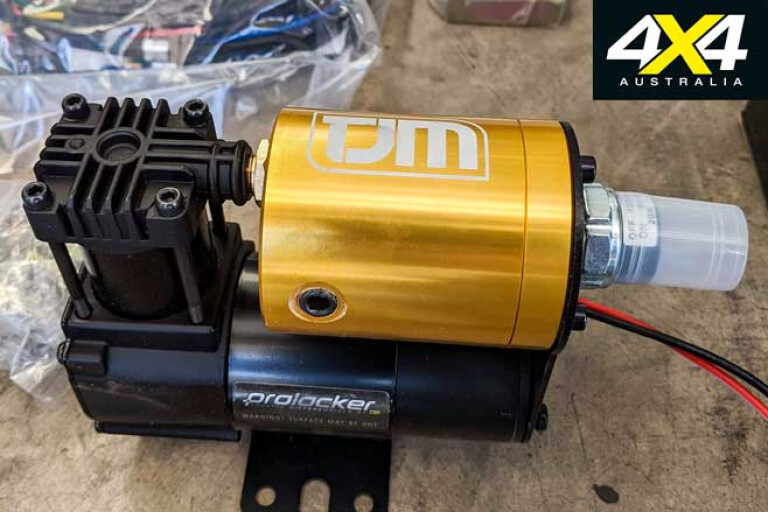
TJM’s Pro Locker is an innovative air-actuated locker running a unique one-piece cross shaft (instead of the usual three), hardened thrust washers and large pinion gears. It’s a solid bit of kit at $1499 and is covered by a five-year warranty. The Pro Locker comes with a small dedicated air compressor ($229) for engaging the locker, and we mounted this in the cabin behind the rear seats, running the airlines under the body and the switches up front.
33
APAC 4x4 on the Sunshine Coast fitted the locker in half a day with no issues. At the time of writing the weather here was on the wet side, with a lot of flooding around my favourite proving ground, so the locker is installed but I’ve yet to take it out and put it through its paces.
The Hilux will be getting some long overdue new wheels and rubber by next issue, and hopefully some time on my favourite uphill tracks. Now that it’s equipped with its new Pro Locker, I’ll let you know how it tackles some of the more challenging climbs where it’s struggled in the past.
Current mileage: 166,000km
Mileage since last update: 5000km
Average fuel consumption: 11.27L/100km
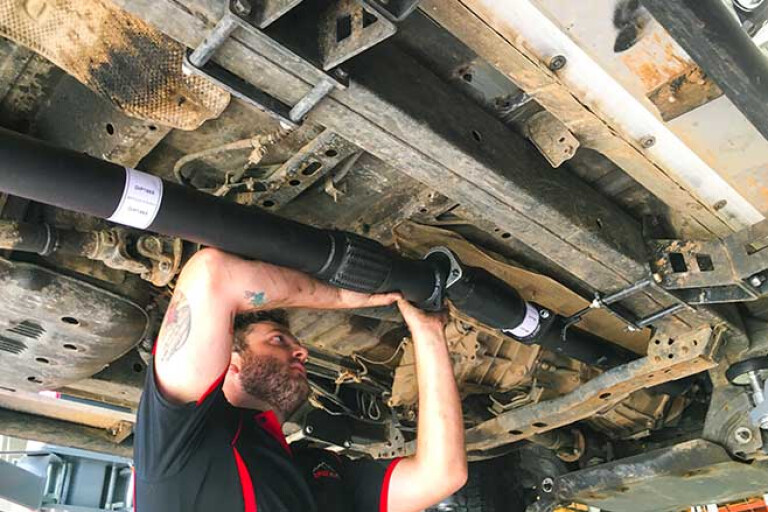
Update 5: On the Pipe
Jimmy hits the pipe to unleash the wild performance of his 3.0L Hilux.
33
This month, the Hilux got a replacment exhaust system and we the TJM Pro Locker through its paces.
Since picking up the Hilux the exhaust has been something needing attention, not as a priority, but more as a reduction in noise pollution. The previous setup was a backyard deal, with the muffler removed in favour of a straight-through system. Not the worst sound, but it did tend to drone at highway revs.
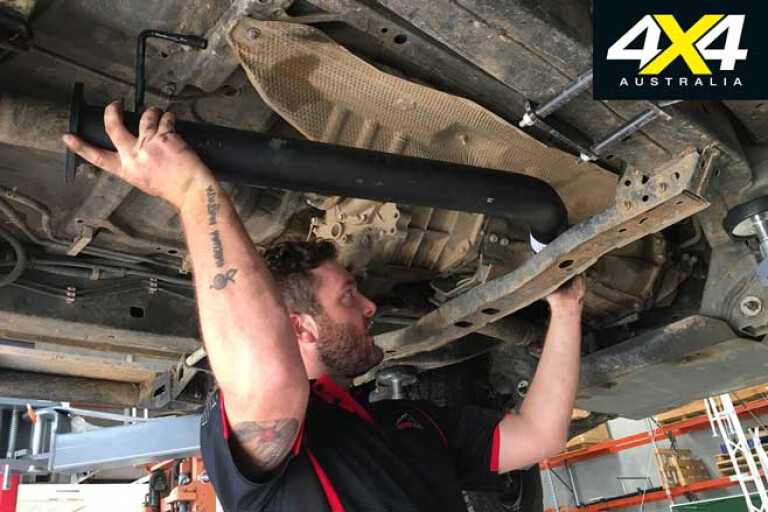
I opted for a 3-inch turbo back with hotdog/resonator and cat setup from Carbon Off Road. This system retails for $869 using CNC mandrel-bent aluminised tubing, 10mm flange plates and electrostatic high-temp paint and two-year warranty.
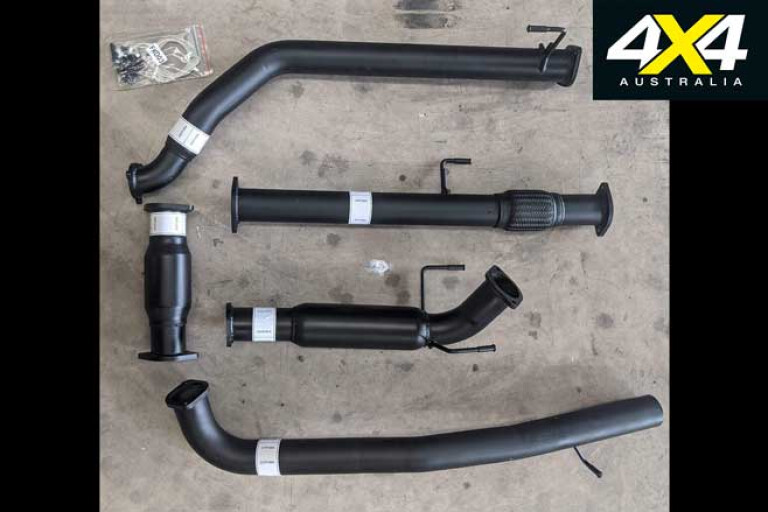
33
Using all the original attachment points the guys at APAC 4x4 on the Sunshine Coast had the system installed in record time, once the usual issue of seized nuts on the dump pipe we’re sorted. Upgrading your exhaust is a relatively easy DIY if you’ve got access to a hoist, and is made all the more pain-free with a system such as the Carbon Off Road that uses all the original hanger points.
After installing the exhaust it was time for a test drive to see how it sounded and if the drone at highway revs had been eliminated. Running a 3-inch exhaust with only a resonator, I did have some apprehension on sound quality, however the guys at Carbon Off Road assured me I would not be disappointed.
Overall the sound is good at highway speeds and throughout the rev range with no noticeable drone at all, and I reckon I even noticed a small increase in performance. The next step will be an ECU tune or diesel chip to take advantage of the free-flowing exhaust and the larger TerraTuff front-mount intercooler setup.
33
Last issue I installed a rear TJM Pro Locker with the help of APAC 4x4, and this one accessory has made a huge improvement when tackling previously challenging tracks. Rutted-out hillclimbs that seemed almost impossible on previous attempts can now be approached with reduced speed and vastly improved traction. With a reduction in momentum needed on challenging trails, the Pro Locker in my opinion should reduce wear and tear associated with more spirited approaches to deep ruts and steep undulating tracks.
At $1728 (including air-compressor) the Pro Locker is a relatively minor expense for a major off-road gain and potentially reduced wear and tear.
Current mileage: 166,000km
Mileage since last update: 1000km
Average fuel consumption: 11.3L/100km
WITH THANKS
www.carbonoffroad.com.au
www.efs4wd.com.au
http://tjm.com.au
www.yakima.com.au
www.4x4modsaustralia.com.au
https://apac4x4.com.au
www.sherpa4x4.com.au
Update 6: Baby Got Back
The tray is the most versatile part of any ute, with endless options for configuration and customisation.
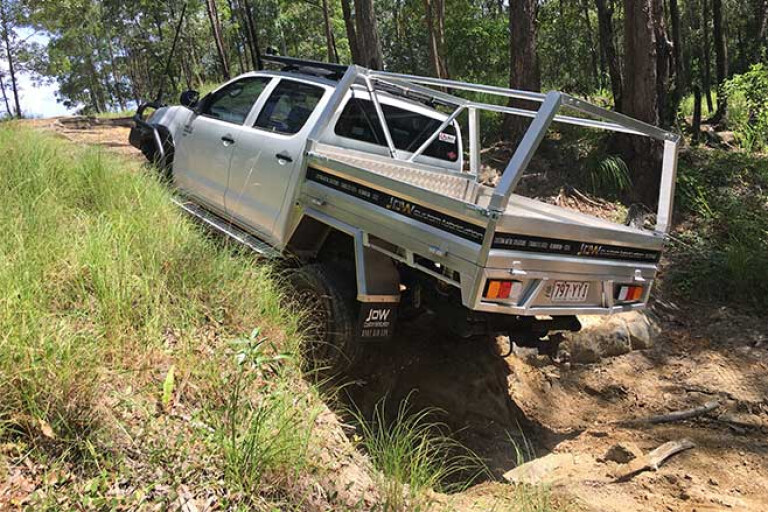
This past month the Hilux has been fitted with a Trade Tuff tray (RRP $5896) from JDW Custom Fabrications on the Sunshine Coast, Queensland.
I’ve seen a lot of JDW trays getting ’round the Sunshine Coast and I liked the build quality and customisation, so it was my first port of call for a tray. JDW has been operating on the Sunshine Coast since 2016, and on top of building trays and canopies it also specialises in full custom-metal solutions for the construction commercial/residential, marine, automotive and farming industries.
33
Chatting with owner John Winiata, it was clear that no job is too big or small; John said they can be building trays and canopies one day, stair stringers the next and stainless-steel kitchens the day after, on site or in the factory, no two days are the same.
JDW builds its trays on two main platforms, Trade Tuff and Adventure Ready. Trade Tuff feature full-length rope rails, two-piece guards, removable rear rack and trundle drawers, while Adventure Ready feature inbuilt tie-down points (no rope rail), tapered under-tray boxes, water tanks, one-piece mudguards and under-floor battery boxes. Both Trade Tuff and Adventure Ready are available with all options and upgrades and can be customised with limitless options.
After consulting with John, I decided on the Trade Tuff economy-build tray as a start, then add on accessories and customise as required. The Trade Tuff tray is a solid bit of kit with top-quality fit and finish using structural-grade aluminium for chassis, side rails and headboard for the added strength.
33
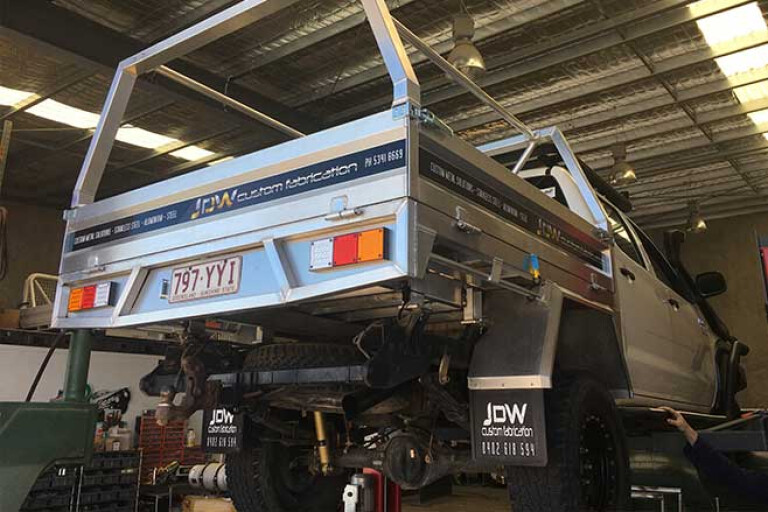
Standard features include full marine-grade aluminium construction; 3mm tread plate floor and flat sheet guards; extruded drop-side section; galvanised over-centre latches; stainless-steel fixings; fuel filler and breather covered under a three-year workmanship warranty; and 280 Series auto LED lights covered by a five-year warranty. Turnaround is roughly two to three weeks depending on options and customisation, with powder coating and two-pack colour matching available.
Over the coming months I will be adding tool boxes, a water tank and either a half- or quarter-canopy and will be consulting with John on customisation options as I add more accessories and find areas that can be adapted to my requirements.
Current mileage: 166,210km
Mileage since last update: 210km
Average fuel consumption: 11.27L/100km
WITH THANKS
www.jdwcf.com.au
www.carbonoffroad.com.au
www.efs4wd.com.au
www.tjm.com.au
www.yakima.com.au
www.4x4modsaustralia.com.au
www.apac4x4.com.au
Update 7: Weighing Things Up
Fitting an aluminium tray to the Hilux has affected the way it drives and has left Jimmy looking at his options.
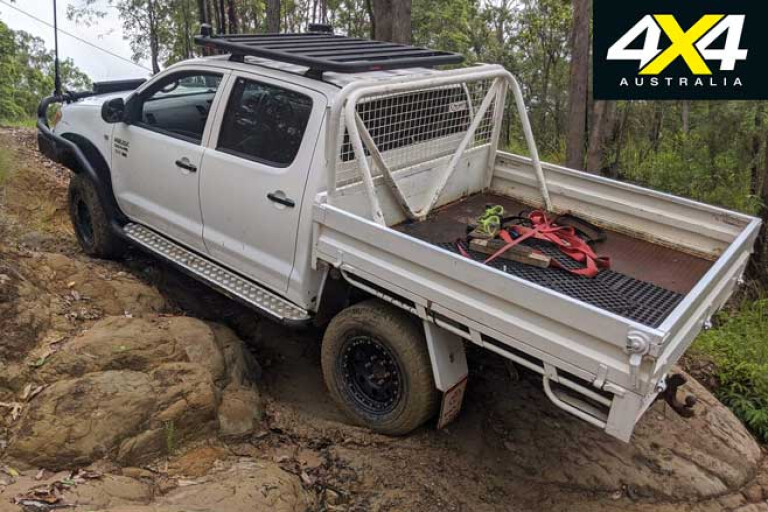
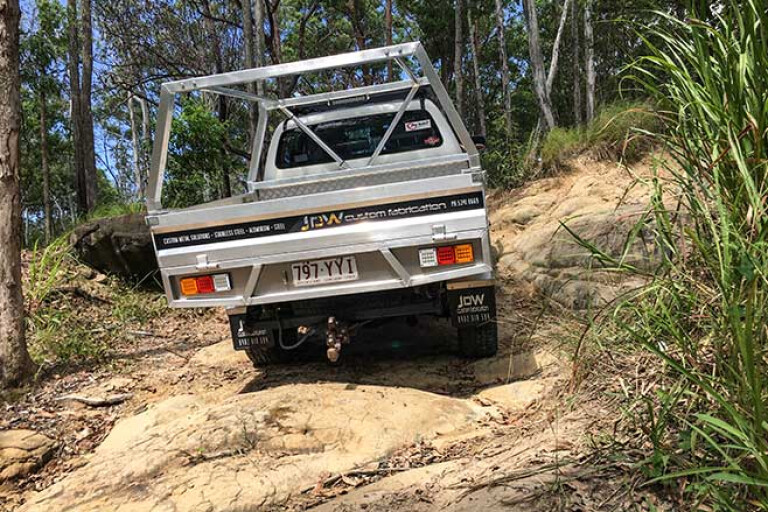
BEING an ex-fleet vehicle with a steel tray the Hilux was carrying a significant amount of weight on the rear, even with nothing in it. Since swapping it out for an alloy tray from Queensland’s JDW Custom Fabrications the reduction in weight has been quite noticeable.
The width of the new tray is more streamlined to the vehicle now and there is a reduction in wind noise over the steel tray in consequence.
33
This decrease in weight and wind drag has resulted in a welcomed minor reduction in fuel consumption, too. The only negative to the tray is the reduction in weight over the rear axle, which has resulted in a noticeably stiffer rear end.
With the rear suspension running less constant load the shocks’ resting positions are nearly fully extended, which means little to no down travel; so while the front is still tracking well, the rear has a noticeable decrease in grip and comfort.
I will be fitting permanent accessories to the Hilux over the next few months, adding to the constant load. This will bring the tray back up to around the same weight as the steel tray by itself, which should address the ride issues.
THE SET-UP
When choosing the right suspension set-up for your requirements, working out your constant load (permanent extra weight added to the vehicle) is very important as there are several options to suit; but if you get it wrong you’ll end up with a poorly performing set-up on- and off-road.
33
Therefore any reputable suspension shop should ask you what extra accessories have been installed or planned to be installed, and then point you in the right direction for the correct set-up to suit your needs.
At the time of writing a new set of Cooper Evolution M/T tyres arrived, but we ran out of time to fit them. Due to virus restrictions at the time, I couldn’t head bush to put them through their paces, either.
As they are a chunky mud tyre I’m expecting fuel consumption to head south, but after chatting to Coopers about new technologies used, this may not be like the mud tyres of old and I’m really looking forward to giving them an initial review and further updates as I rack up the kays on- and off-road.
Current mileage: 173,000km
Mileage since last update: 6790km
Average fuel consumption: 10.34L/100km
WITH THANKS
www.coopertires.com.au
www.jdwcf.com.au
www.carbonoffroad.com.au
www.efs4wd.com.au
www.tjm.com.au
www.yakima.com.au
www.4x4modsaustralia.com.au
www.apac4x4.com.au
Update 8: Muddies Muffled
Jimmy’s Hilux gets a set of mud-slinging, dirt-digging Cooper Evolution tyres.
THE Hilux got a bit of well-overdue track time and I got to put the new Cooper Evolution M/T tyres through their paces.
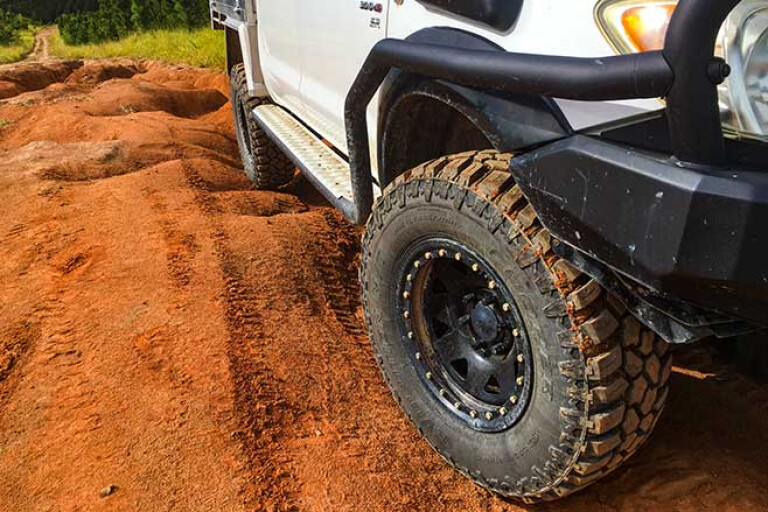
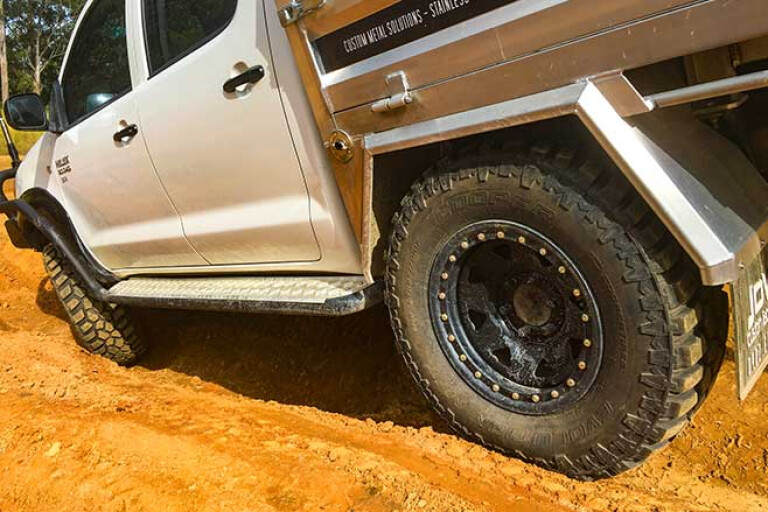
Going from a 265/65R16 to a 285/70R17 the Hilux gained an extra inch-and-a-half of lift adding to overall clearance and a larger footprint increasing available grip.
It was tight squeeze fitting the 285s under the guards and I had to modify a few inner-guard plastic wear points, but so far there have been no issues.
33
Being a mud terrain tyre, the Evolution has the typical aggressive tread pattern and wide tread blocks that can be quite noisy on road.
Considering it’s a fresh design, though, Cooper has incorporated some new technologies to address noise and wear, while also increasing sidewall strength and utilising the aptly named Mud Slingers and Earth Diggers features for added grip.
Cooper claims the Earth Diggers’ large lugs at the edge of the tyre, with the alternating scoops at every other tread block, give you extra grip by forcefully digging into loose dirt, sand and sticky mud, providing extra traction in tough situations.
The Mud Slingers, which are massive grooves between the large Earth Digger lugs, allow continuous cleaning away of stones and thick mud for improved off-road traction.
The lugs and sidewalls are designed to work with the rest of the tread design to wear more evenly, resulting in a decrease in wear noise. Plus, keeping the tyres’ servicing, rotation and balancing up to date is the best way to extend your tyres’ lifespans and reduce premature wear and noise.
33
First impressions on bitumen showed no sign of excessive noise; they are really quiet for a mud terrain tyre and the ride is comfortable around town and on the highway.
Off-road, I put the Evos through their paces in sandy soil, dry rocky hills and rutted-out muddy tracks, with impressive amounts of grip on offer in all situations. The Evolutions performed well on steep downgrades and under hard braking, too.
On trails where I have previously needed to engage the rear locker, I was confident enough with the grip level to attempt these without engaging it.
This can be attributed to a few factors of increased clearance and, of course, greater amounts of grip and footprint provided by the tyres.
As they are a true mud-terrain tyre they performed as expected in muddy conditions, and were impressive in sticky clay conditions where mud tends to turn a tyre into a mud donut – the mud slingers did their job and ejected excessive mud quickly resulting in grip when I needed it.
Due the increase in rotational size going from a 265/65R16 to a 285/70R17, as well as mud-terrain tyres having an aggressive tread pattern, they tend to rob a bit of power on-road. In the case of the Hilux this was only really noticeable in second gear acceleration, so this will justify my need for a diesel chip to claw back any lost acceleration and turn the wick up just a little bit more.
As this is only a first impression of the Cooper Evolution M/T conducted over a short period of time, wear and fuel consumption can’t be evaluated as yet. However, first thoughts are Cooper has developed a mud terrain tyre that ticks a lot of boxes in noise, grip levels and overall comfort, and I look forward to evaluating them further with different pressure levels and after some significant kilometres.
Current mileage: 175,000km
Mileage since last update: 2000km
Update 9: Power Hungry
Jimmy fits the final piece of the performance puzzle - 04/08/2020
THIS MONTH the Hilux received the final piece to the puzzle for the performance upgrades I wanted: a Diesel Power performance module.
The Hilux is already running an aftermarket Terra-Tuff front-mount intercooler and a Carbon Offroad three-inch turbo back exhaust, so to take advantage of the increased airflow and to deal with the power loss after the muddies were fitted last month, I installed a Diesel Power Australia tuning module.
Tuning modules have been around for years and have been the go-to performance upgrade for avid 4WD enthusiasts, especially when coupled with an exhaust or other engine upgrade.
Diesel performance chips or modules (same thing), go by many names and can work in slightly different ways. Many brands offer claimed power increases from anywhere between 10 and 35 per cent increase over factory figures.
33
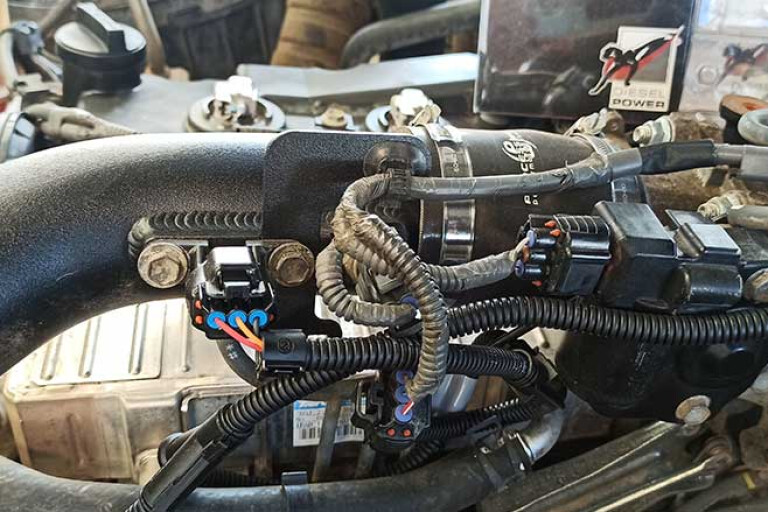
Most chips are easily installed in around 30 minutes and come with all the wiring harnesses and plugs needed to get you up and running. Once installed, the chip/module works by intercepting the signals coming from the ECU going to the fuel injection rail and then sending modified signals back to the ECU.
The control unit sees a lower fuel pressure signal than what is actually occurring and compensates by demanding more pressure from the common rail pump. The increase in fuel pressure increases the amount of diesel each injector fires, thus increasing power with the extra fuel injected. Fuel pressure is increased or decreased based on what you’re doing with the vehicle at the time.
The Diesel Power Australia module I chose for the Hilux is a two-channel chip/module that regulates fuel rail pressure and turbo boost pressure rather than just fuel rail pressure alone. Boost pressure modification optimises airflow into the motor, so a combination of increased airflow and fuel pressure results in more power and a smoother torque delivery.
As most chip/modules sit upstream from the vehicle’s ECU, the ECU still retains the power to override the chip/module if it is operating outside of the factory specifications of the engine. In the off chance there is an issue, on most vehicles a check engine light will come on or the vehicle will go into limp mode.
33
This can be cleared easily by disconnecting the chip/module, or disconnecting and reconnecting the vehicle’s battery. The Factory ECU still monitors all parameters of the motor and offers a backstop of protection and reliability.
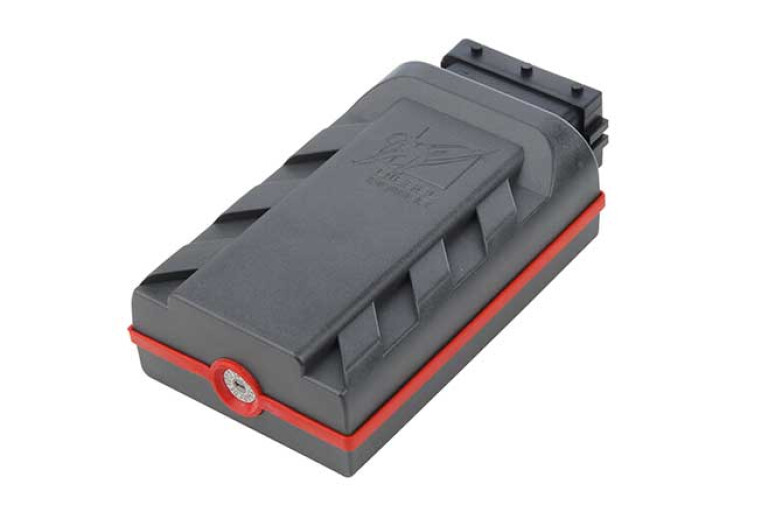
The Diesel Power Australia tuning module came with everything needed for a relatively quick and easy installation on the Hilux, plus it came with a synthetic bag with a Velcro fitting strap to keep it tucked away and safe in the engine bay. There are 15 settings on the module (1 to 9; A to F), offering a claimed increase in power up to 25 per cent above factory.
This module has been TUV-approved and verified in Germany to meet strict performance guidelines and performance claims. Setting 9 will give you the claimed increase in power with a factory vehicle but with additional modifications; turning it up to setting C saw the sweet spot of performance. Wind it up too much and you will have a decrease in power as you are flooding in more fuel and not making the optimum burn.
The setup comes with a handy bypass plug, which, when plugged in, returns your vehicle to standard tuning without having to remove the harness. This came in handy when deciding which setting I liked and how much difference it made, as I drove the vehicle for a while on a particular setting then plugged in the bypass to compare to factory settings.
Turning it all the way up to F made a noticeable difference, but was a bit of overkill and there was the looming potential of a check engine light coming up on the old Hilux, which I’d prefer to keep as reliable as possible.
For now I’ve settled on the setting C, which provides enough power to counteract the power being robbed by the bigger tyres fitted and should provide reasonable fuel efficiency. Once some significant highway, around town and 4WD kilometres have been racked up, I’ll report back on the overall fuel consumption.
RRP
Diesel Power performance module: $995
Current mileage: 178,000km
Mileage since last update: 3000km
Update 10: The Shake Down
Time to take a breath and assess the modifications, with plans afoot for further improvements - 01/09/2020
ASIDE from adding a few more items to the tray and the racks, the Hilux is somewhat complete.
The planned big trips have been postponed for more shorter day trips, which have been enjoyable and a great test of the vehicle’s capabilities. However, accessories suited to more remote travel still remain on the drawing board.
Building a tourer from a stock standard ex-fleet car has been less problematic than expected and, apart from some very minor maintenance, the Hilux has stood up to the reputation as a reliable platform.
33
The most outstanding product among the accessories fitted has been the TJM Pro Locker. The TJM suspension upgrade with bigger wheels and tyres certainly helped with ride and grip off-road, and the addition of the Pro Locker vastly improved those capabilities.
The EFS Vividmax LED driving lights and light bar have performed perfectly, but the smaller eight-inch LEDs did have some minor water ingress but were replaced without issue by the team at EFS.
In the performance department, the TerraTuff intercooler and Carbon Offroad three-inch turbo back exhaust helped the engine breath easier, while the Diesel Power Australia chip squeezed some extra power out of the engine to compensate for power robbed by fitting the Cooper Evolution muddies. After messing around with the different settings on the diesel chip, setting C seems to be the sweet spot for increased power and reasonable economy.
33
The JDW Custom Fabrications Trade Tuff tray has taken some punishment off-road and stood up to the day-to-day rigours of abuse a work ute should, with not a blemish or issue to show for it. I’m thoroughly impressed with the workmanship and attention to detail the guys at JDW have put into even their entry-level tray. I’ll be adding a quarter canopy, spare wheel carrier and water tank before some big trips later in the year.
The Yakima LockN’Load roof rack platform has worked as expected. I’m a big fan of Yakima products and have run them on other vehicles before. They look great, are strong, create no noticeable wind noise and have a multitude of accessories to make life that little bit easier with carrier loads up top. But Yakima had me sold on its racks when I first discovered the built-in stubby opener.
33
A bullbar can make or break the aesthetics of a vehicle, and there are some odd looking bars on the market. I opted for the EFS entry-level Stockman bullbar; it’s a good looking bar and built strong. After a lot of abuse off-road and some disagreements with some obstructions on tracks including a barbed wire fence, the bar has very few battle scars and surprisingly looks almost as good as the day it was fitted.
The updates on the Hilux are far from over, but the lion’s share of kit has been fitted to achieve what I was looking for: an extremely capable off-road tourer that didn’t break the bank and was, most importantly, reliable.
Current mileage: 179,000km
Mileage since last update: 1000km
Average Fuel: 12.0L/100km
WITH THANKS
www.coopertires.com.au
www.jdwcf.com.au
www.carbonoffroad.com.au
www.efs4wd.com.au
www.tjm.com.au
www.yakima.com.au
www.4x4modsaustralia.com.au
www.apac4x4.com.au
www.diesel-power.com.au
Please enable JavaScript to view the comments powered by Disqus.
COMMENTS