TALK to a spray painter about how to get a good finish and the answer is virtually a cliché — it’s all in the preparation. Fine, but what does that actually mean? What exactly do you have to do to prepare properly? Or, for the ‘glass half empty’ folk, what do you have to do to get a poor paint job?
This article was first published in the April 2011 issue of Street Machine
We put these questions to House Of Kolor representative and accomplished show car painter Owen Webb and well-known elite hall ink man Trevor Davis. Trevor’s painted several cars that have appeared in Street Machine and most recently was responsible for the top-shelf paint on Peter Fitzpatrick’s Trilogy, Aaron Fitzpatrick’s Datsun 510 and Justin Gardner’s EH.
“You should be thinking about how to get paint onto a body even as you’re purchasing a car,” Trevor says.
“People seem to be under the impression that anything can be fixed, which is true. But not everything can be fixed for the price people have in mind.”
He says that although a body needing more work may be cheaper to buy, in the end the extra work required will almost always cost more than you save on the purchase price.
“Always buy the best body you can find, even if it costs considerably more,” he advises.
Of course, that’s easier said than done as it can be difficult to judge what’s under someone else’s repairs and many cars have been slapped together for a quick sale. On the surface a car can seem like a reasonable proposition only to turn into a disaster as you start to strip it back.
Step 1. Trevor suggests that stripping the car and finding out exactly what’s underneath is where it all begins. While paint stripper is essential for getting the old paint off, even the tiniest remnant of stripper will ruin your paint job. You should remove as much stripper as possible when you’re actually removing the paint. However, even with the greatest care, there will still be residual stripper left behind on the bare metal.
Step 2. Using a blade to remove as much stripper as possible, wipe the panel over with water. This will neutralize any remaining stripper. Then immediately dry the area with a clean, dry rag to get rid of the moisture which would otherwise create rust. Follow with a Scotch-Brite pad and gun-cleaning thinners. At this point the surface is ready for sanding. It’s best to work in smaller, localised areas that overlap.
Step 3. Not all primers are the same. For instance, welding primers should be applied where panels overlap. There are two types. The copper-coloured variety is for panels that are MIG welded. The more common grey-coloured primer is designed to be used between panels that are spot-welded together. They’re formulated differently for specific reasons. “Don’t imagine you know better than the chemists,” Trevor says.
Step 4. We’re talking about preparing for paint rather than repairs, so we’ll assume all repairs have been done properly and the bare metal is ready for paint prep. A Scotch-Brite wheel will get everything off and leave a clean surface but it also generates enough heat to distort a panel. You must be mindful of this if you use one because if the panel becomes stretched you’ll have to shrink it, which is complex and costly.
Step 5. Trevor and Owen both pointed out that a Scotch-Brite wheel can make the steel so polished and smooth that epoxy primer won’t stick properly, which would undermine the whole paint job. It’s best to ensure the surface has sufficient texture by sanding it with a rotary or orbital sander after cleaning with the Scotch-Brite wheel. You can see the different surface each creates. The one on the left is what you’re after.
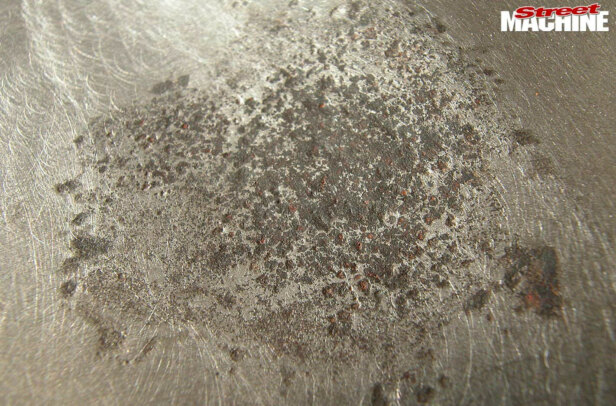
Step 6. It’s vital to read and strictly obey all instructions for all products used. For example, it’s recommended you treat the bare metal with Deoxidine rust converter. It’s applied with a Scotch-Brite pad, wiped off with a damp cloth (strange, given it’s an anti-rust treatment) then immediately dried off with a dry cloth. People have tried using thinners but this has a bad effect and results in the formation of rust later on.
Step 7. When it comes to creating a show-quality paint job, Owen and Trevor agree that the most important process of all (once the panel has been stripped, had metal repairs carried out and been thoroughly cleaned) is to apply a quality epoxy primer over the bare metal before anything else. This has not been standard practice in the past but while some people still baulk at the idea, it’s indisputably the best method.
Step 8. Trevor says all primers except epoxy have some porosity and allow moisture to work its way down to the metal if it sits for a while before being painted, which undermines your efforts. Owen adds that epoxy is also an excellent first coat because if a finished paint job is scratched down to the metal, any moisture reaching the underlying panel can’t migrate across the metal surface underneath the layers above.
Step 9. This Falcon is in high-fill with a misted black guide-coat to assist in rubbing it back ready for base and colour coats. A summary of the layers to this point is: Deoxidine anti-rust treatment; epoxy primer; filler if needed; polyester; and high-fill. It’s important to get that layer of epoxy on as fast as possible. The more humid it is, the more urgent this step is as even the moisture from your hands can cause rust.
Step 10. A show paint job might have four layers of high-fill. Don’t apply it thickly in fewer layers, as it’ll suffer solvent entrapment — minuscule bubbles of solvent trapped near the surface, which when sanded become exposed and evaporate, leaving microscopic holes that often go undetected until the car is painted. Trevor says thicker layers of high-fill are also more difficult to sand, as they become ‘pebbly’.
Step 11. When sanding primer or filler, the main dangers are an overly coarse finish resulting in visible lines, or an overly fine finish introducing the possibility of delamination. Primer should always be rubbed back with 400 or 600. Always use the right rubbing blocks — a lot of good painters use aluminium blocks because they remain flat and aren’t influenced by irregularities in the surface they’re working on.
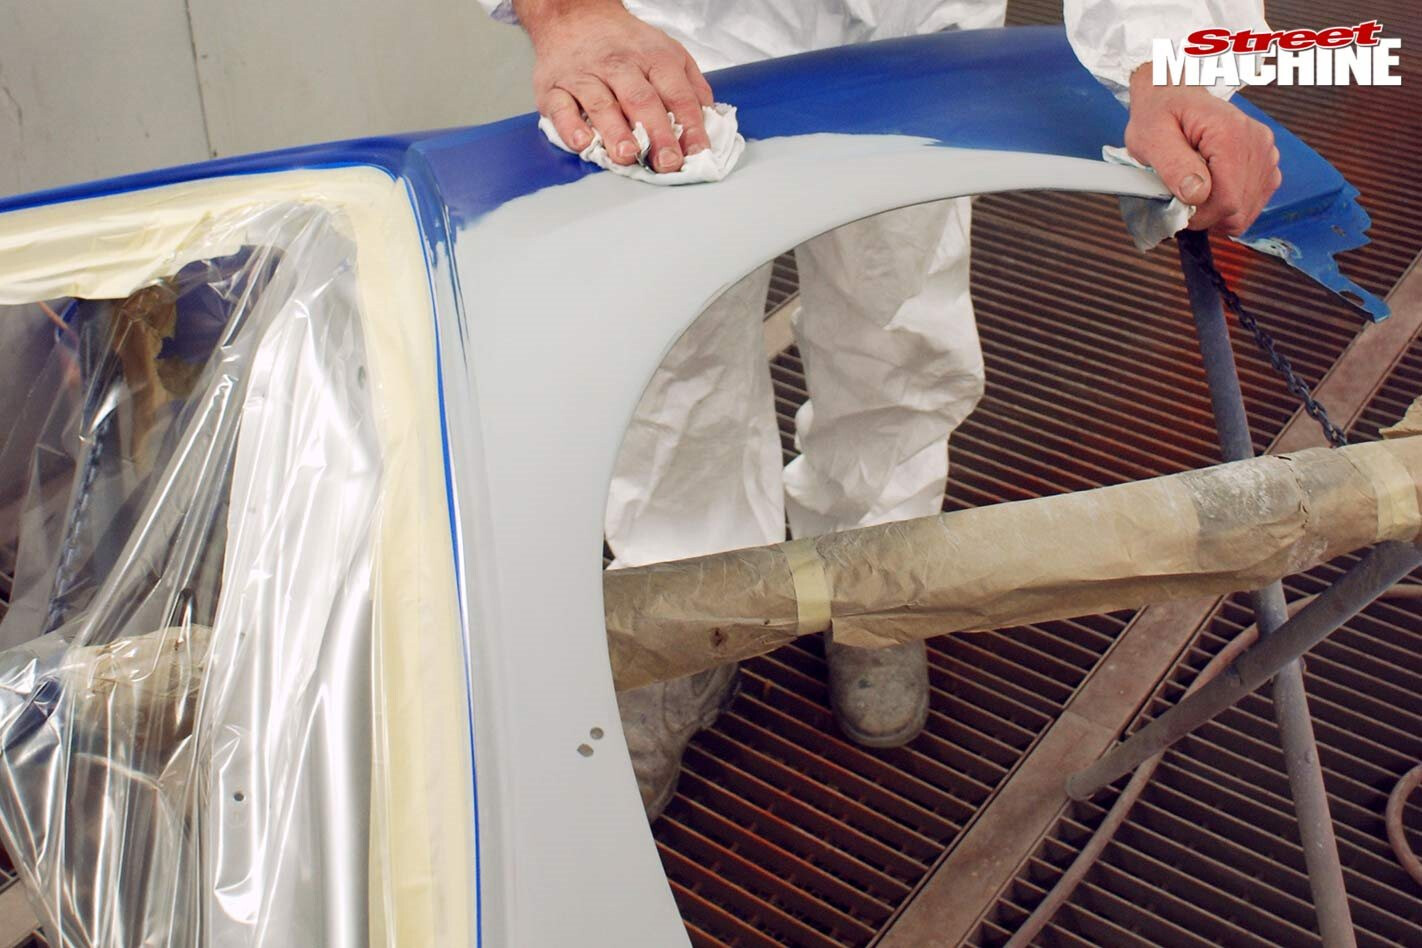
Step 12. Just prior to the application of paint, the entire surface needs to be thoroughly cleaned using Prepsol. This is wiped on with one rag and then immediately wiped off with another rag or lint-free cleaning cloth with thinners on it. For wiping off, Trevor likes Kimberly Clark’s Kimtech Epic Wipers. This is another situation where it’s best to work the process through completely in small areas, in order to be thorough.
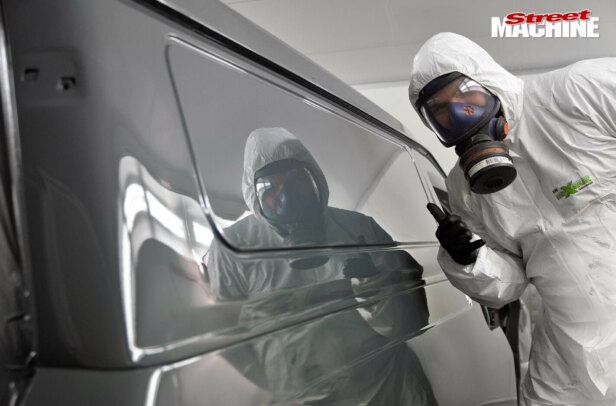
Step 13. Painters love to say preparation is difficult and applying the paint is the easy part. That may be true for them but it takes years of practice to develop the skills that justify that statement. In fact, the precise and controlled arm and hand movements of a skilled painter are reminiscent of an industrial robot. During painting allow sufficient time for the layers to dry, or ‘flash off’ as painters say, between coats.
Step 14. Colour sanding after paint and clear have been applied is the penultimate step. This can be used to get rid of small irregularities. It’s a good idea to use soapy water as the lubricant and sand in a dust-free area to avoid small particles getting into the paper and causing scratches that need further rubbing. The process starts with maybe 800, 1200 or 1500 grit paper and most often ends with super-fine 2000 grit.
Step 15. Problems in paint fall into two broad categories: surface problems, which can be sanded and buffed/polished out, and those that have their origins deeper under the surface; the latter usually have to be stripped back to the layer in which they occur. That’s why it’s vitally important to get the early steps right. Fortunately there’s no particular problem here; this bright red paint is just getting its final touches.
Step 16. A finished job ready to go out the door. This is a fairly easy colour and Trevor and Owen recommend that when more complicated paint is involved, it’s best to spray a good sized panel to see how it’s all going to come off the gun. This is particularly important with lighter colours that don’t cover so well. Exactly how a base coat will interact with a pale top coat is hard to predict without checking in advance.
WRAP UP
You’d think a test spray would be an obvious step but Owen says people don’t do it. However, if he and Trevor agree it’s a good idea, then another painter’s talents would have to be positively otherworldly to do without it, particularly when it comes to candies.
Another good reminder from Owen is that some manufacturers offer expert training for their products — always take advantage of such schooling whenever it’s available.
Using compatible products is also essential. There are cheap clears available but some aren’t designed to be used with particular products. Mixing them with higher quality products is like playing Russian roulette, Owen believes.
It’s interesting to watch good painters pick over their own work. They’ll find the tiniest imperfections and buff away in an attempt to reach perfection. Of course perfection is impossible but it’s no bad thing to have one of these guys trying to achieve it on your car. So next time you’re trying to screw your painter’s price down, you might want to think about that.
You can reach House of Kolour through its website: www.houseofkolor.com.au.
Comments