UNTIL fairly recently, the concept of printing parts for your car out of thin air was pure science fiction. However, 3D printing is beginning to change the way cars are built, and, as the cost of the printers tumble and the software is made ever more user-friendly, this new technology is sure to become more popular.
This article was first published in the November 2019 issue of Street Machine
Born out of the need for rapid prototyping, the type of 3D printing most commonly used today is known as fused deposition modelling. The concept is simple: You either 3D-scan or use computer modelling software to draw a 3D model of what you want to make, then export that file from your computer to a three-axis printer, which uses plastic extrusion to build each part in thin, stacked layers on the printer bed.
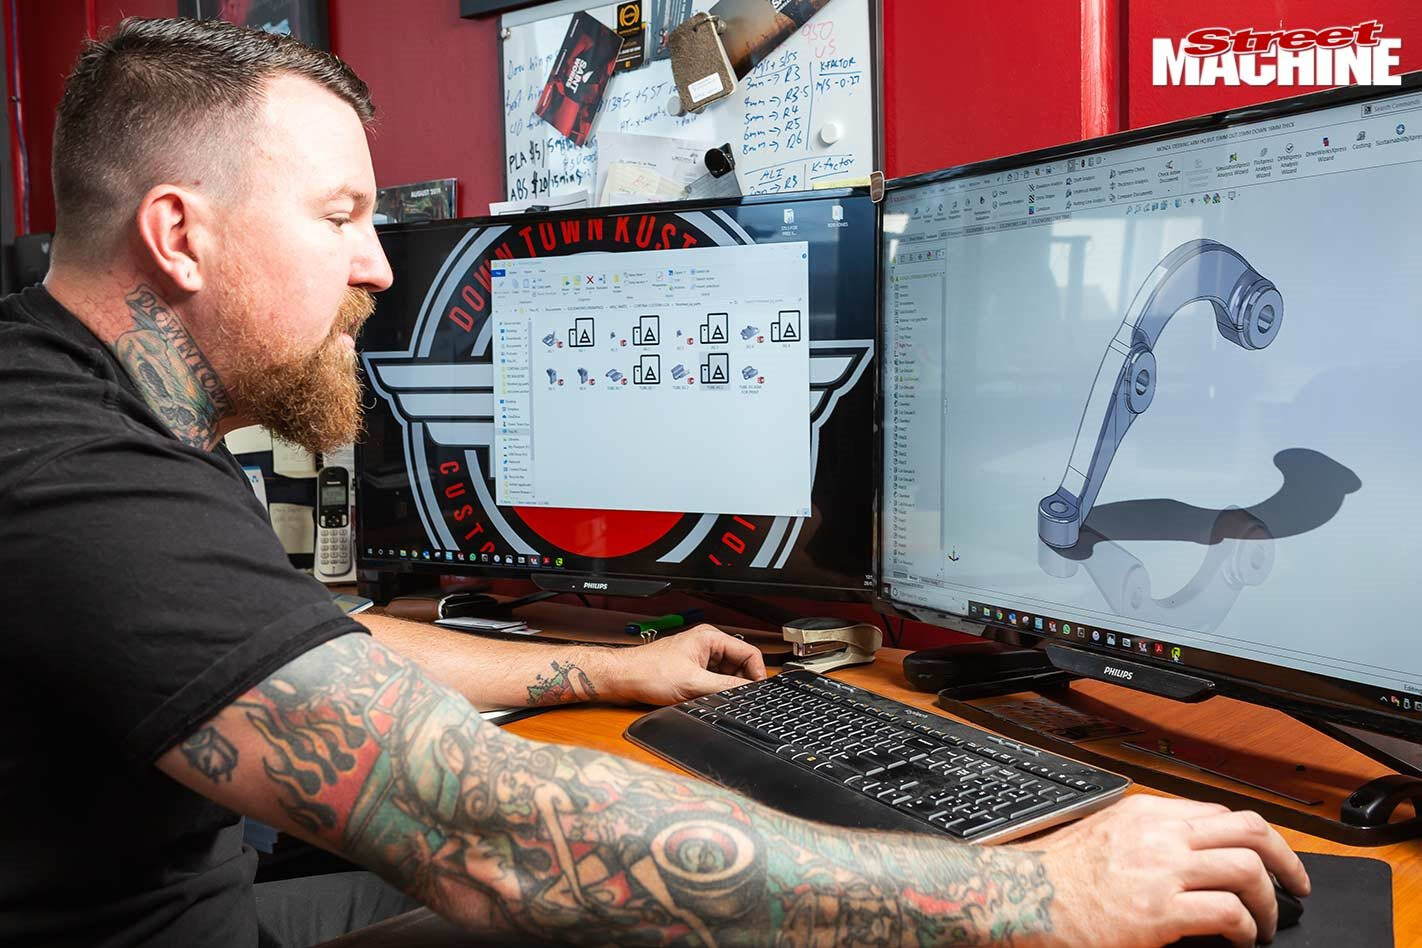
Taree’s Down Town Kustoms has been using 3D printing as a way of improving workflow efficiencies, as it can help slash the time normally required to make custom parts. DTK owner Graeme Brewer can design a part on his computer, 3D-print an example to see if it works and check it on the car, without having to touch a welder or grinder. So we sat down with him to find out how it all goes down.
PRINTING IN PRACTICE
“I THINK we started 3D printing about 3.5 years ago,” says Graeme. “I got into printing because I found it hard to get a sense of the dimension and size of parts after I’d designed them on the computer. This way I was able to quickly and cheaply hold parts I’d designed in my hands and know if they’d work.
“3D printing would save days from the process of prototyping parts. It’s quicker to draw the parts on the computer and then the printer runs overnight after hours, so the part is ready to go first thing in the morning and it is dead-accurate.”
Graeme has a pair of LulzBot TAZ 6 printers, with one kept in a temperature-controlled room to prevent defects in the ABS plastic that printer uses. “We found the finer resolution of the ABS plastic needs the heat in the room so it doesn’t warp,” Graeme says. “We use ABS plastic for finished products we are using in cars, like gear shifters and console surrounds, because that is what car manufacturers use. The ABS plastic gets a much nicer finish than the PLA plastic we use for jigs, but the PLA plastic is cheaper and doesn’t need to be in a sealed room.”
On top of prototyping parts, Graeme soon found other uses for plastic printing, including making custom interior pieces as well as templates and jigs for custom metalwork around the shop.
Maintenance for the printers isn’t difficult, according to Graeme. “You have to load each file individually and once that print is done, you come in, scrape it off and clean the bed so it is ready for the next part. Every now and then you need to change the mat, too.
“One really good aspect to the LulzBot machines I use is that half the machine itself is 3D-printed, and it is open-source, so you could go on the ’net and build it yourself if you have another 3D printer to print it out. I’ve had parts on printers break and I’ve just printed new parts myself to fix that printer.”
MONARO MAGIC
HOLDEN’S Project Monaro features some of the company’s cutting-edge 3D printing technology, so we sat down with GM-H designer Jeff Haggarty and Joe Carmody from EVOK3D 3D Printing Solutions to find out how they made this VZ Monaro a real one-off. As you’d expect from an OEM, the software and hardware used is more advanced than what DTK employs, including a fusion-based printer.
Jeff, as a designer for Holden, is 3D printing part of the core processes you using each day?
JH: We use it quite a lot here for prototyping parts, which don’t normally go out into the public but are used to assess their viability on projects. For Project Monaro we wanted to make some bespoke parts just for this car, so it made sense to utilise this technology.
Joe (left) jumped at the chance to work with Jeff (right). “Holden’s Monaro is an iconic Australian car, and the idea we could do customised parts working with the original designer, Jeff, was really an honour”
Being one of the biggest car companies in the world, GM would’ve surely been right at the cutting edge of using 3D printing?
JH: We’ve had 3D printers for a while – probably around 15 years. They provide a huge advantage in how quickly we can make a part and assess its viability.
Jeff drew the parts for Project Monaro in Alias, a high-end surfacing program. From there it went through another program before it was ready to print. There are checks to be done to ensure there are no rough edges or problems with the design file before you hit ‘print
Joe, what kind of 3D printer was used to make Project Monaro’s parts?
JC: That is a HP Multi-Jet Fusion 3D printer. There are a bunch of different 3D printing technologies, but what they have in common is you’re building up a part by adding material layer by layer. This HP printer is cutting-edge and is what is known as ‘page-wide technology’, where it prints the entire drawing in a single pass, which makes the process massively quicker.
“The integrity of some 3D-printed parts I’ve seen is almost is as good as injected-moulded plastic,” Jeff says. “The test parts we print in some acrylic-based materials just don’t have a service life, as they’re not designed to last in the field”
How does the fusion process differ to a plotter-style printer?
JC: The Multi-Jet Fusion process is a powder-based technology where we’re laying out a very thin layer of 80 microns, in this case with nylon, and building it up in a powder cake. The machine jets agents onto the bed of powder that either absorb infra-red energy where we want parts defined, or it absorbs the energy stopping thermal bleed into the powder cake.
After the print run is finished, the parts can be fished out of the raw powder and cleaned off. The powder can then be extracted, put through a filtration process and be reused for the next print job
And this is much faster than the other additive styles of printing?
JC: Typically between 10 and 50 times faster. Each layer generally takes 7-12sec per layer, independent of the complexity of the layer. Because it is a page-wide technology, it doesn’t matter how thick or complex the pass is.
While Project Monaro uses plastic-based powder media, Bugatti has recently made news for using aerospace technology and lasers to 3D print solid titanium six-pot brake calipers for its 400km/h Chiron
Does the bed of powder limit your creativity with what you can print?
JC: The type of geometry we can print is pretty much limitless; you just need a way to remove the unfused powder (if you need to get it out). We can print hollow parts, or very, very complex parts.
Project Monaro scored a pair of 3D-printed bonnet scoops, a front splitter, fuel filler door and rear spoiler in order to stand head and shoulders above other CV8s on the street
What happens to the left-over powder?
JC: It’s taken through a cooling process where we recover most of the unused powder. It’s a very efficient process. We only use the material needed to produce the part, and the left-overs can be reprocessed and reused.
Do fusion-type printers require extra steps between design and printing?
JH: For Project Monaro’s parts, I took an existing CAD model and rejigged the surface you see to look how I wanted it to appear. I then provided the file to EVOK3D and we used a conversion program called Step to prepare it, and they used their own program for printing the parts.
“Project Monaro is a bit of a labour of love,” says Jeff (right). “I’m the sort of guy who has never owned a stock-standard car in my life, and never will. 3D printing allows people to make parts themselves and keep things going, which is really exciting to me”
Do you see hobbyist 3D printing becoming as ingrained in the car hobby as welding or painting?
JH: The technology is moving so quickly I see a future where people and companies can make all sorts of tiny widgets and bits you just can’t get anymore. It means we can keep all sorts of machinery going, and redesign parts to help street machining live on.
PRINTING PARTS:
“I believe these LulzBot units are worth around $4000,” Graeme says. “They are top-of-the-line hobbyist machines and, from here, the printers step up to cost $20,000 and way up from there. It can get really extreme!”
1. Graeme uses SolidWorks to draw and model the parts he needs, but, as he explains, the computer program doesn’t come cheap. “It costs $15,000 up front for the licence to the software, and then $2500 per year to maintain that, so it is by far the biggest cost in the process,” he says. This part of the process also requires exact measurements and very careful design, according to Graeme: “If you don’t draw parts perfectly accurately, it will bite you later.”
2. “At times the ABS printer runs all day, every day,” says Graeme. “We’re doing a GTS-style dash cluster for an HZ to suit Speedhut gauges, so it will be running hot doing the speedo, tacho, the middle gauge, and then the four-gauge pod. In terms of time, that’s nine, nine, eight and then 15 print hours.”
3. Another template the DTK team whipped up is this housing to hold their ball joint cups, which are then linished to ensure clearance on the DTK front ends. Graeme says these printed parts will last through the construction of approximately five front ends before he needs to reprint the template again.
4. Graeme keeps one of his printers in a room upstairs where the temperature is set to 52°C. This is to prevent the ABS plastic he’s using on that printer from warping
5. This HG Monaro sports 3D-printed upper and lower control arms, sway-bar end-links and steering arms, as well as the steering rack mounts. Before the DTK team get these parts CNC-machined, they can test their designs in practice to ensure everything works as it should.
HQ STEERING ARM
Graeme draws up the steering arm in SolidWorks, which he can then export to the laser-cutter or CNC machinist, depending on what he needs machined. “I allow 0.3mm tolerance in my parts, so that bolts can slide through holes perfectly and everything fits.”
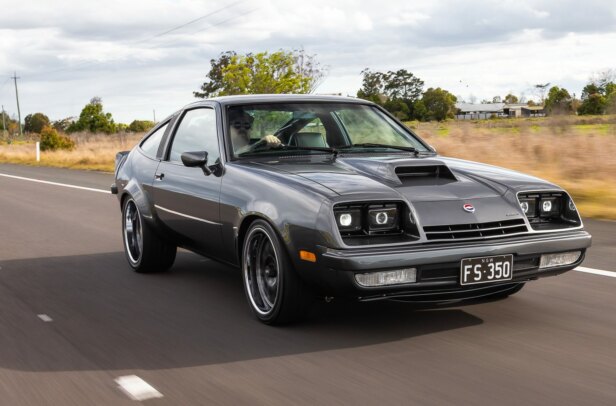
Graeme whipped up this HQ Holden steering arm to double-check the geometry in the front end of a Chevy Monza currently in the shop. Once he is happy with the design of the part, he exports the file into Cura, the software the LulzBot printers work with. Graeme orients the parts so their flattest side sits towards the printer bed to help ensure it prints true.
1. The lower resolution of the PLA plastic used by DTK for prototyping and jigs can be seen on top of the finished arm. This is not a concern, as it won’t be used in the finished car. PLA plastic isn’t as sensitive to heat as the finer ABS plastic used in Graeme’s other printer.
2. Five hours later and the LulzBot TAZ 6 presents the finished arm. Graeme now has to remove the pedestal from the bottom of the arm; it’s easily snapped off with some love from the pliers. Every printed part has a pedestal as a way of keeping it level on the printer mat.
3. The printed arm lines up perfectly with the Monza’s front end, from the bolt holes right down to the tapers. This way Graeme can test his designs on the car in real life before he commits to getting anything CNC-machined.
CORTINA CONTROL ARM
Graeme was approached to make some custom adjustable control arms for a Ford Cortina, and he didn’t miss an opportunity to give his printer a workout.
After working out the shape the control arm needs to be, Graeme designs a jig to hold the arm, which he 3D-prints. The jig ensures the arm is made perfectly and eliminates the risk of a misalignment during welding.
1. This smaller jig gives a precision fit to part of the Cortina arm, making it far quicker and easier to TIG-weld together. Prior to using these jigs, DTK would have to find a way to hold the tube in the drill press, then machine it from multiple angles to suit the shape needed.
2. The tube is machined to fit tightly against the other parts of the control arm. You can see the two sides that had to be linished, adding to the complexity of the part.
3. The machined tube fits tightly against the cotton-reel mount and the end part of the control arm.
4. The full Cortina control arm in the 3D-printed jig is ready to be welded together. The original customised control arm behind the new adjustable arm in front features what Graeme charitably refers to as “interesting welding”
Comments