
MIG (Metal Inert Gas) and TIG (Tungsten Inert Gas) are the two most common types of welding practised in automotive applications. This month’s column will serve as an introduction to both types, for anyone wanting to jump in and have a crack themselves, using the most common of auto body metals: 1mm mild sheet steel.
1. BASIC EQUIPMENT
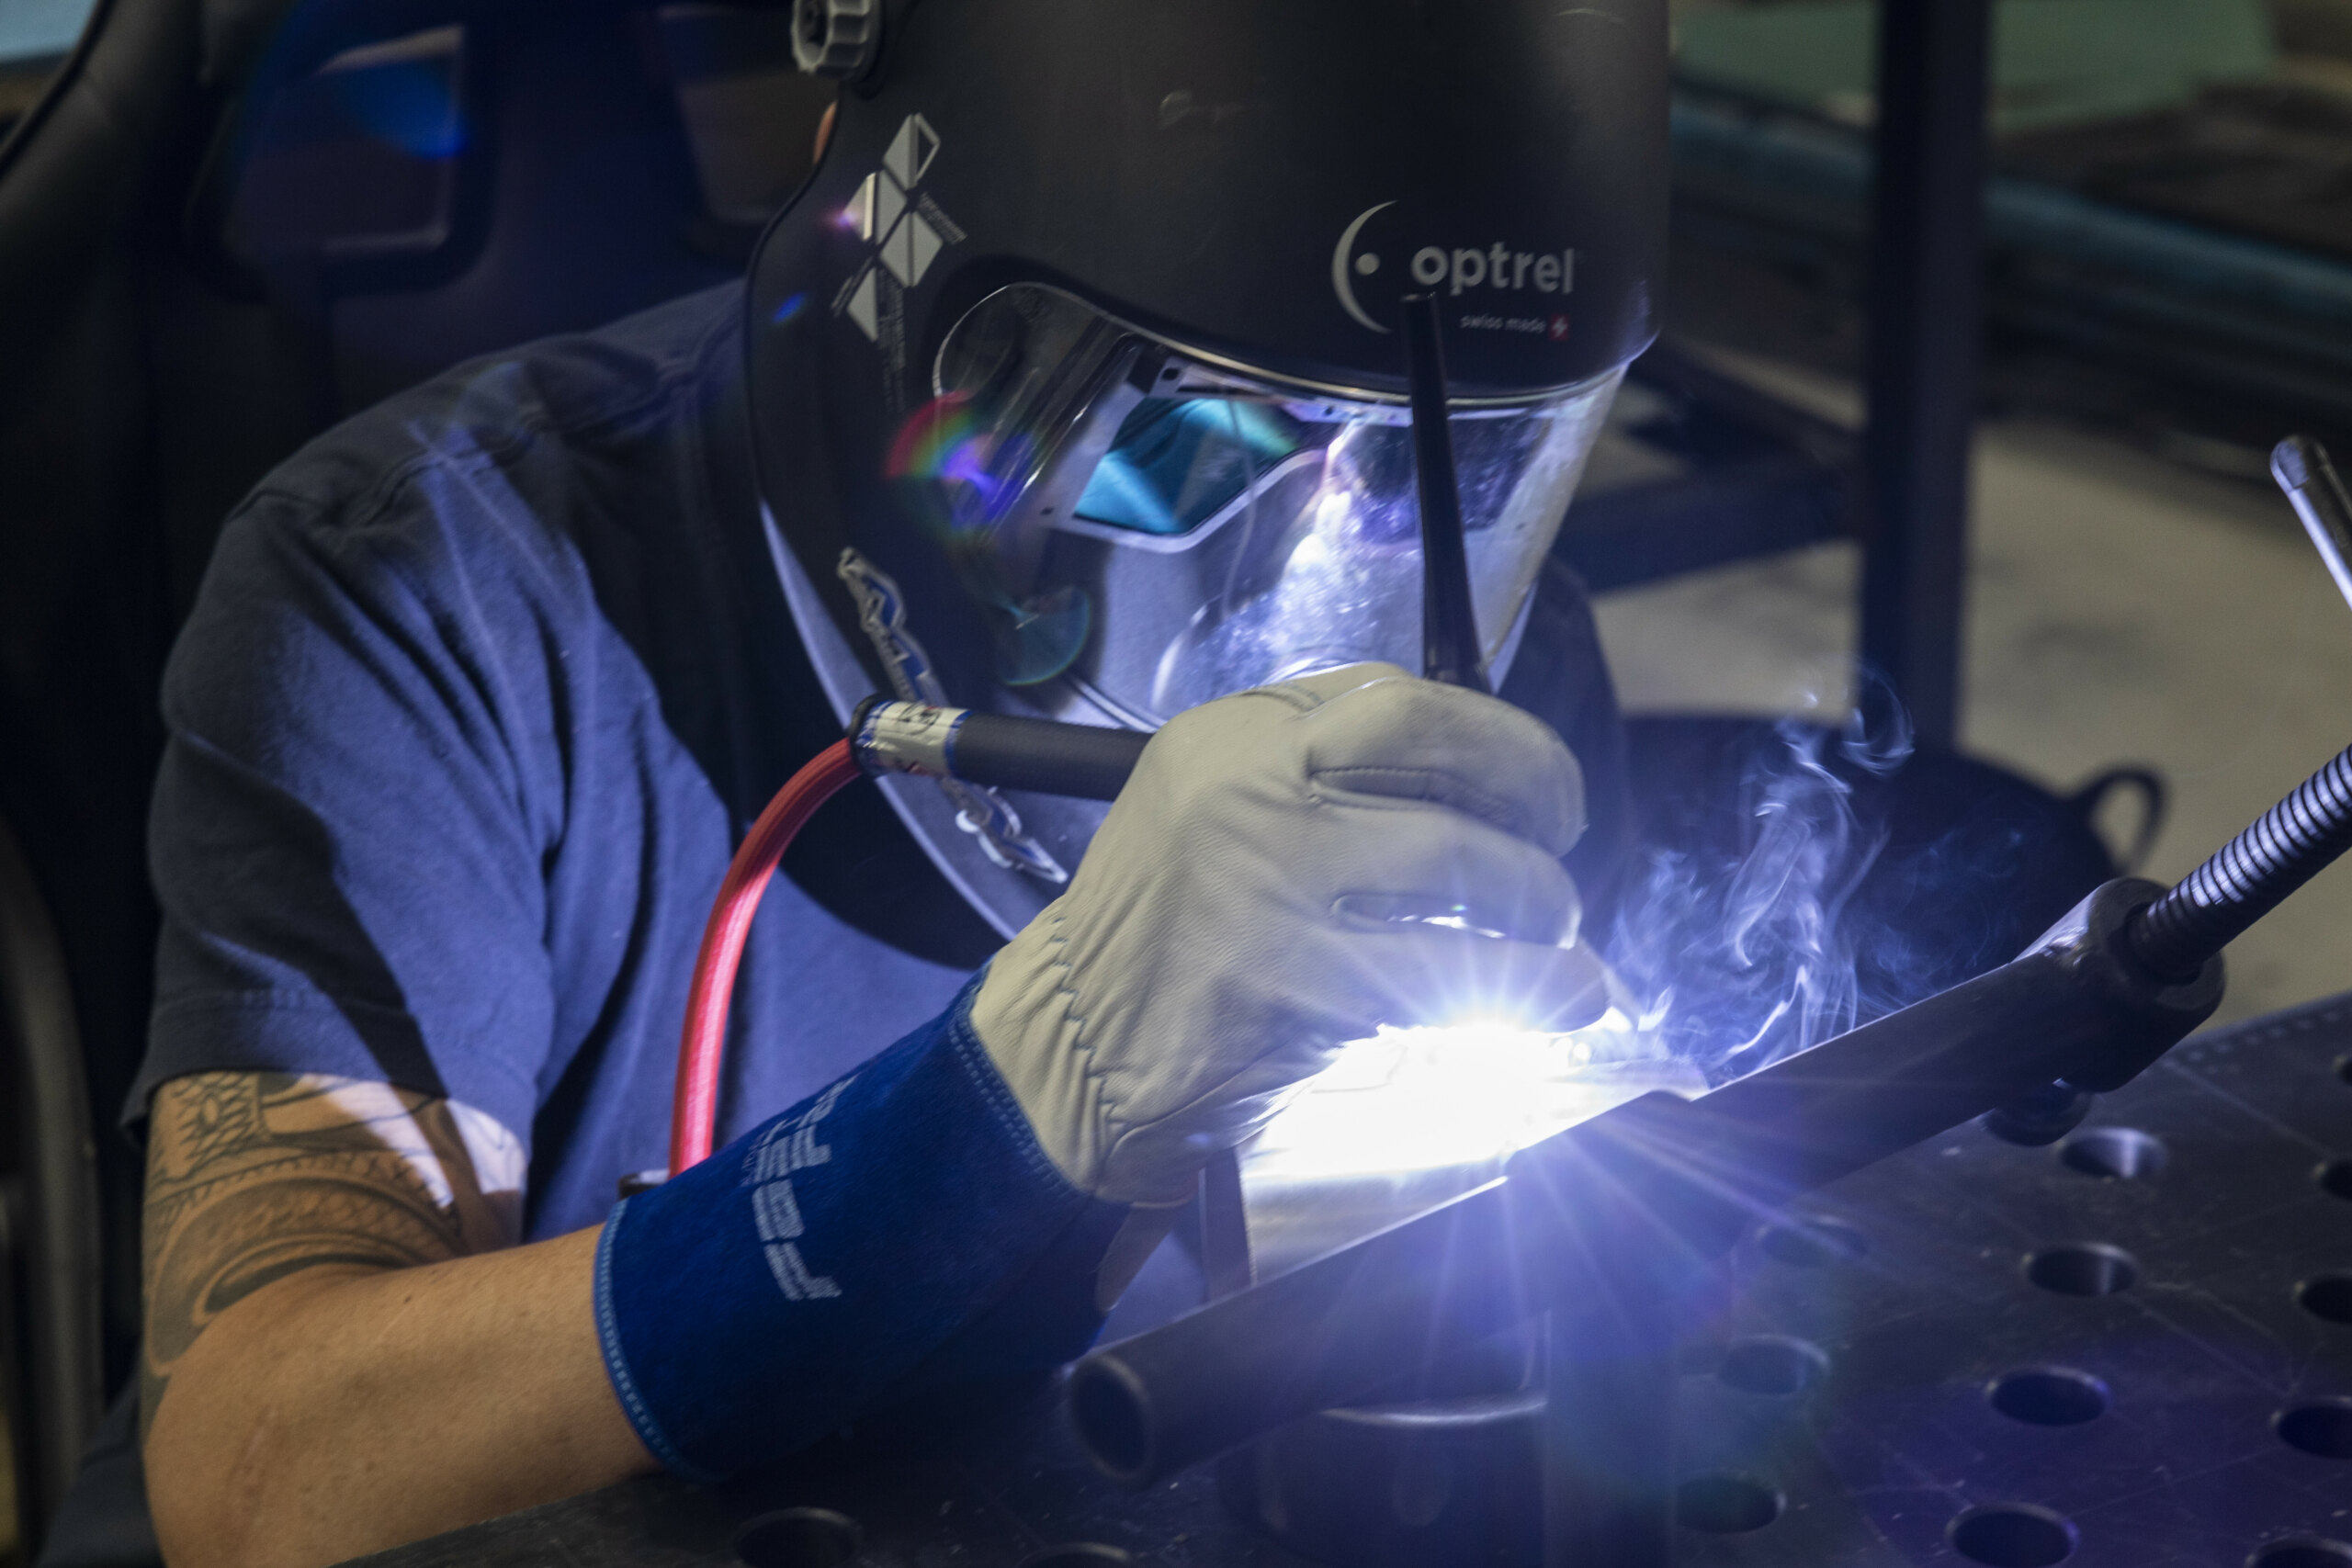
Personal protective equipment
A good helmet is right up there on the list of priorities, and like most things, you get what you pay for. This is one piece not to skimp on, as anyone who has suffered from welder’s flash will attest – you only get one set of eyes.
A separate helmet for TIG and MIG is also handy, as MIG tends to dirty up lenses.
Fitted welding gloves, long sleeves, pants and enclosed boots are handy for avoiding MIG spatter.
Wearing fitted gloves and long sleeves will also help you avoid being burnt when TIG welding, but the real beauty of TIG is the lack of spatter, meaning you can wear shorts and thongs like a true-blue Aussie.
Wire/filler rod & Tungsten
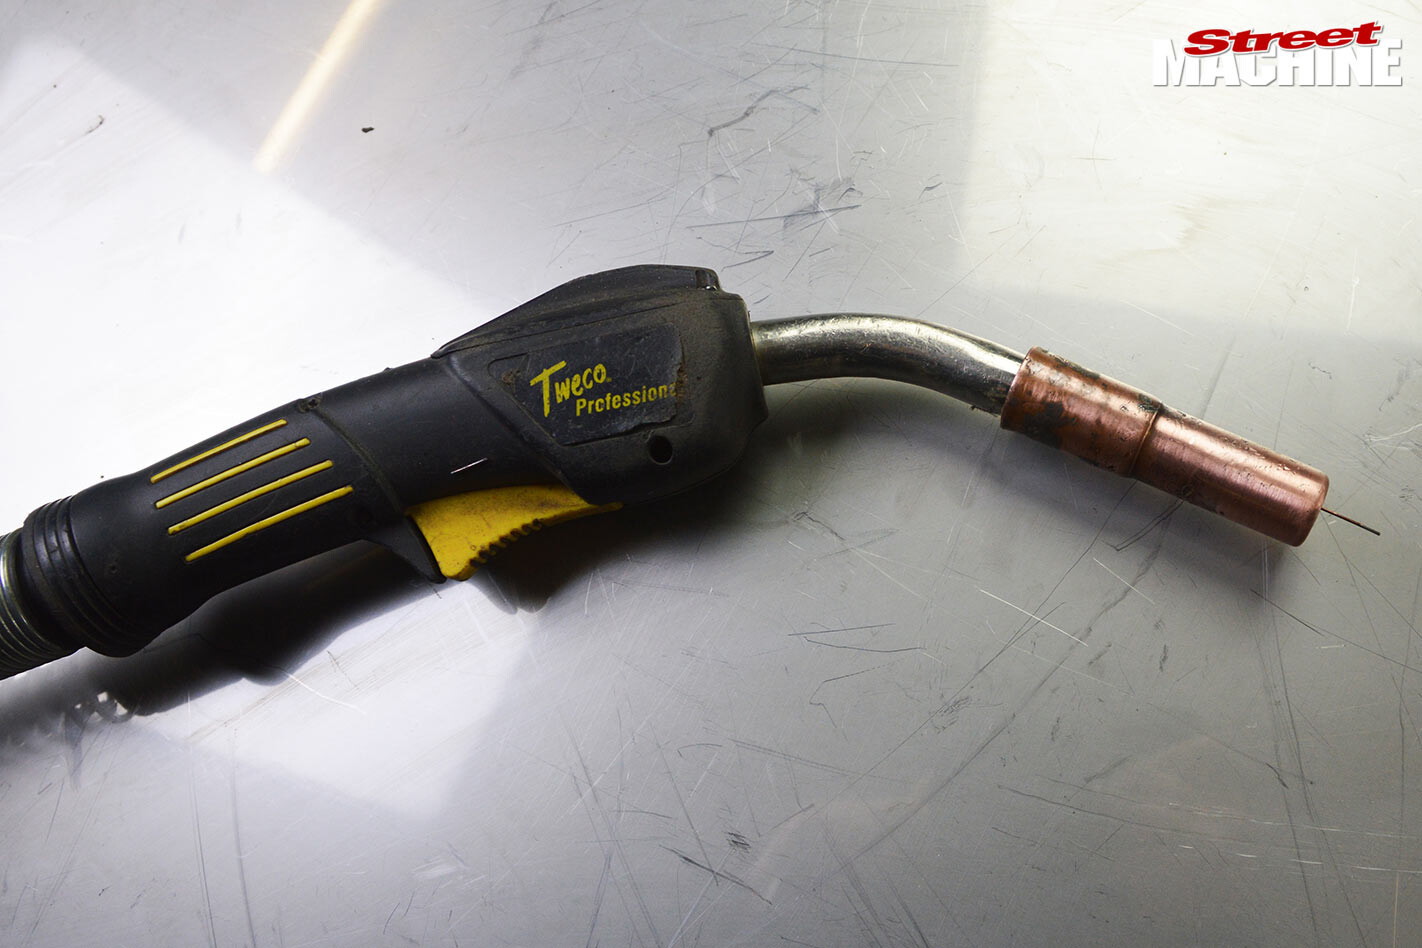 1. For MIG-welding 1mm sheet steel, 0.6-0.8 MIG wire is ideal. Thicker wire will work, but when tacking, the wire will not have enough time to properly melt, leaving poor penetration. It’s highly recommended to not use gasless wire on automotive applications, in order to avoid porous welds.
2. With TIG filler rod, the thickness will depend on the job, and if you’re filling a gap, anything from a piece of 0.6 MIG wire to 1mm filler rod will work well on 1mm sheet. Using a red-tipped tungsten sharpened at around a 30-degree angle will give you an accurate arc with good penetration.
GAS
For MIG, use Migshield run at around 25-30. As mentioned above, it’s best to avoid gasless set-ups. Gas is used to shield the weld from oxygen and other crap in the atmosphere for both MIG and TIG. For TIG, straight argon run at around 10 is sufficient for mild steel. Setting up post-flow for the gas will help protect the tungsten while cooling, and larger cups can be used for greater gas coverage.
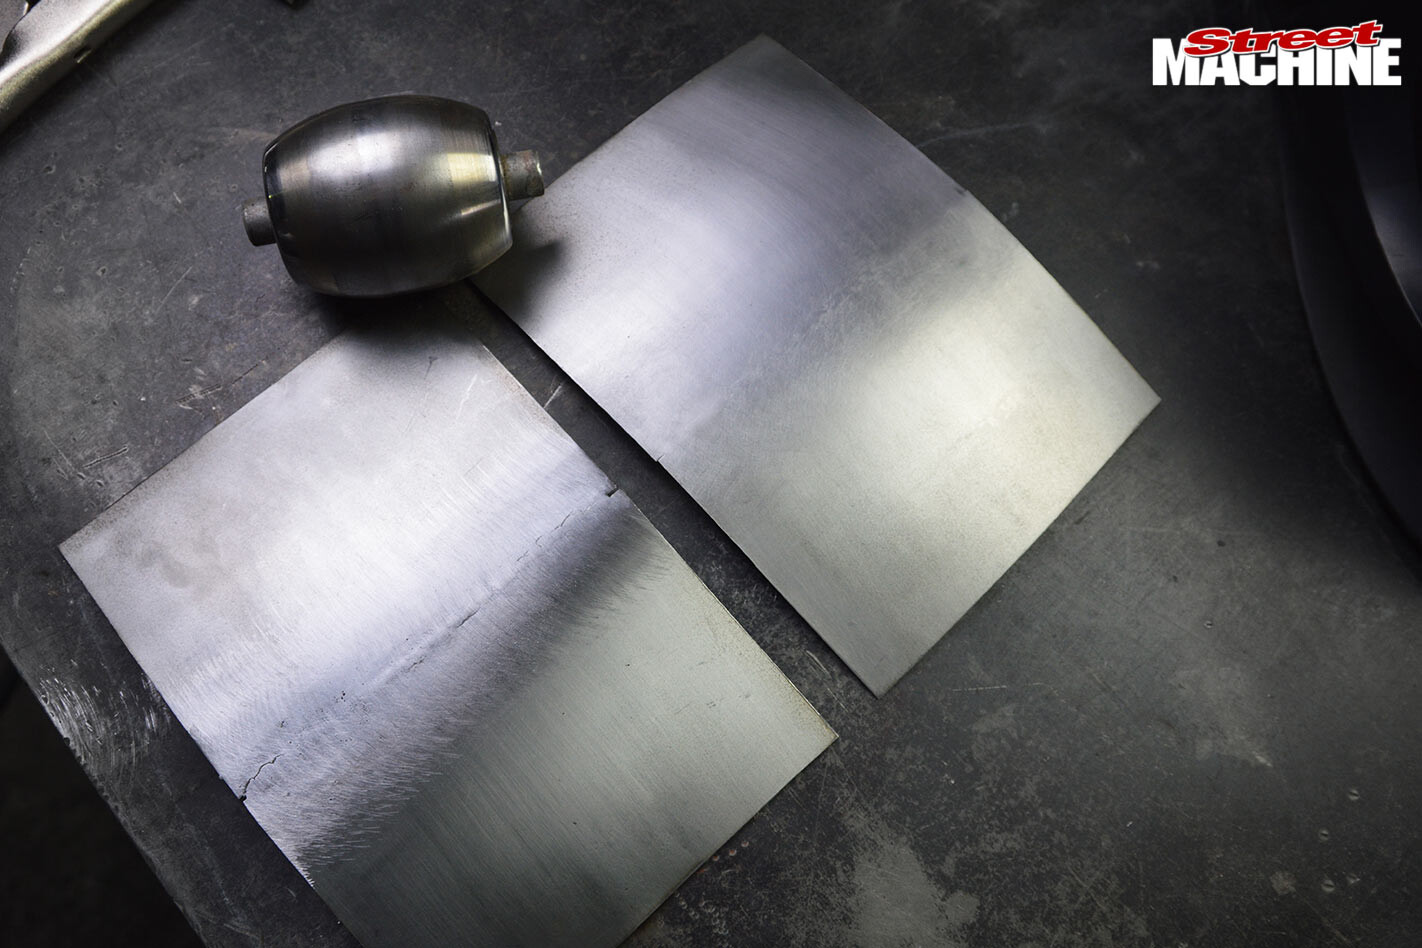
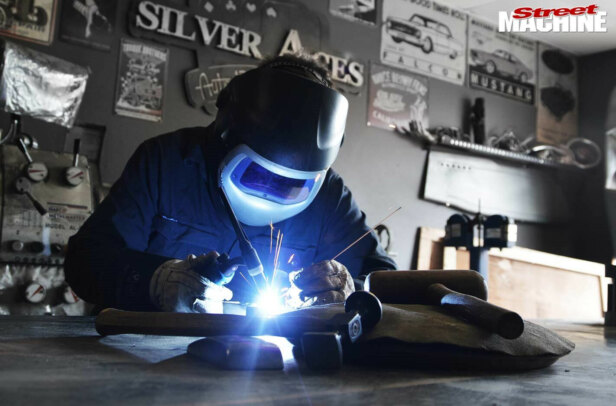
2. HOW TO BUTT WELD
The most common type of join in this application is a butt weld; two pieces are simply pushed together to join with weld. While that’s pretty straightforward, the two types of welding machines can be used differently to achieve the same result.
Using a TIG
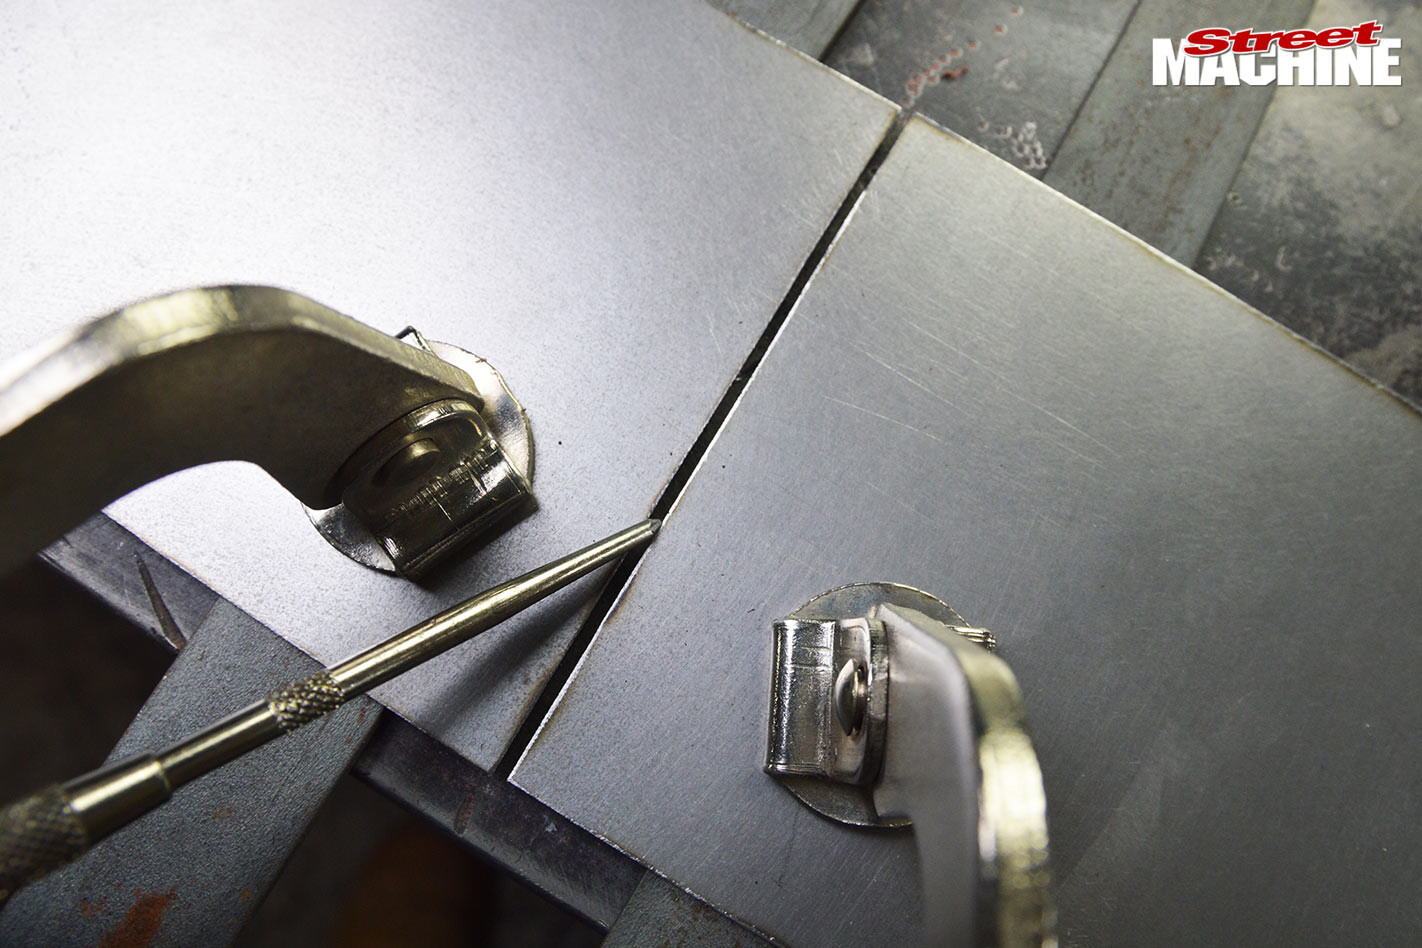
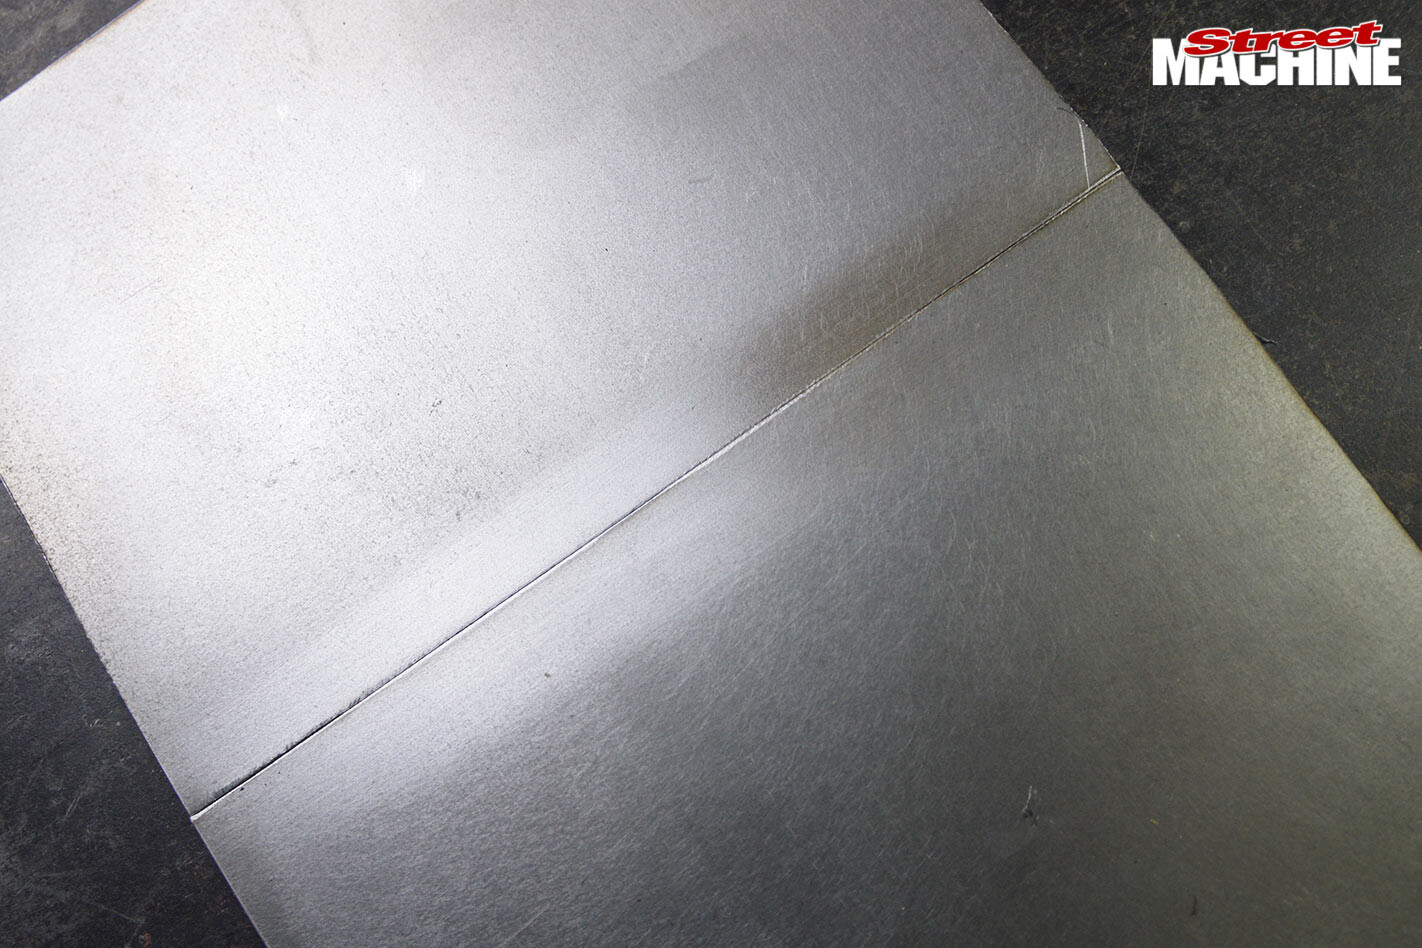 STEP 1: The two pieces can be fitted flush; the tighter the better.
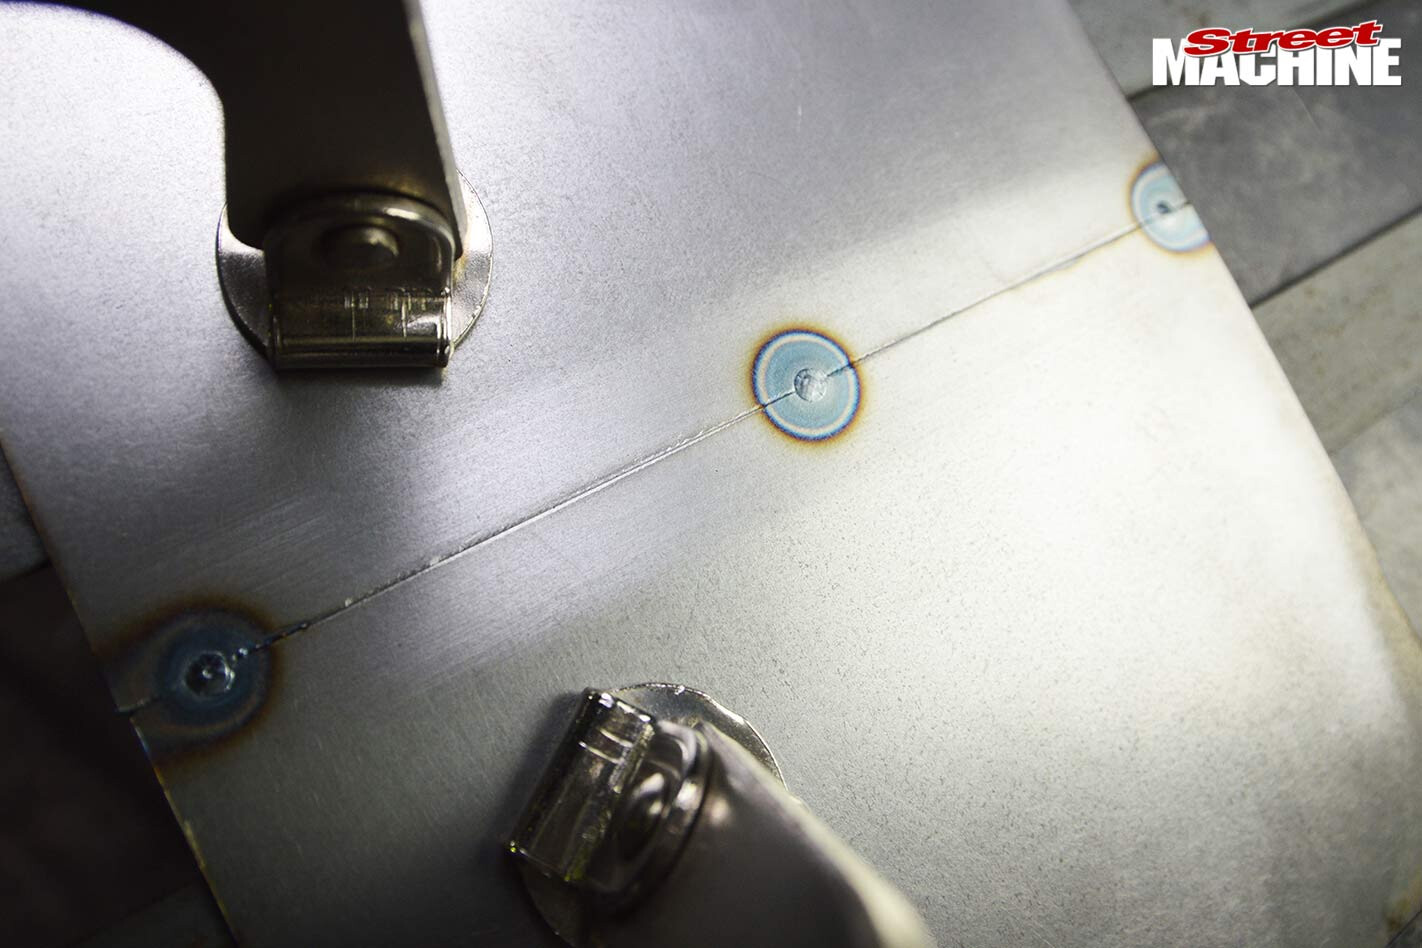 STEP 2: With both sides clean, a few tack welds are placed to hold the metal in position.
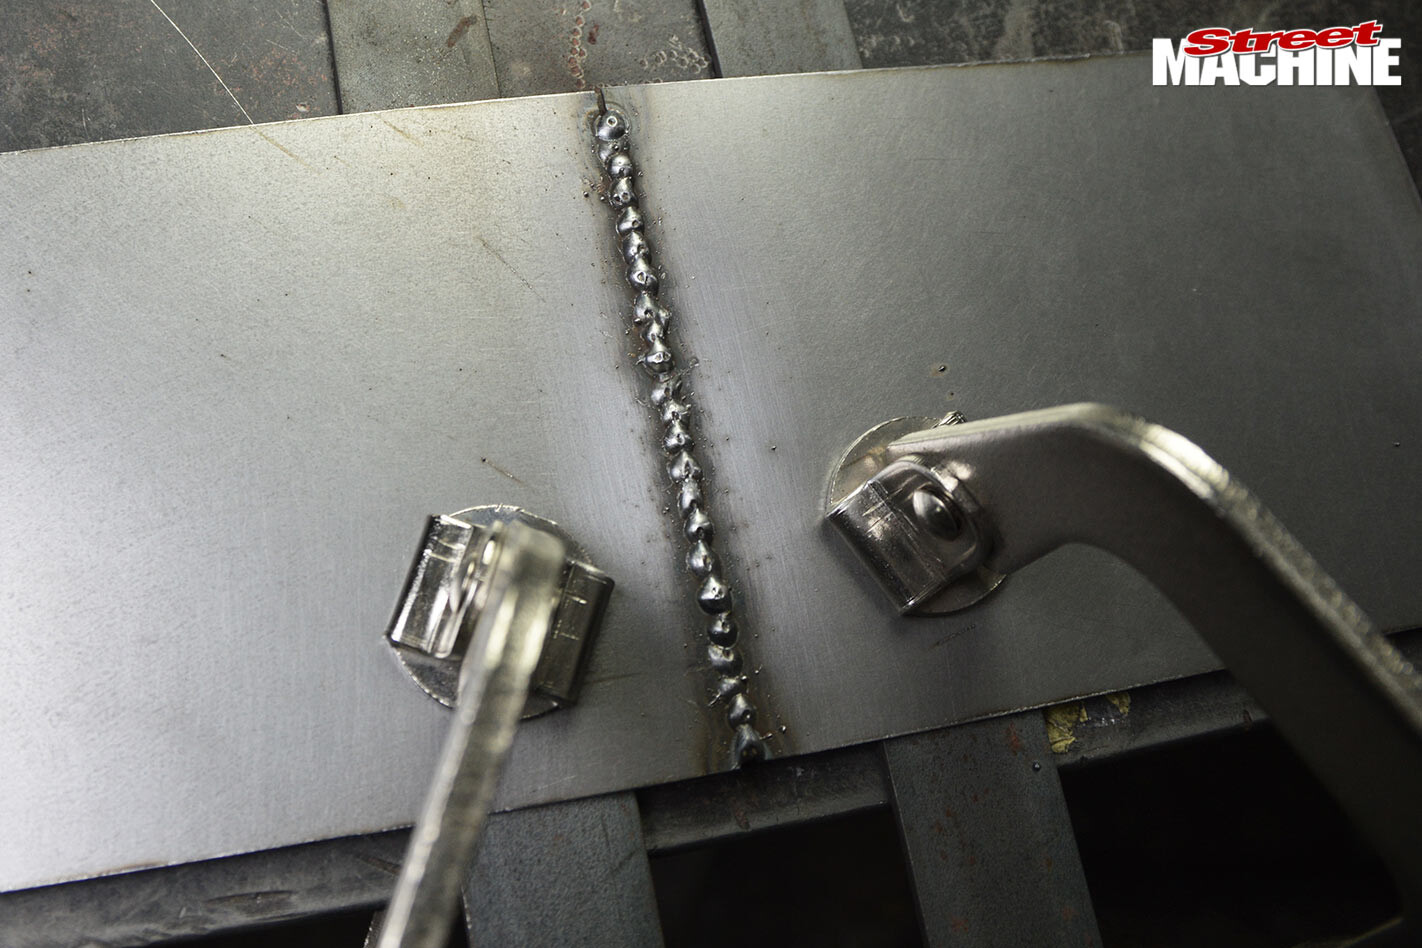
 STEP 3: The join can now be fuse-welded from one end to the other. A consistent metal pool that can be ‘pushed’ along the join is required here.
 STEP 4: If you flip the piece and can still see the edges of the join, there wasn’t enough heat. Welding in one run will cause distortion, but that’s okay; a common misconception is that the heat has buckled the surrounding metal, but actually the weld is pulling everything in around it, causing it to warp.
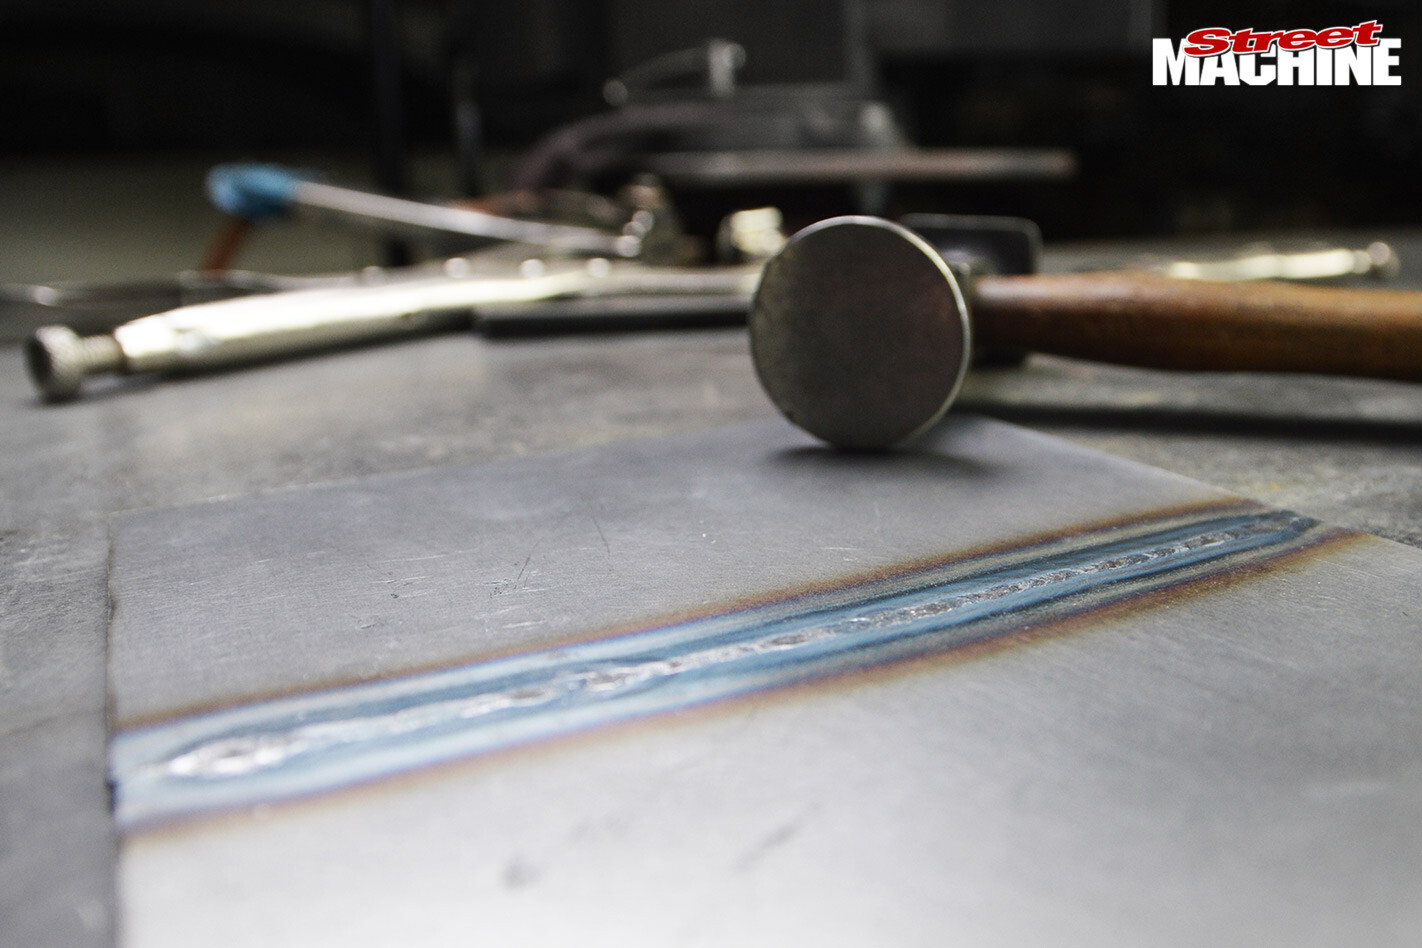 STEP 5: Using a hammer and dolly (or similar) along the weld, the tension can be released, letting the surrounding metal return to its original position while flattening out the piece.
Using a MIG
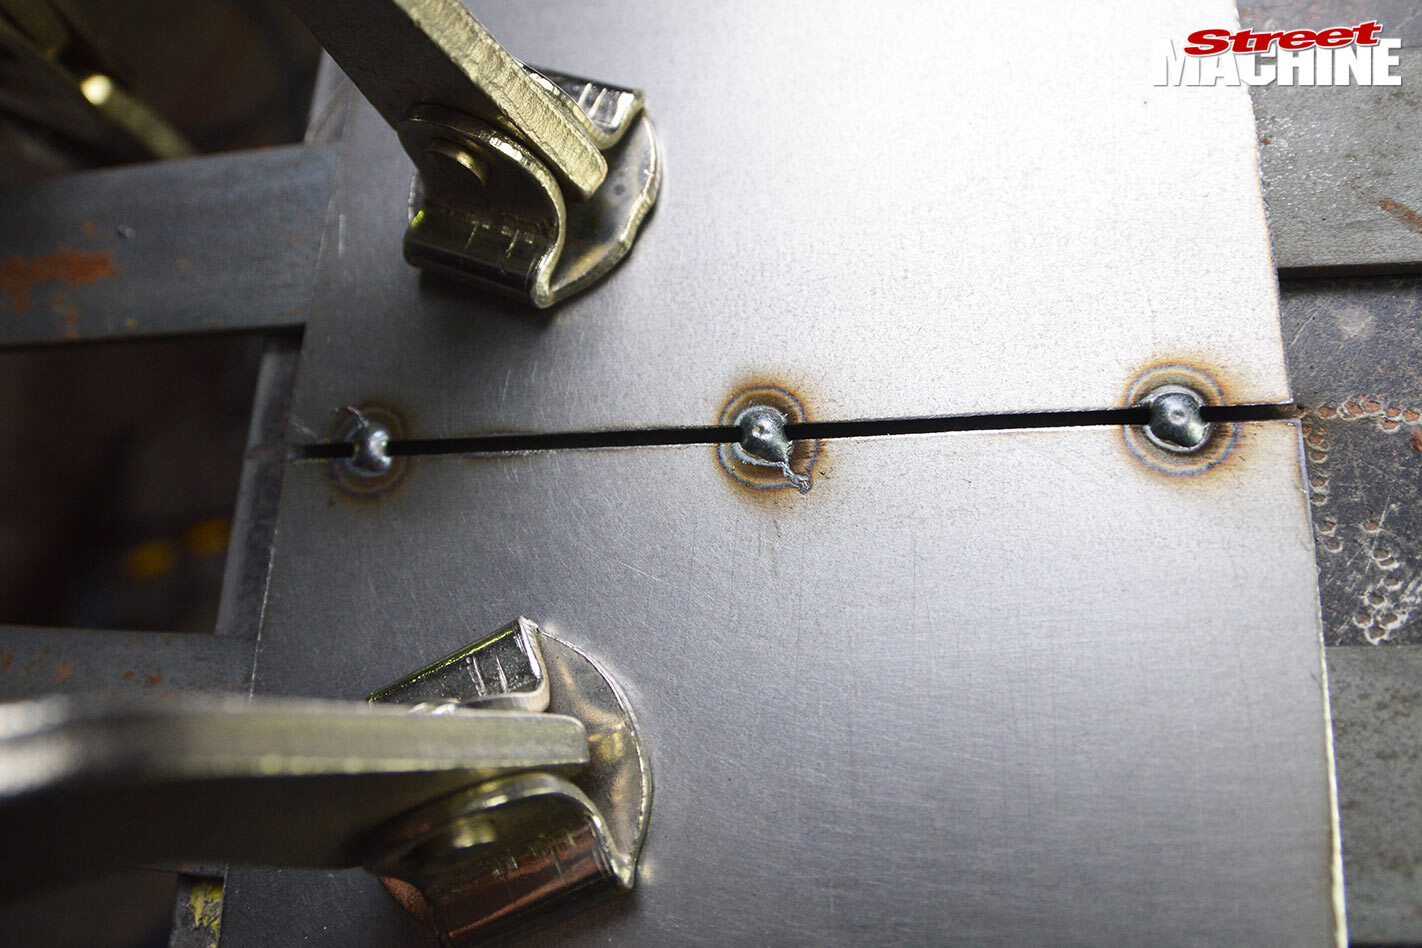
 STEP 1: The two pieces are pushed together, but a 1mm gap is left in the middle. This allows for when the two pieces are pulled together from the heat, known as weld creep. This gap also gives the MIG wire an area to melt, connecting the two pieces of metal together.
 STEP 2: This join is formed from numerous tack welds made along the panel. A good weld here requires heat – enough to penetrate but not enough to blow a hole – and enough wire to not melt into the tip but not so much that it’s pushing the handpiece away before it burns. A good tack will have a small dimple on top.
 STEP: 3 After every few tacks, the area is cooled with compressed air. This is best done not too close to the panel, as a high-pressure blast on a hot weld will cause it to become porous.
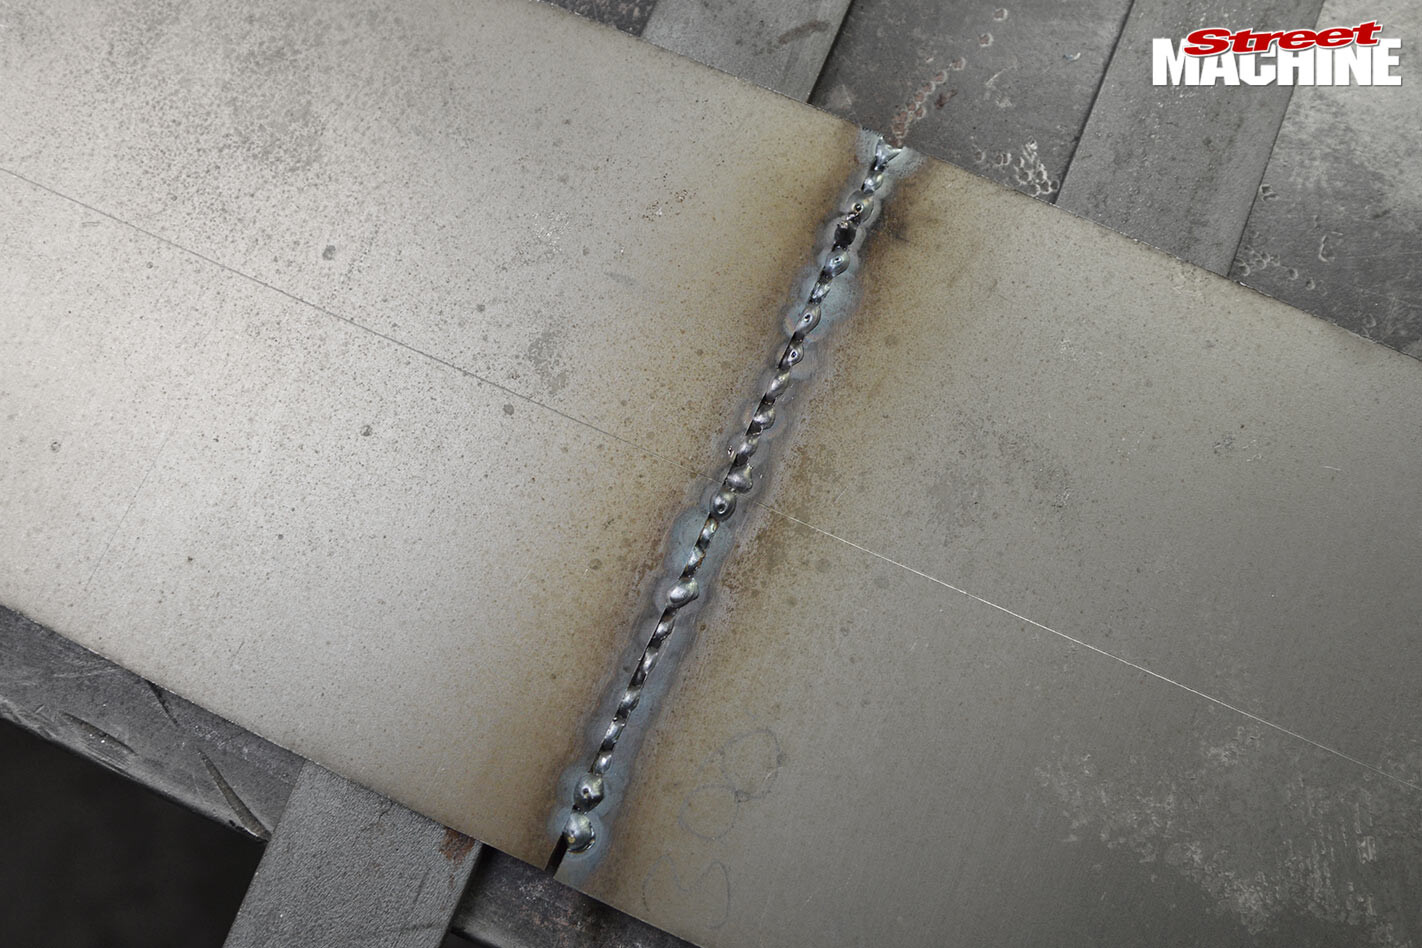 STEP 4: Welding tacks onto 1mm sheet and trying to keep things cool is never going to look overly nice, but fear not, as these will be ground off anyway. Flipping the piece over, the penetration is okay, but lacking.
These MIG welds will need grinding down, sometimes exposing areas that didn’t receive enough penetration. This and any impurities will end up leaving pinholes that require a few more tack welds and more grinding. At this point things are no longer overly workable. MIG welding will leave sheet metal hardened, and any hammer work can lead to the welded area cracking. This is not ideal for metal finishing.
3. THE CLEAN UP
These MIG welds will need grinding down, sometimes exposing areas that didn’t receive enough penetration. This and any impurities will end up leaving pinholes that require a few more tack welds and more grinding. At this point things are no longer overly workable. MIG welding will leave sheet metal hardened, and any hammer work can lead to the welded area cracking. This is not ideal for metal finishing.
In TIG welding, the parent metals are simply (in this instance) fused together, leaving it malleable. The weld is not hardened and can easily be sanded down to clean up. This also means it is ideal for working into shape to get the best finish.
Workability
 After a quick run though the English wheel, you can see the MIG weld is harder than the surrounding material and already starting to show signs of cracking, while the TIG weld will last all day.
Butt wait, there’s more…
Every welding machine is set up differently. There isn’t one set of numbers or a magical button that suits all jobs, and this is probably the first major hurdle for beginners to overcome. Time spent experimenting and getting to know your machine is really the only way forward. While it’s all well and good to jump onto a machine that has already been set up, most operators will have their own specific setting that suits them.
These are just a few of the methods I have used over the years. The results will vary from job to job, and when you have limited access to certain areas, different techniques are required. As with everything, it just takes practice; the challenge is half the fun. Good luck.
MIG OR TIG?
|
|
| PROS: One-handed operation; fast learning curve; point-and-shoot | PROS: No spatter means you can weld inside a vehicle without having to cover or strip the interior; stronger and malleable/workable welds; faster welding time no ‘grinding’; job satisfation |
| CONS: Leaves area hardened; spatter, not a TIG | CONS: The occasiional requirement of two hands |

.jpg)
Comments