WE’VE all been there: despite our best intentions, projects can stall and lay dormant. It’s not always through lack of time or money either; at times it can simply be hard to find the spark to reignite the passion for these projects.
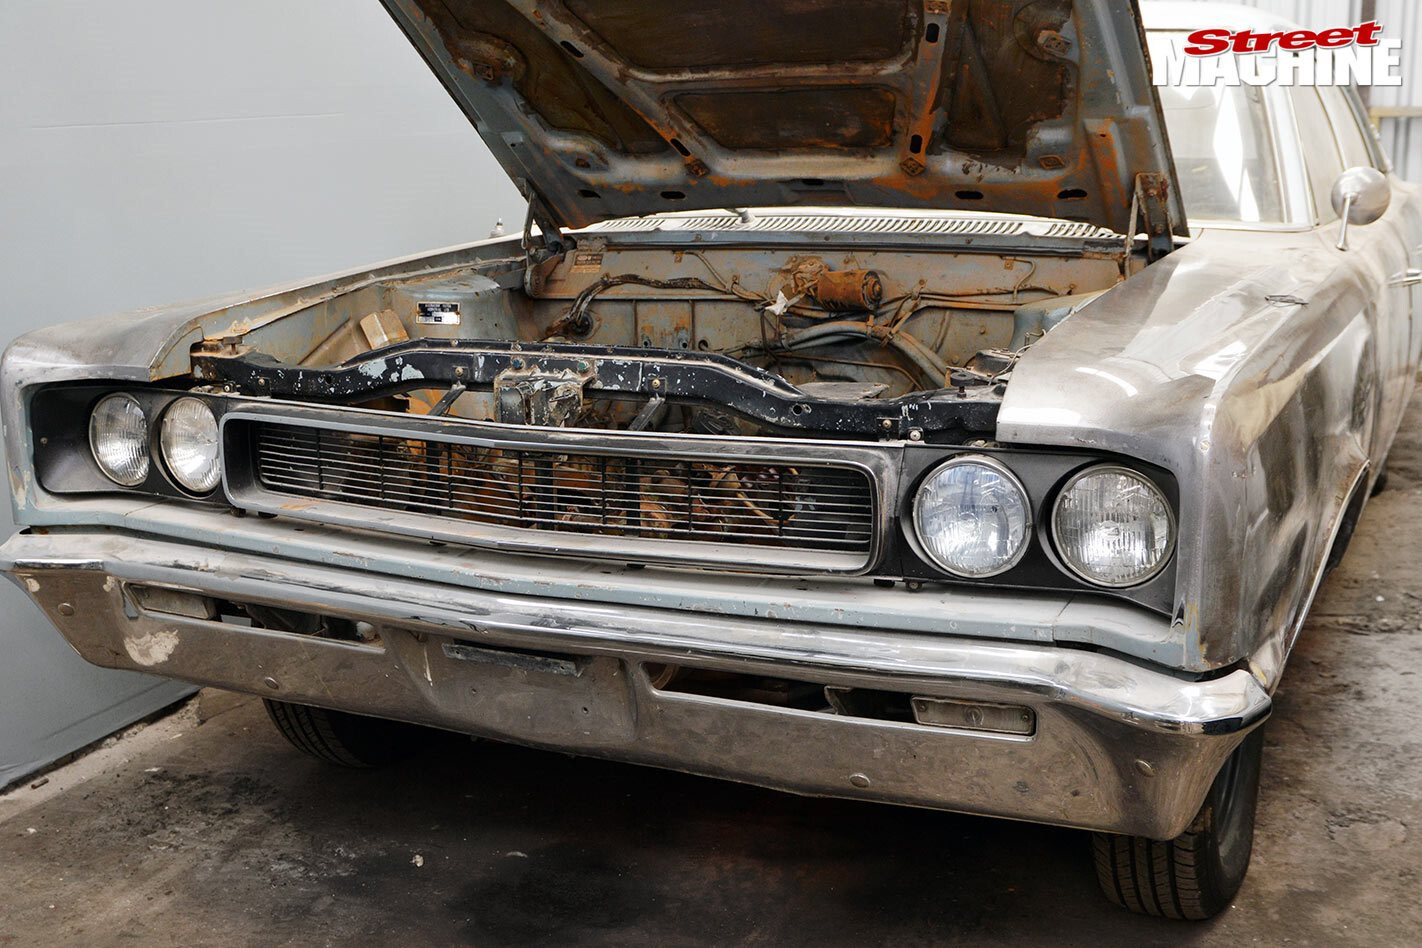
In the back of my mate Grant’s workshop was one such project that had been in deep-freeze for the best part of a year: his bare-metalled ’69 Rambler. The big four-door had been parked up after blowing out a head gasket on its now partially stripped 290ci V8. Grantley had more than a few project cars on the go; the old AMC just had to wait its turn.
So over a few celebratory brews one weekend, a few of us took it upon ourselves to help get things rolling. A shopping list was written, and a date set.
Call it a working bee if you like, but an invite was extended to a handful of like-minded mates, with the plan of making the Rambler whole again and giving it an engine bay overhaul in the process.
STEP-BY-STEP:
STEP 1. On midday Thursday, with the car now at my shop, the Rambler’s bonnet is removed and the engine block and trans are then pulled out as one. With the donk pulled, the bay is now fully accessible for a good degrease. The block and trans also receive a much-needed wash. By Friday morning things are clean and workable. Numerous components such as relays, horns, the washer bottle and wiring are then removed to be relocated in the fender wells and hidden from sight.
STEP 2. We planned to clean things up by welding up some holes in the engine bay, so the paint is removed back to metal in and around these holes prior to welding. Cutting and seam-welding along the tops of the shock towers is also in order. A simple copper pipe with a flattened-out end is a great way to fill the larger holes. Held on the backs of the holes while welding takes place, the copper will not fuse with the metal, making the job a lot easier. The chassis and any other offending areas are taken care of with a quick sandblast to remove any surface rust. After a light epoxy, a wipe over with some filler on the areas that require attention takes place. Then it’s on to a 2K high-build primer.
STEP 3. On the other side of the shop, the engine and trans have been separated and inspected. Apart from a bit of gunk in the galleries and sump, things look okay, and everything is reassembled with fresh gaskets.
STEP 4. By Saturday we are at the halfway point, with freshly sanded primer in the bay and a quick mask-up, before a custom coloured basecoat is laid down. From there, a nice coat of HS clear is thrown on to seal things up.
STEP 5. Meanwhile, fresh head gaskets are fitted and torqued down to the small-block. With the engine assembled, colouring in takes place. The auto then cops a fresh front seal, and the converter and tranny are then reattached to the engine.
STEP 6. A bunch of Rambler performance parts are on hand thanks to the generosity of Street Machine’s own Boris Viskovic – a Rambler weirdo from way back. With the aftermarket intake bolted down, the factory air cleaner snout is hacked off the housing and a bunch of speed holes drilled and dimpled. The rocker covers also receive a clean-up and a one-off oil filter cover is fabricated.
STEP 7. It’s all hands on deck as the motor finds passage into its jazzed-up new home.
STEP 8. With everything from fuel to sparks connected and the engine firmly bolted into place, it’s time to kick her in the guts. A few tweaks to the dizzy and some fuel down its throat and it’s not long before the old V8 roars back into life. Shed rules come into play and a little shed skid is in order.
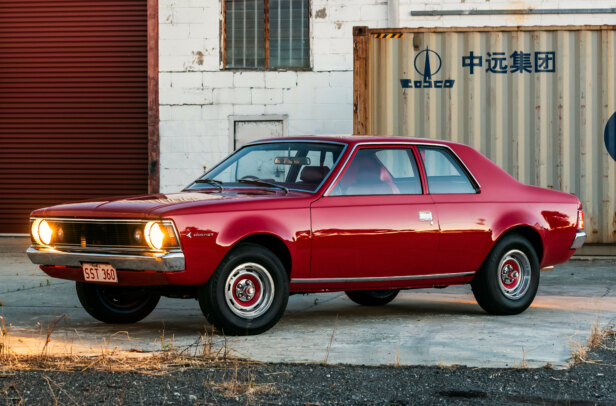
By Sunday evening, the Rambler is alive again, and looking a whole lot better for it.
STEP 9. A few weeks after having the car running, a bunch of us take it out on a private road for its first shakedown run. Success!
STEP 10. The end result speaks for itself, both visually and functionally, proving what a little know-how and a plan can achieve in a short space of time. Jobs like these are not always easy when trying to push through by yourself, but things tend to be a lot more enjoyable when a few good mates are thrown into the mix. So with a successful low-budget weekend in the bag, the Rambler is now ready for the pits and fresh registration. All just in time for summer cruising.
Special thanks to Steve, Quinny, Tinny, Biddy, Darren, Tug, Boris, Daniel and everyone else that was able to lend a hand.

Comments