Lead wiping isn’t hard, you just need the right equipment and plenty of practice
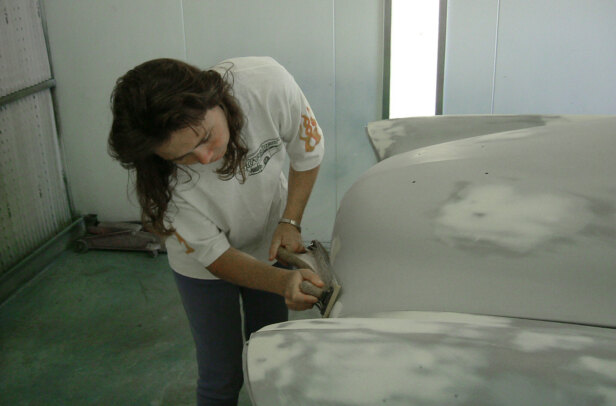
LEAD wiping, lead filling, lead loading or lead slinging. Call it what you will, it’s just another way to finish off your repairs for a smooth enough finish so that you can prime and paint your car. Or in the case of Pete Forster’s ’33 Ford roadster, maybe not paint. With the near-invisible repairs that the lead creates, a coat of brush-on clear worked just fine for this traditional roadster.
Imagine if Pete had done all his repairs in white plastic filler and then clear-coated the lot — I don’t think that’s a trend that would ever catch on!
In recent times, lead wiping has been dismissed as simply an old-fashioned version of filling repairs. More modern polyester or plastic fillers — aka bog — have been around since the 60s and rapidly overtook lead as the fillers of choice as they’re easier and quicker to apply and arguably require much less skill.
In a nutshell, lead and bog essentially serve the same purpose. However, lead wiping is definitely more labour intensive.
Having seen it done a couple of times now, including watching Gene Winfield wave his 60-plus years of experience over a lead-filled panel, I’d say the process isn’t that difficult, but it does take practice.
Here, Pete’s son Ben gives us a step-by-step guide to get you on your way to becoming a certified lead slinger.
WHERE DO YOU GET IT?
The key to a successful repair is using the correct solder, which comes in various ratios. Radiator shops use a 60:40 tin to lead ratio (the first number is always tin). Plumbers use 50:50, and at least 70 per cent lead (30:70) is recommended for body repairs.
As for the tools, most people would already have what’s needed, apart from the body file, shaping paddle (in the blue container, above) and Kemtex B solder paste (red lid, above). It’s very important to use appropriate safety equipment (respirator and safety glasses) when working with lead. Also, be sure to sweep up the lead shavings and dust before thoroughly washing your hands, as there are a few nasties involved.
STEP-BY-STEP
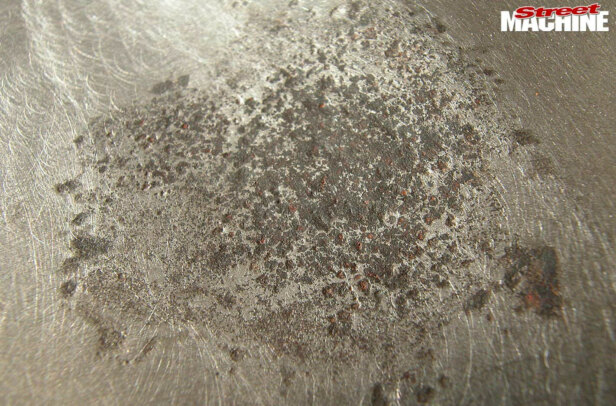
1. It’s good to circle the problem. With any repair requiring filler, you want to get the panel as flat as possible first. Although some people suggest it’s okay to fill holes with lead, it’s not a good idea. The first step in a lead repair is ‘tinning’, which chemically cleans the surface using acid. If there’s a hole or a porous seam, the acid will get trapped behind the panel, rusting it from behind, so weld up all holes and seams first.
2. Although you can purchase lead paddles of varying shapes and sizes, most prefer to make their own. It’s not difficult and allows you to create different paddles to perform specific tasks, such as getting into tight curved areas. Ben’s handcrafted masterpiece has been soaked in a tub of old sump oil — paddles need a coating so the wax doesn’t stick. Other options are beeswax or tallow, which is made from animal fat.
3a. Ideally you would have the area to be repaired (usually the entire vehicle) media-blasted, as this gets into pitted areas and removes all traces of rust. For the purpose of this demonstration, our very rusty ’27 Ford cowl was hit with a stripping disc and then various brass wire wheels (below) to remove as much rust as possible.
3b. Even the smallest amount of rust left behind could come back to haunt you in the future.
4. It’s looking a lot better after the attack of the wire wheels but this is not as clean as you’d need it if this was going to be a real repair. I have seen Gene Winfield in the past use the end of a drill bit to get into pitted areas like this. The point being, do whatever you can to make the sure the surface is spotlessly clean before applying any filler, regardless of whether you’re using plastic or lead.
5. To apply the lead you need to heat both the panel and the lead. Ben used a propane torch, which has a softer and cooler flame than oxy-acetylene. If you use oxy, you need to set the torch to a ‘licking’ or carbonising flame. You are trying to evenly warm the panel and heat the lead until it starts to droop. In this state it will stick to the warm panel, allowing you to twist off a small piece.
6. With the paddle suitably coated in lubricant (wax or oil) and the lead heated to the point where it’s soft enough to shape, begin spreading or wiping the lead across the surface. Get it too hot and it will fall straight to the floor — that’s why most people recommend practising on a horizontal panel. If you’re really keen, do it in thongs; you’ll soon figure out not to let it fall on your feet!
7. With the lead smoothed and spread over the repair area, check whether you need to add more. The big advantage with lead over plastic is you don’t have to worry about curing time or solvent build-up; you can get straight onto it. Just warm the area again and melt more solder on. The trick is not to melt out your previous hard work. If you find a high spot, you can tap it down — try that with bog!
8. An adjustable body file is ideal for panels with a substantial curve like this cowl. Most people recommend that you never grind lead; only file it as you don’t want lead dust in the air. We used a low-speed DA sander to finish off this repair and there was very little dust created. A filtered respirator mask is essential and, once again, make sure you clean up the area and wash your hands when finished.
9. Being so soft, the lead build-up is quite easy to remove using a coarse body file. Just as with plastic filler, you want to get the surface as smooth as possible and put on as little material as possible so that you don’t make any extra work for yourself. Just be careful not to gouge into the repaired area. The only way to gauge this is with practice, practice and some more practice.
10. Not surprisingly, most of the lead ends up on the floor. Some people gather up the filings and re-melt them. However, this can add impurities to the solder and you will lose some of the tin from the mix, which will affect how the solder behaves. Also, lead fumes are bad news, so it’s not really a recommended practice. However, the lead sticks are fairly expensive, which is why some people try to recycle the shavings.
11. The semi-finished repair after a quick run over with a DA sander. We’ve circled a couple of low spots that need more lead. It’s surprising how seamless the repair is and how well it feathered into the surrounding metal — you can’t feel any edge at all. Once finished, the repair area needs washing with soapy water to remove any traces of flux, followed by a solvent cleaner to remove the lubricant left behind by the paddle.
12a. Unlike the 60-plus years of lead-wiping experience that guys like Gene Winfield and Bill Hines have, Ben only has about 60 hours’ worth — all of it on his dad, Peter’s, ’33 Ford roadster you see here. This body was pretty stuffed when they got it and needed quite a bit of lead to tidy up the panels and the joins.
12b. It’s been in clear coat for about a year now and the repairs are holding up just fine.
TINNING
The instructions for tinning a surface are pretty straightforward — it’s even written on the jar. Here’s quick a step-by-step guide:
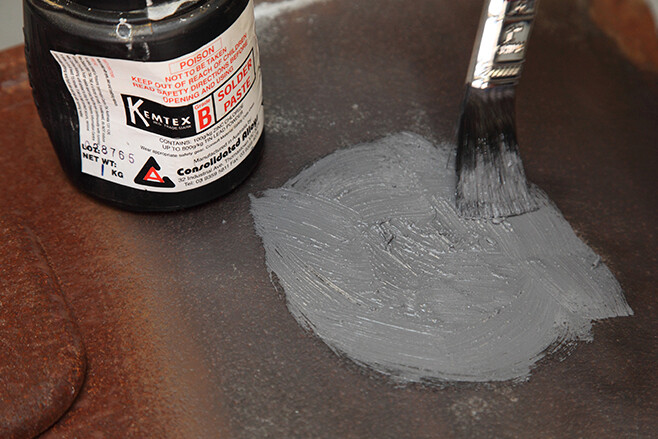 1.
1.
Clean surface with steel wool and apply paste with brush
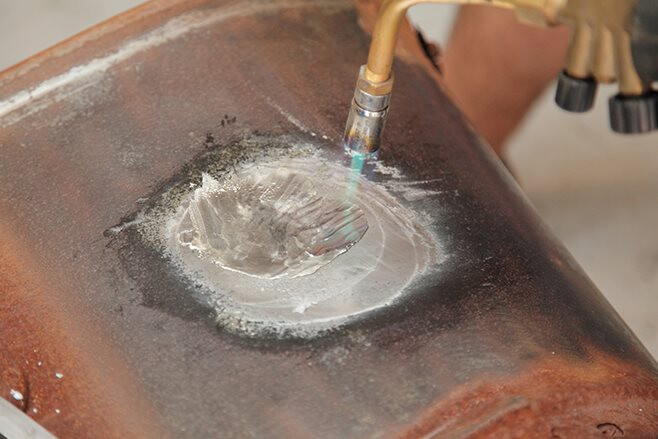
 2.
2.
Heat with torch flame
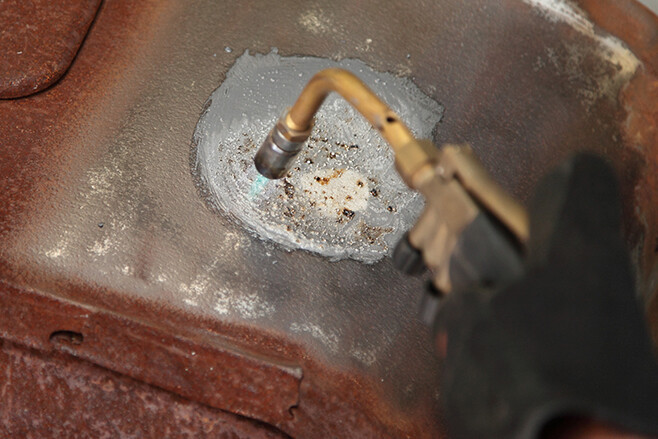
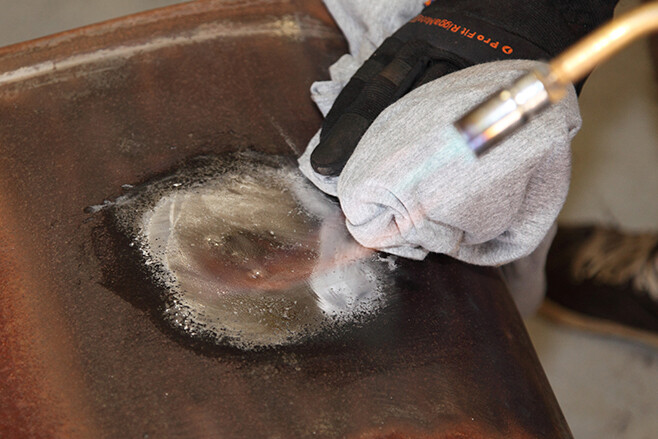 3.
3.
And whilst solder is molten, wipe surface with clean cloth to give smooth bright finish.
The flux is called Kemtex B solder paste and is a combination of zinc chloride and tin/lead powder. All tinning pastes have hydrochloric acid in them, which chemically cleans the surface and removes any oxidation, while simultaneously applying a very thin layer of lead that helps bond the new lead that you are about to apply to the surface of the metal. Always clean and tin a much larger area than the repair requires. This will ensure maximum adhesion right to the edge of the final repair.
WRAP UP
Lead fillers still have some advantages over the modern plastic fillers, Ziggy Sadler from Ziggy’s Hot Rods says.
“It’s a double-edged sword; the technology is in the plastics. We metal-prep our jobs and do all our file-finishing, then in areas where we know that there’s going to be a little bit of vibration or movement, over a double-lapped joint or something, we prefer to lead load. It’s less likely, especially in joints, to crack out.
“From a paint preparation point of view, when you’ve got something in bare metal then you epoxy prime it and then put fillers and stuff over the primer, there’s always the problem of breaking through or rework, so you tend to back over yourself a bit.
“If you can file it and lead-load it — and if there’s enough budget to enable us to do that — that’s normally where we will take it.”
Comments