Recovery
Gallery1
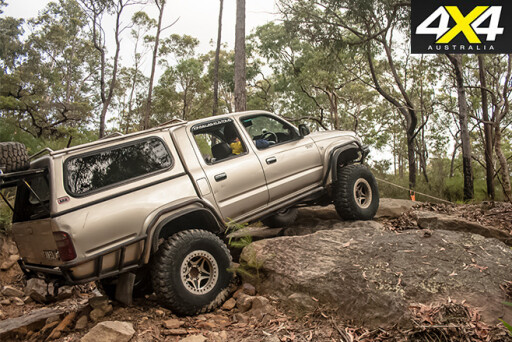
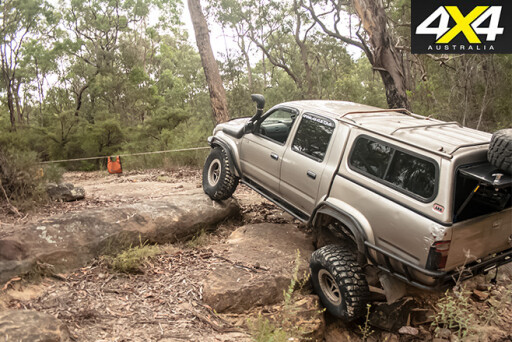
Picture this: You’re out driving by yourself scouting out a new campsite you plan to visit with some friends and family in a couple of weeks. There are a few small rock ledges in your way, but you’ve driven them plenty of times before.
But this time you get the line slightly wrong and you’re high-sided, wheels spinning in the air, with no more forward momentum.
With no-one around it can be a pretty daunting experience, unless you have the most useful tool in the off-roaders arsenal – a winch.
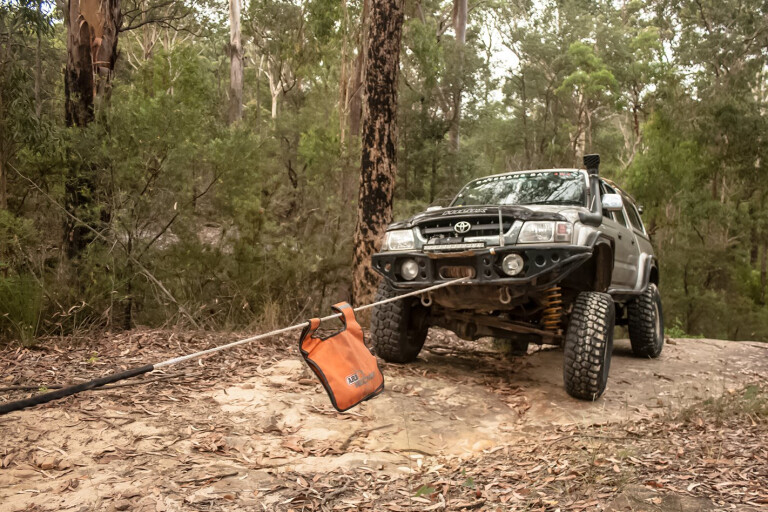
 With a basic recovery kit sitting on the back seat and a tree 30m away, a winch turns something that could be a disaster into a five-minute delay.
The downside is that winching places tremendous loads not only on your recovery gear but also on your four-wheel drive. It’s a simple enough process but one that can have deadly consequences.
This month we’re looking at the dos and don’ts of 12V winching, and the fundamentals that will get you home safely.
WINCHING: STEP BY STEP
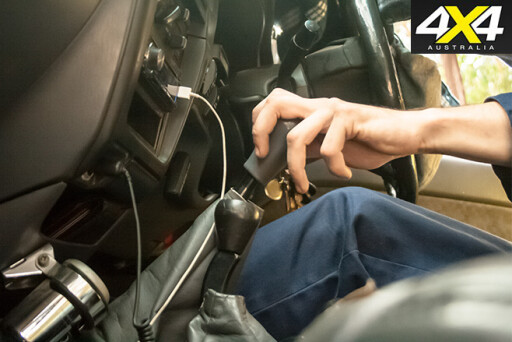
1. CHECK IT
Electronics have a funny way of malfunctioning at exactly the wrong time.
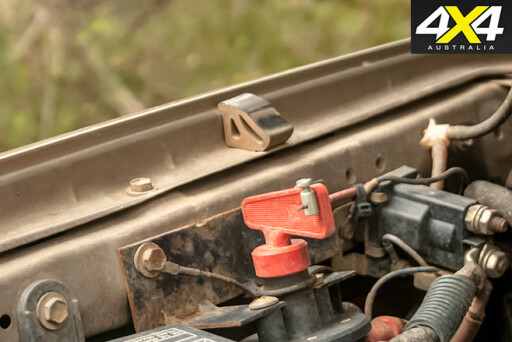 A quality winch install will always include an isolator to minimise the amount of live cables running around your engine bay, so now is the time to grab out the winch controller, turn on the isolator and give your winch a quick spool-out under power to test that it’s working.
There’s nothing worse than setting up for a recovery only to find the winch motor’s seized.
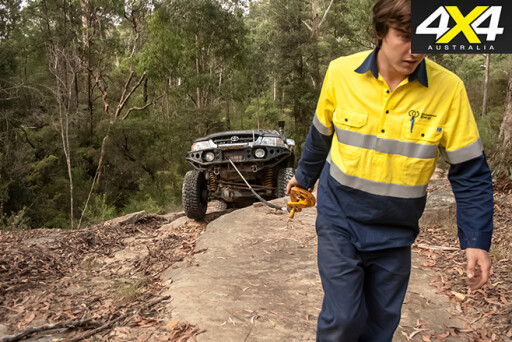
2. ANCHOR POINT
From here you will need to select a suitable anchor point. Ideally, choose the largest and healthiest tree you can find.
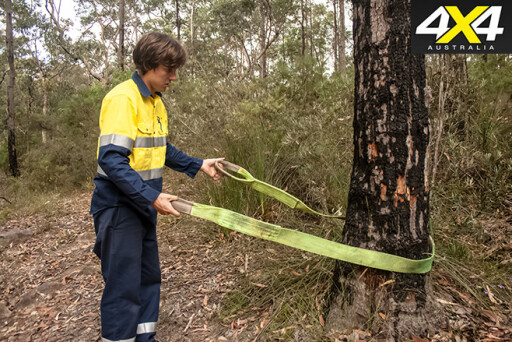 Keeping the tree trunk protector as low as possible will also help minimise the stresses on the tree.
Side loading a winch can lead to catastrophic failure of the housing, so keep your pull as straight as possible to ensure that the cable or rope doesn’t rub against any hard or rough surfaces.
3. ENGAGE FREE SPOOL
With your anchor point secure, engage your winch’s free spool and run out your cable or rope.
 Your winch has more pulling power when more rope is off the drum. But never leave any less than one full layer on the winch. There’s a variety of ways you can use hooks and shackles to attach your cable or rope to the tree trunk protector but, as a rule, the fewer metal connectors the better.
If it doesn’t absolutely have to be there, get rid of it.
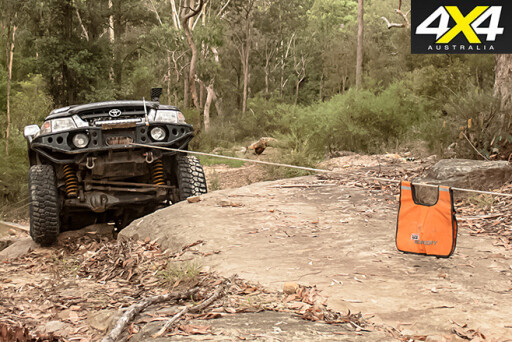
4. USE A DAMPER
Before tensioning the rope or cable, attach at least one damper to the line.
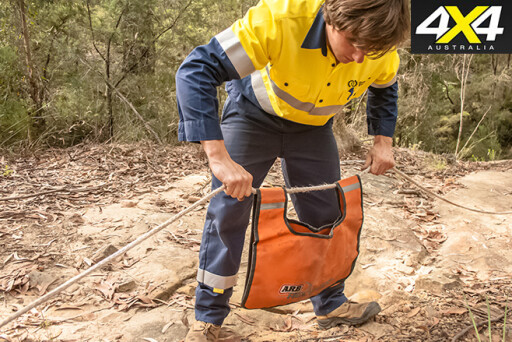 There are two possible hazards: either the cable snaps and acts like a giant whip, or a hook or bow shackle fails.
With that in mind, best practice is to attach a damper in the middle of the line and a second damper as close as possible to any metal components.
If you’re in a bind, then a heavy jumper, a tarp, Driza-bone or a towel will also do the job.
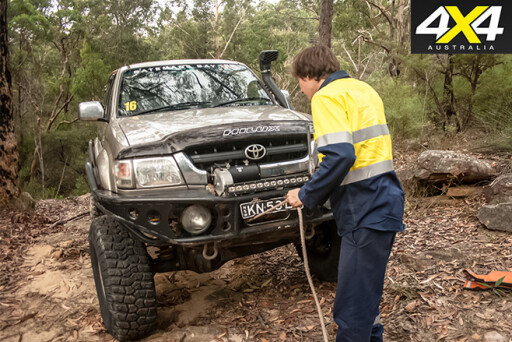
5. CLEAR THE AREA
If you find 100 ways to prevent an accident, there will be 100 more you didn’t think of. Things do go wrong, so ensure the immediate area is safe.
 Clear a safe zone at least the length of the cable or rope and then run through your winching plan. Double check your connections and straps and plan out exactly what’s going to happen, what can go wrong, how to deal with it, where you need to steer and when you’ll reach a safe point to stop.
6. DISENGAGE SPOOL
Disengage your winch’s free spool and take up the slack in the line. Put your 4x4 into low range first gear and begin winching in.
 Slowly turning the wheels can help break suction in mud and take some load off the winch. You’ll want to match wheel speed with the winch to share the load, paying attention not to overrun it and tangle the line.
A winch’s internal components aren’t very strong, so winch in a 30 second on-off cycle as smoothly as possible.
7. RELEASE TENSION
When you’re back on solid ground and your 4x4 is stable, release any tension off the winch line and begin disconnecting your recovery equipment.
 Leave the damper on until last and never step across a winch line even if it’s not under tension. When running the winch line back onto your winch, keep some load on it and guide it onto the drum as neatly and tightly as possible.
A loose or messy winch line allows outer layers to pull through the lower layers of line, becoming tangled and complicating your next recovery.
8. DISCONNECT POWER
With the winch line in and secure, disconnect your winch from the battery with your isolator again, and pack any controllers up in an easy to access location.
 We recommend leaving it within reach of the driver to save digging through drawers if you’re stuck in mud. When you pack your straps and shackles away, put them in a separate storage bag to isolate them until you can wash them.
Mud and dirt are abrasive and friction can make thousands of microscopic cuts in a strap, so clean gear is vital.
10 RULES FOR SAFE WINCHING
 1. Always use as few connections as possible – if you don’t need a shackle, don’t use it.
2. Always winch off a live tree – dead trees can be hollow and have rotten roots.
3. Keep the strap low to the ground – the less leverage on the tree, the less likely you’ll rip it out.
4. More line off the winch means an easier time for your winch motor.
5. Never use a snatch strap as a winch extension strap – it’s not designed for a constant load.
6. Winch lines can become tensioned or snap before you realise – never step over them.
7. Always agree on clear signals between spotter and driver before you begin.
8. Only the spotter talks directly to the driver – everyone else speaks via the spotter.
9. Keep the area clear – snapped cables can be deadly out to their full length.
10. Poorly maintained gear is more dangerous than cheap gear.
Please enable JavaScript to view the comments powered by Disqus.
COMMENTS