Reviews
Gallery7
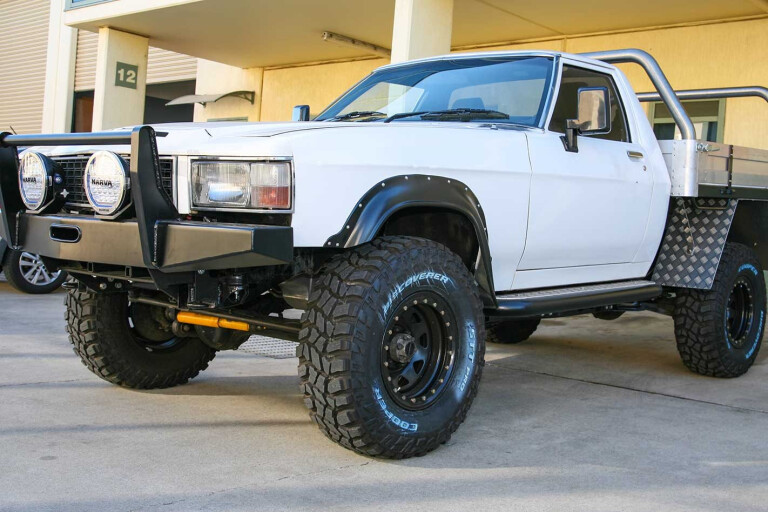
GRANTED, the Tonner has been given the final tick from the engineer – a massive achievement in itself – I expected it to be registered and a few thousand kays down by now. Sadly, that is not the case.
Nothing major has gone wrong; just a long list of minor mechanical parts I want sorted. Plus, we are waiting on that all-important engineer’s report which has to accompany the Tonner when getting the NSW Blue Slip check.

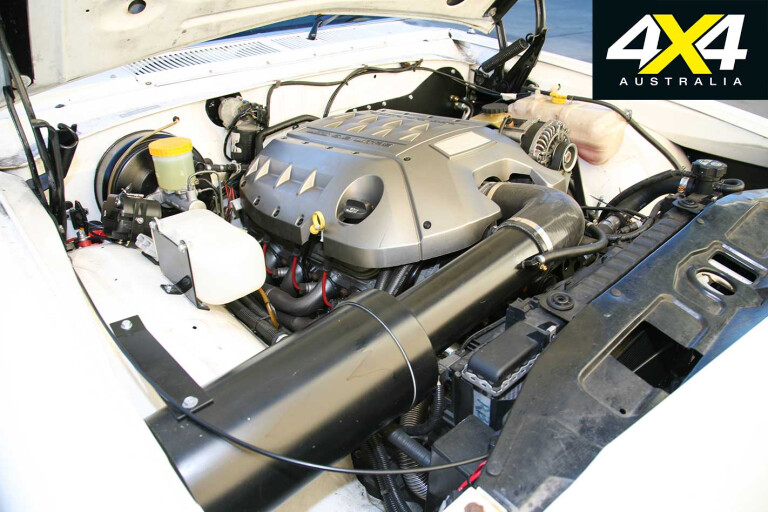
The Tonner starts and drives, but only the engineer has tested it on the road (with trade plates attached). I’ve only driven it around the carpark, and it’s frustrating not being able to ring that LS3 out just a little.
While the Tough Dog foam cell shocks are waiting to be bolted into place, we’ve been working on the coil spring rates and the weight of each four corners of the Tonner. They have a heap of different rates on offer and, while we know the correct set to slot in, I want to reserve judgement until after a few road tests; and that involves getting the vehicle registered first and driving it with both near-empty and full (195L) fuel tanks.
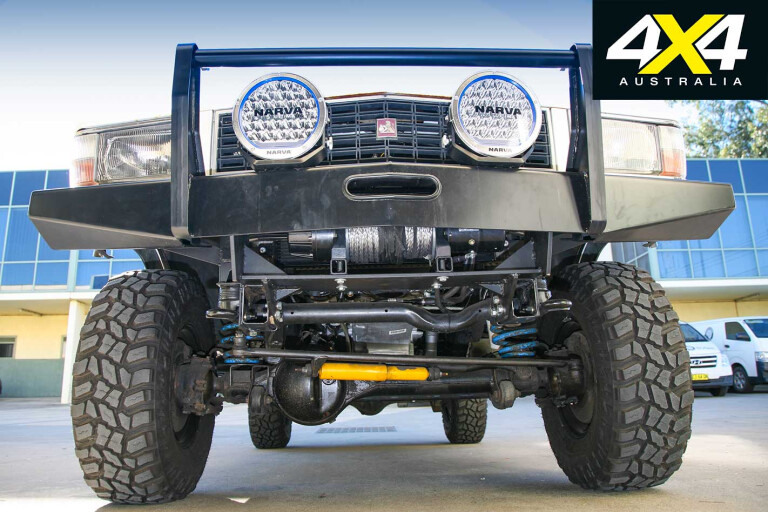
The engineer vetoed my want for dual snorkels, so that left me with the predicament of what type of air-induction system to utilise. I’d originally wanted dual flat-panel filters behind each headlight, but I’ve slimmed back to a single custom-made barrel behind the driver’s side headlight.
7
That leaves a vacant spot behind the passenger’s side headlight, given I’d relocated the batteries to behind the cabin. Perhaps I can fit an onboard air compressor, a huge train horn or a chicken roaster?
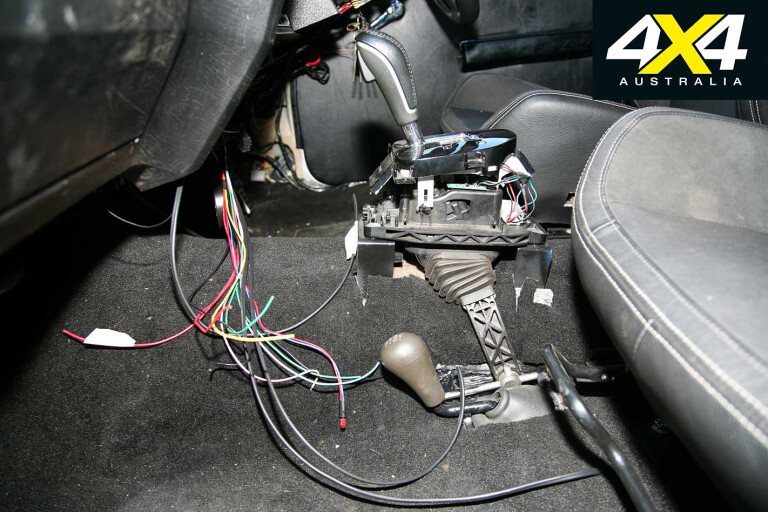
In an attempt to minimise future problems – just in case I have a flat starter battery (mounted behind the cabin) – we’ve put a heavy-duty Anderson plug beneath the bonnet that can be hooked into for a jumpstart if needed. To help access the deep-cycle batteries we’ve allocated power posts in the cabin and near the front of the tray, ready to run leads to my fridge and other 12-volt accessories.
7
I purchased a set of Superior Engineering Superflex sway bars; we’d installed the rear ages ago and left the front until recently, only to find it didn’t fit directly to the GQ front radius arms. Rather than swap sway bars, we ditched the GQ units for a set of GU radius arms – problem solved and a note to self: never leave fitting custom parts until the last minute.
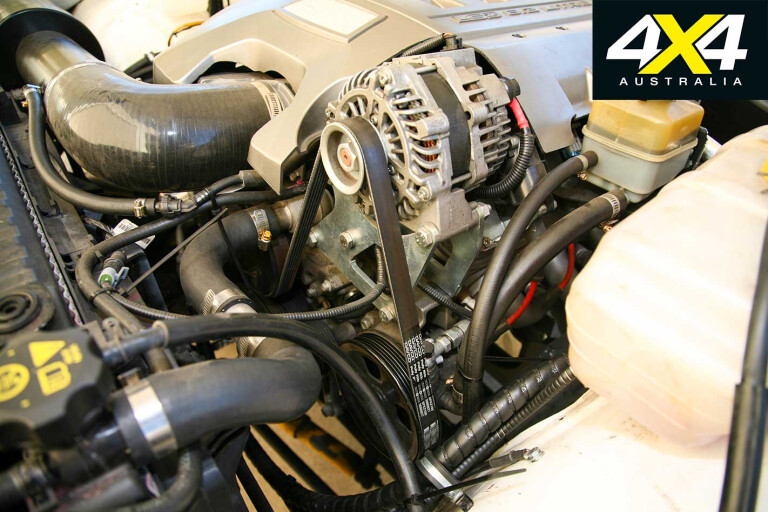
More for aesthetics than any practical reason, we ditched the dodgy aftermarket engine cover that came with my Maloo R8 in favour of a stock unit; although, we had to do a little chopping to allow for the high-mount alternator conversion to clear it.
7
We’ve cleverly slotted a Runva 11,000lb winch behind the Holden grille and into a custom-made cradle, but accessing the clutch lever proved a little hard given the winch body doesn’t sit within the main bullbar cross-member like most fitments. Instead, it’s mounted rearwards of that cross-member, effectively directly under part of what was once the radiator-shroud support panel.
By fluke design, cutting a simple hole just large enough to fit my hand through allowed easy access to the clutch lever. The only disadvantage is that you have to pop the bonnet to access it.
7
I hate seeing winch ropes and hooks dangling or attached to front recovery points while not being used, as it leaves them in a beaut spot to be damaged, especially synthetic rope like I’m using. So, while making a steering protection plate, we’ll incorporate a hidden hook underneath to hold the winch rope while not in use. The worst I’ll have to do is thread it through the fairlead prior to using the winch.
I still have no idea what I’ll eventually do in the tray. Short term: a couple of large toolboxes to offer a little security. Long term: either an alloy canopy or even a slide-on camper unit. There are a couple of black paint patches from previous repairs (driver’s door and plenum panel) so I’ll look into colour-matching a couple of spray cans to clean them up, or maybe I’ll vinyl wrap the whole shebang in bright orange.
Drop back next month for what will (hopefully) be the final huge custom shoot that shows off how damn capable my One Tonner has become.
Please enable JavaScript to view the comments powered by Disqus.
COMMENTS