This article was originally published in the October 2011 issue of Street Machine magazine
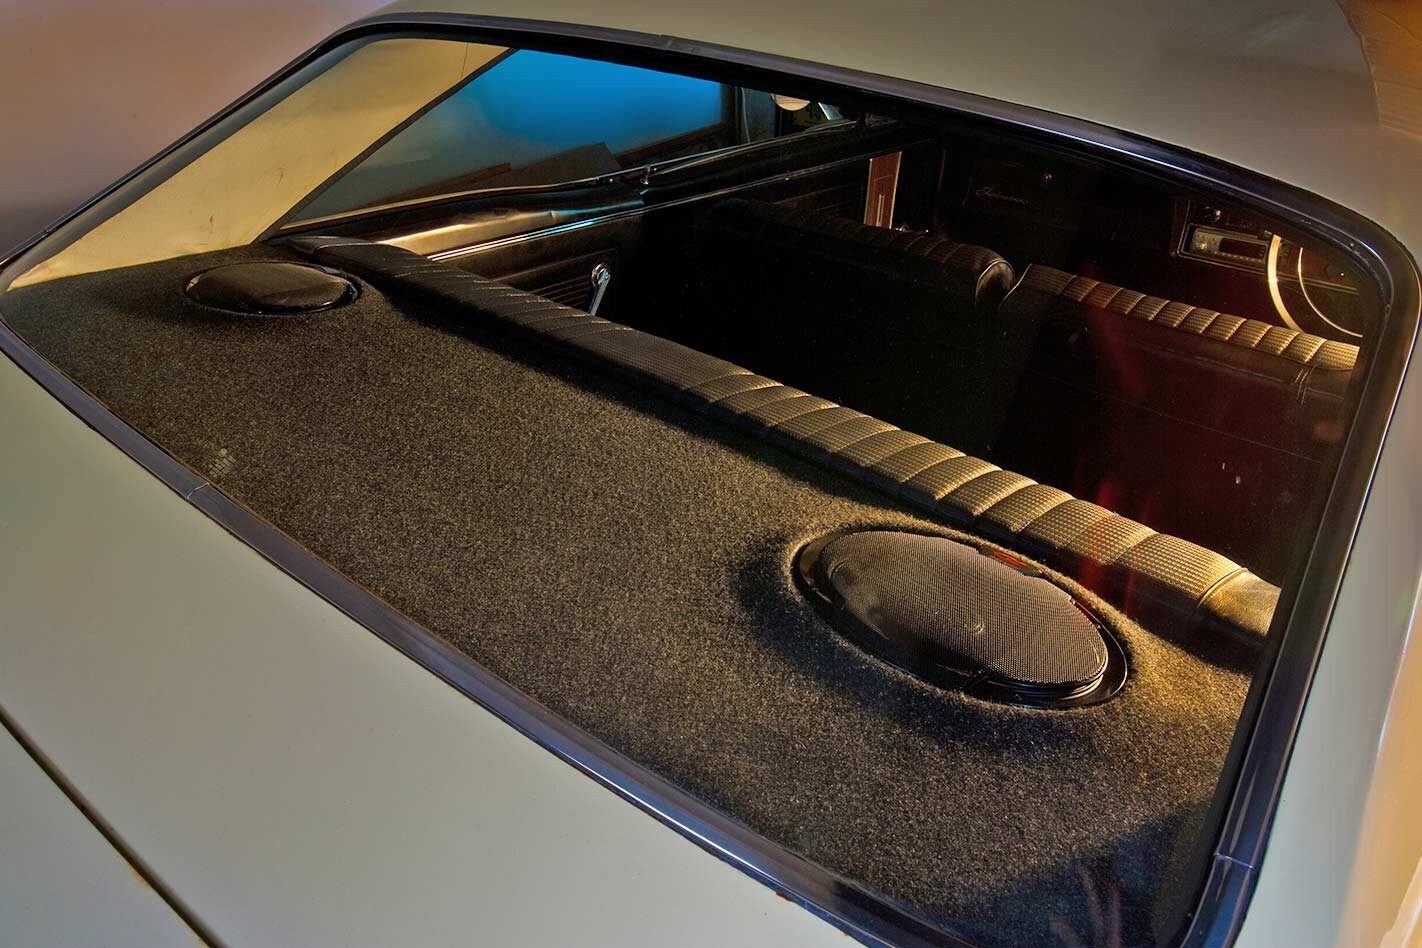
WITH their generous cone area, the humble 6×9 can produce plenty of bass and quality sound, but only if they’re mounted right. To maximise bass response, 6x9s need to be mounted to a solid, flat surface. In short, your streeter’s flimsy factory masonite or compressed cardboard parcel tray is simply not going to do the job.
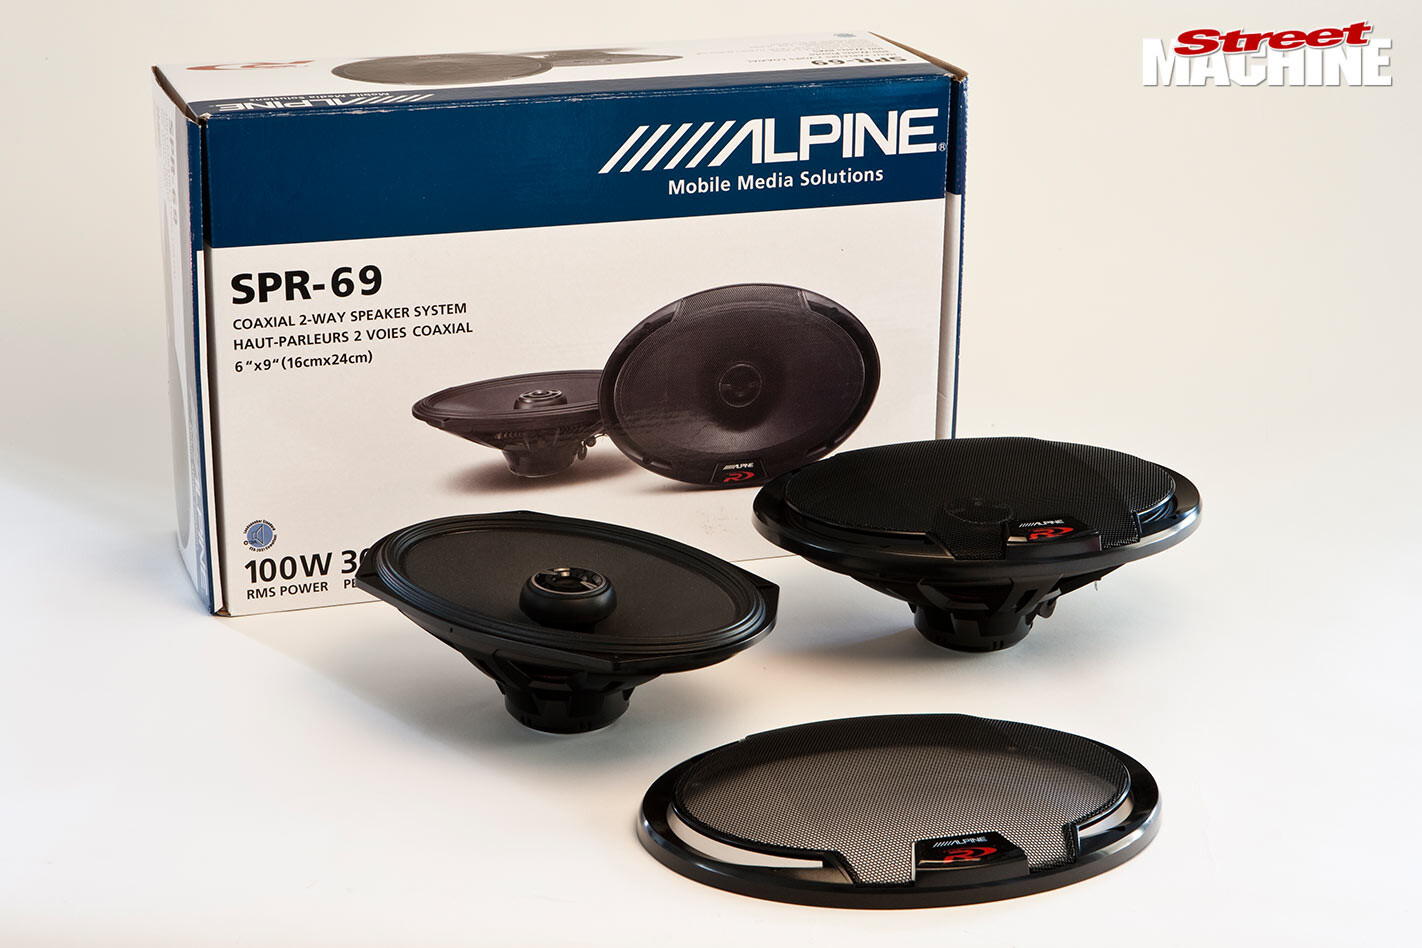 The solution is to fashion a new tray out of heavy, solid MDF – you’ll be amazed at the difference it makes. Best of all, it’s an easy job that anyone with a jigsaw can attempt at home. Watch on while I whip up a new tray for a ’67 Fairlane hardtop to house a pair of Alpine Type R, SPR-69s.
STEP-BY-STEP
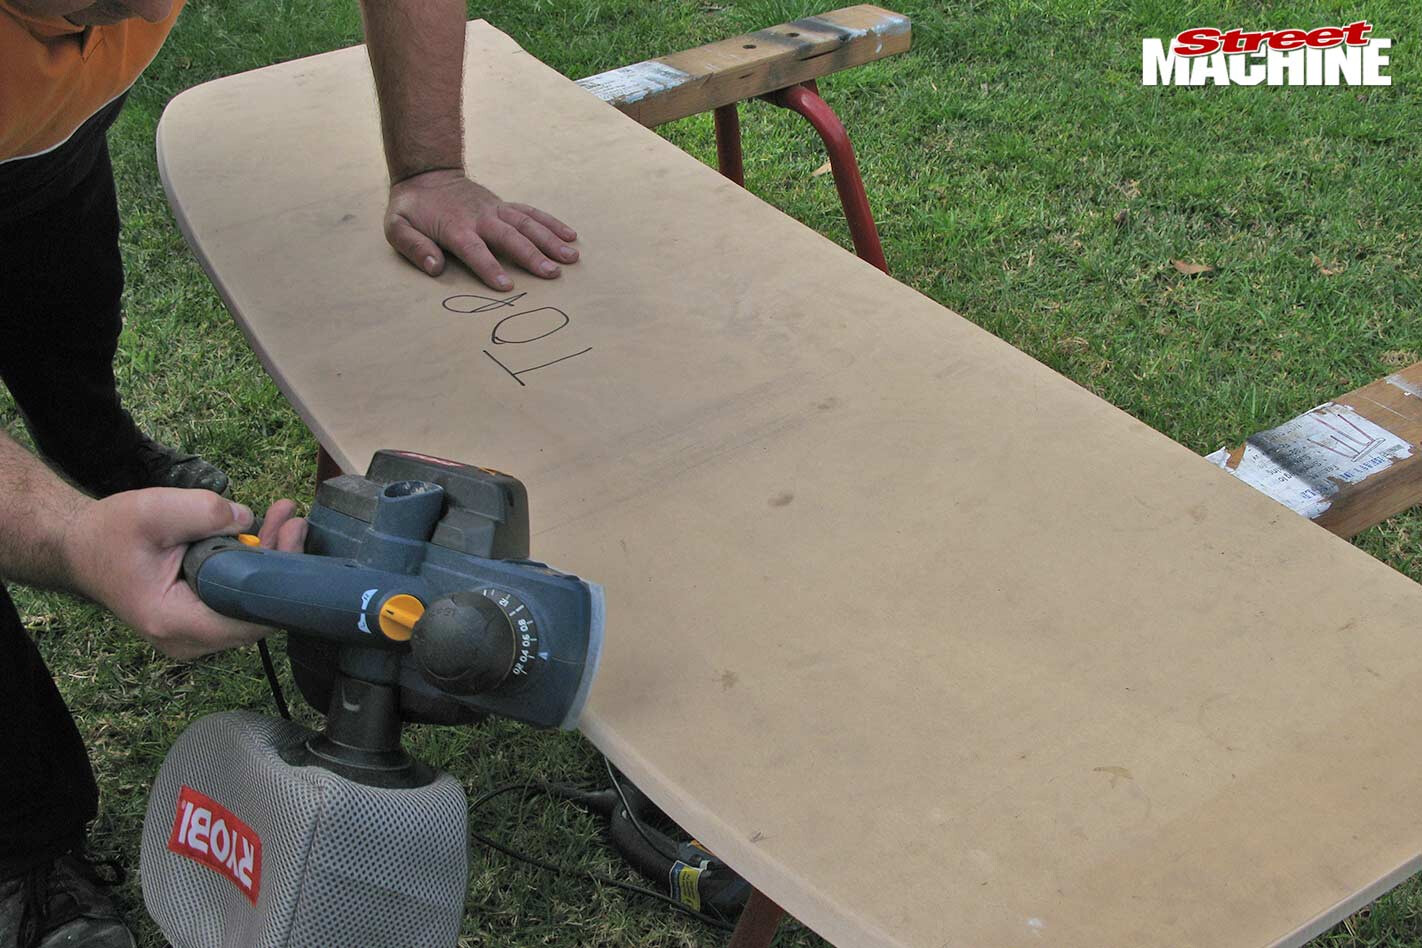
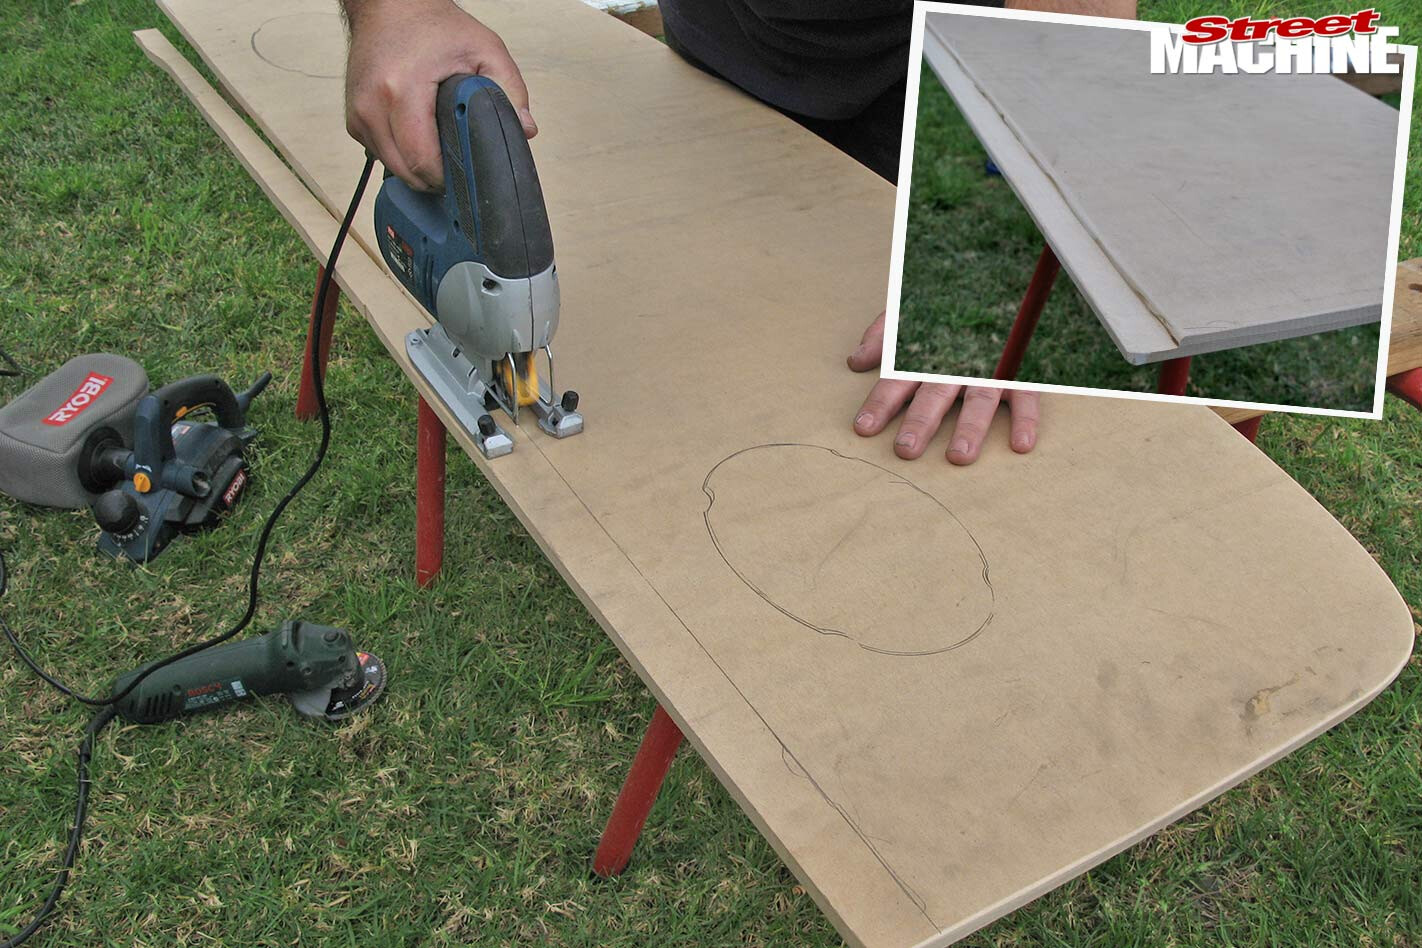
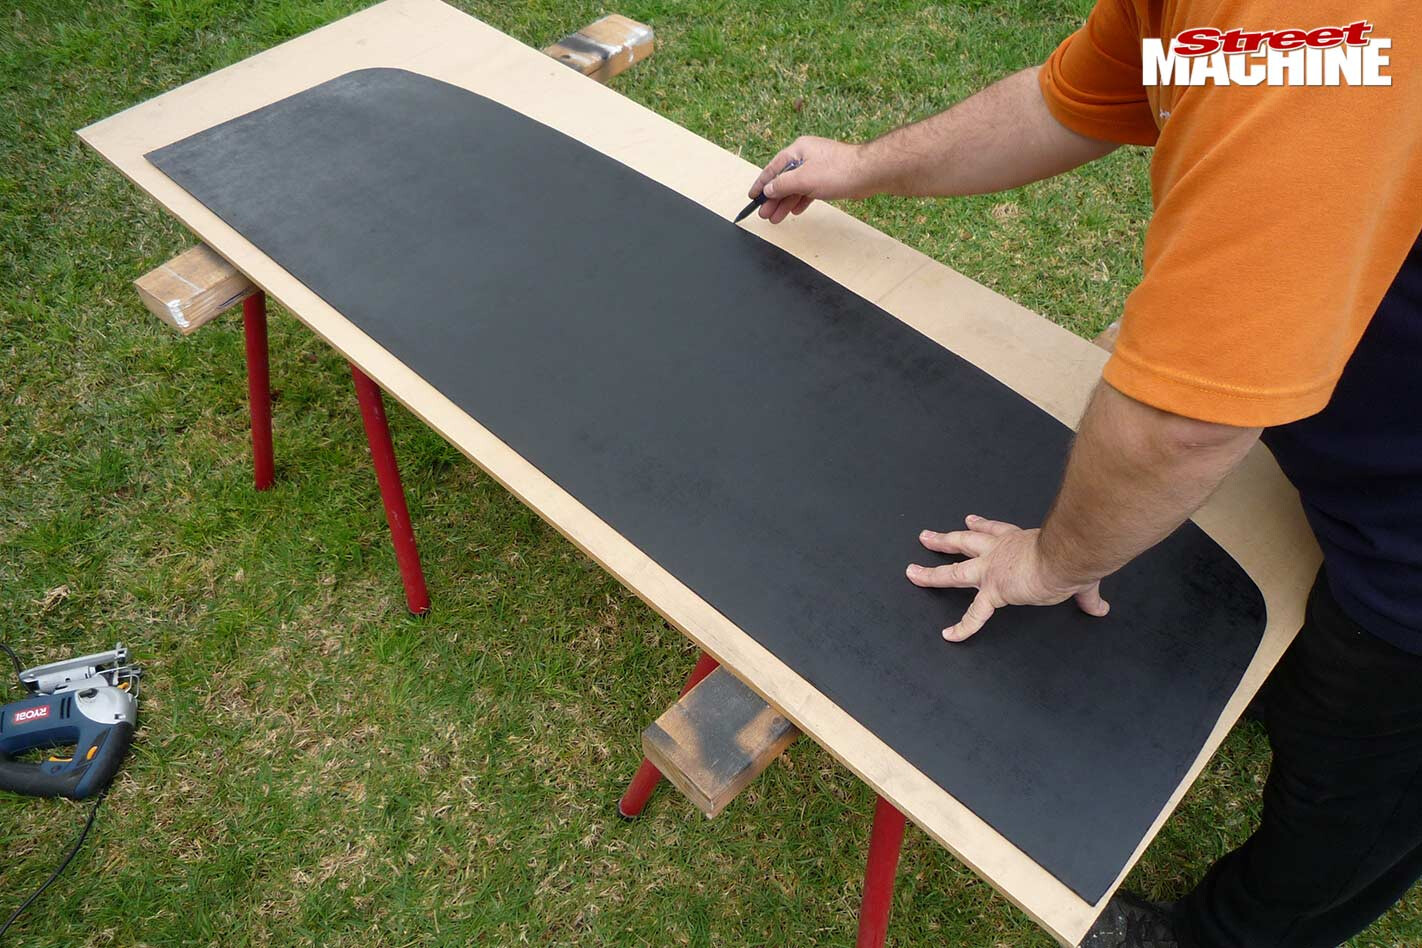 1. Remove the back seat and drag out your old parcel tray to use as a template – leave a bit extra at the front. I’m making the new tray out of 12mm MDF. While 12mm is adequate, you can go thicker if you wish. However, like many cars, the Fairlane’s parcel tray has a slight curve in it – any thicker than 12mm and it gets difficult to curve the wood to match the body. After you’ve marked it up, cut it out with a jigsaw.
 2. The 12mm shelf will sit differently to the thin masonite version. So you’ll need to do some reshaping and trimming to get it fitting snugly against the window rubber. The extra 25mm overhang at the front (see arrow in Step 01) will allow for this trimming process. Also chamfer the edge so that when the finished tray is pushed up hard against the window rubber, the tray’s wedge shape will create a reasonable seal.
 3. When shaping, don’t make it too tight, as it’ll grow once the carpet is added. Once fitting snug in the car (careful around the C pillar lining) and run a pencil across the bottom of the overhanging front edge. Now take it out and trim off the excess. The back of the seat overhangs the parcel tray so for it to sit down and clip in properly, I carved a notch in the front (inset) with a grinder fitted with an 80-grit flapper disc.
 4. Don’t mount the 6x9s too close to the glass, or overly close to the sides, otherwise screwing them in will be problematic. Also keep them away from braces and seat belt mounts – remember it’s illegal to eliminate the child restraint mounts. To keep the 6x9s straight and parallel to the back of the seat and to each other, draw a line right across the tray to line up with the mounting holes in the template.
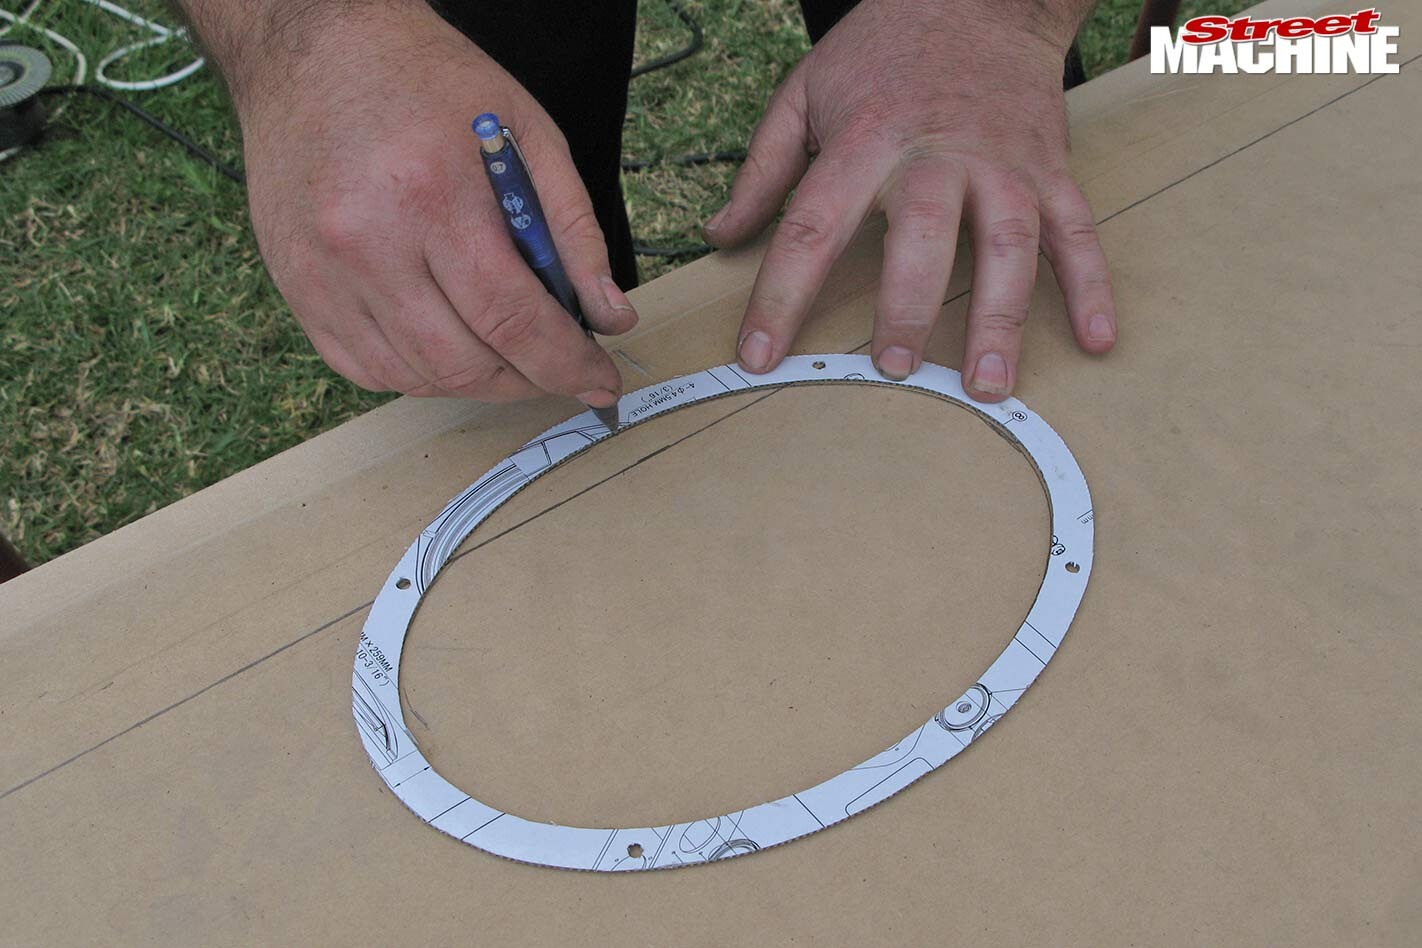
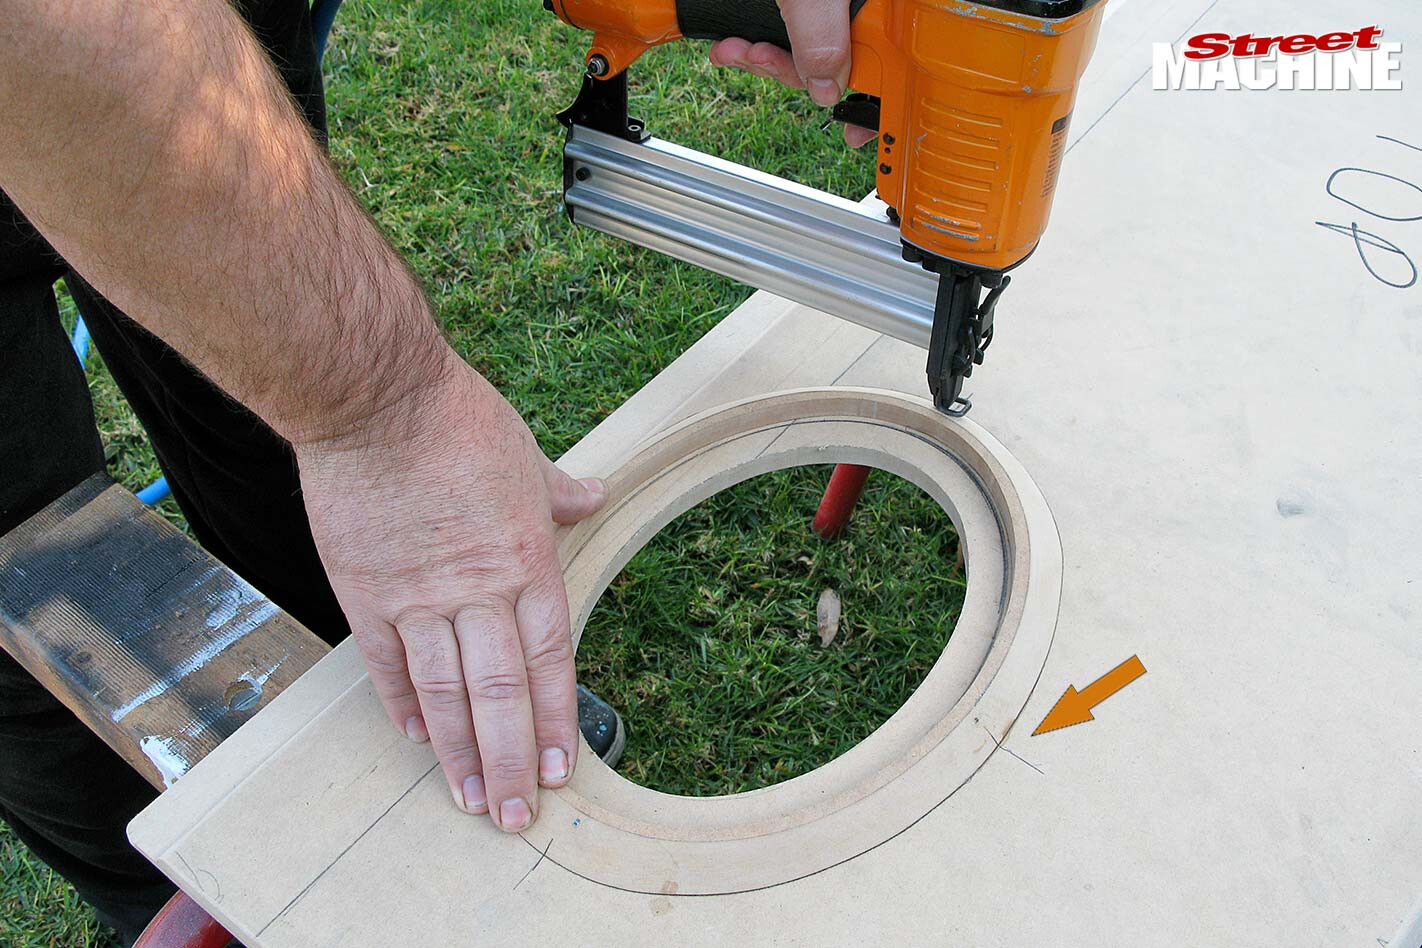
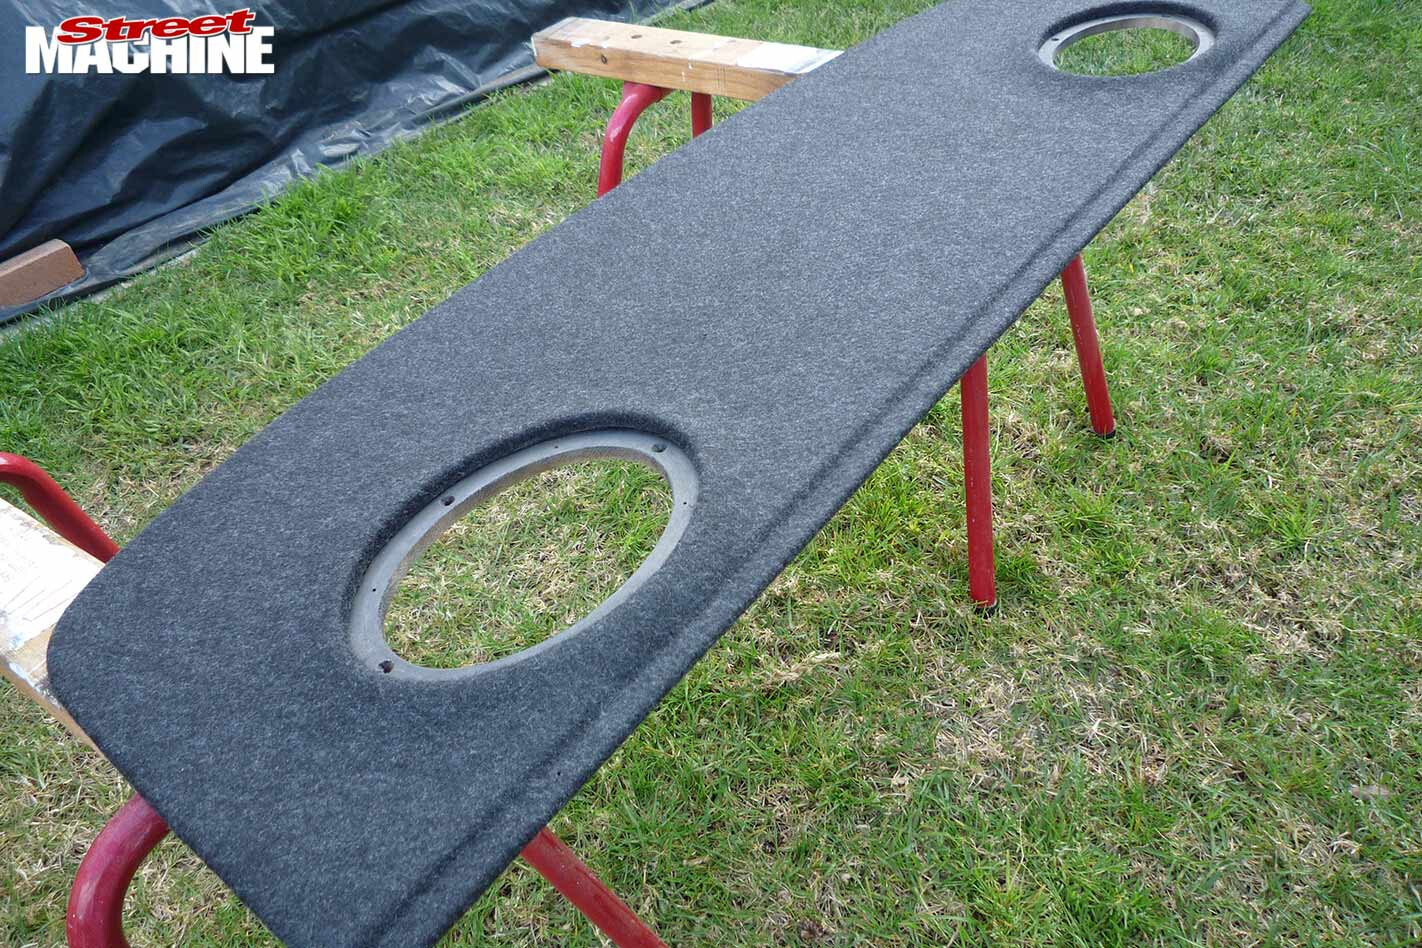
 5. You can simply mount the 6x9s on top of the new parcel tray, however I decided to give my tray a bit of form and flush them in. To do this I grabbed another piece of 12mm MDF and cut out a couple of oval doughnuts. Various sized washers enabled me to create a series of concentric lines – 3mm gap to the grill to allow for the carpet, a 6mm lip to form the top edge and a 25mm-wide outer edge.
 6. After cutting out the rings, I used the angle grinder to chamfer their edges. Note how I’ve left the 6mm-wide top lip untouched – it will get rounded off later on. This tray is to going to be covered in carpet, so I didn’t have to be too fussy with the cutting and grinding, as the carpet hides a multitude of sins. If the new tray was to be trimmed in vinyl or leather, you’d have to be a lot more precise.
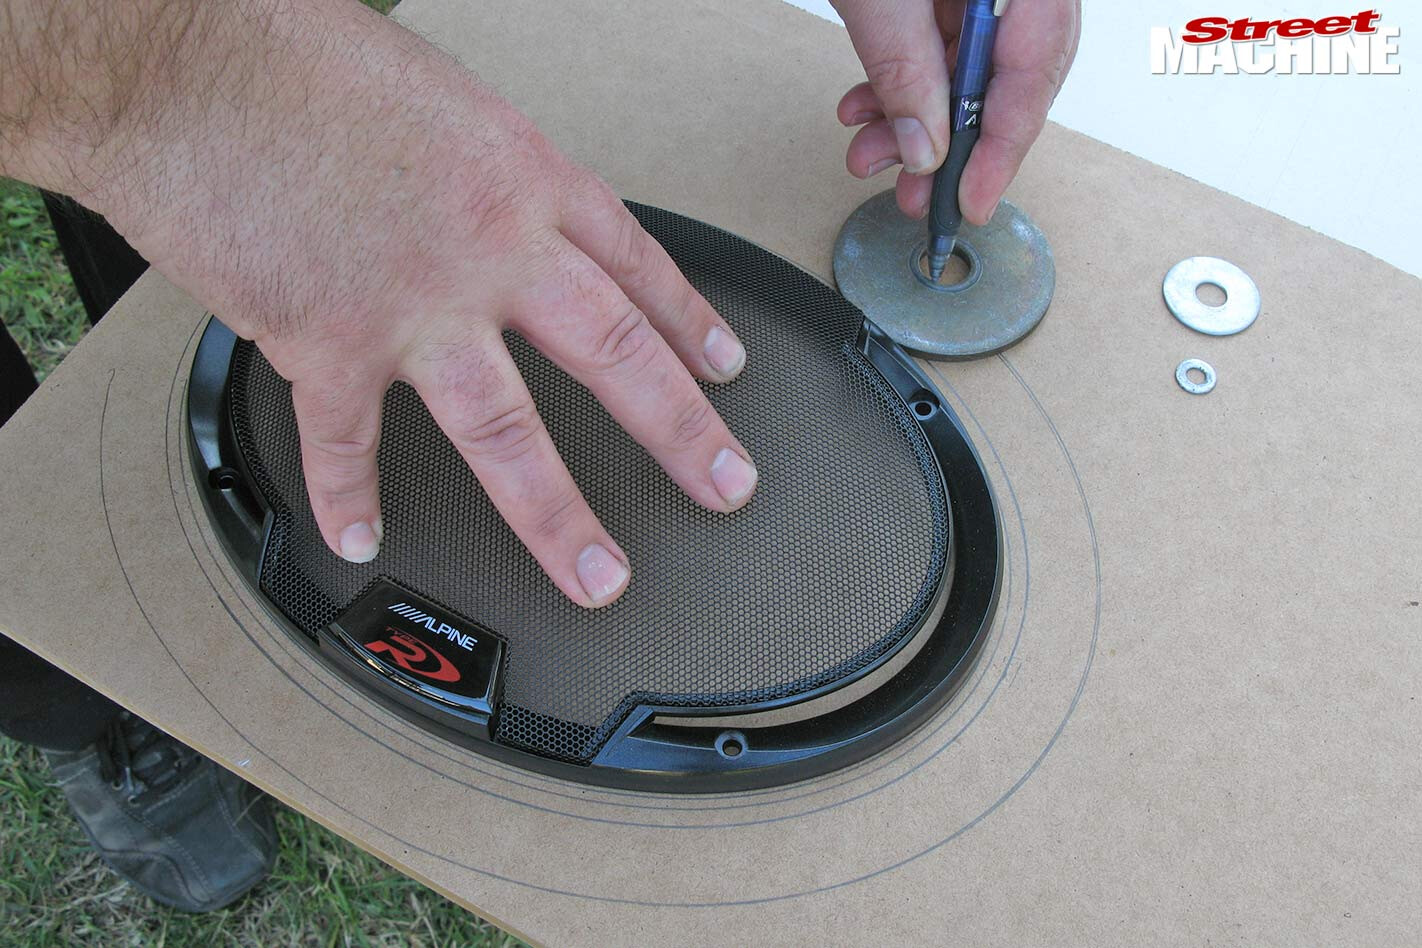
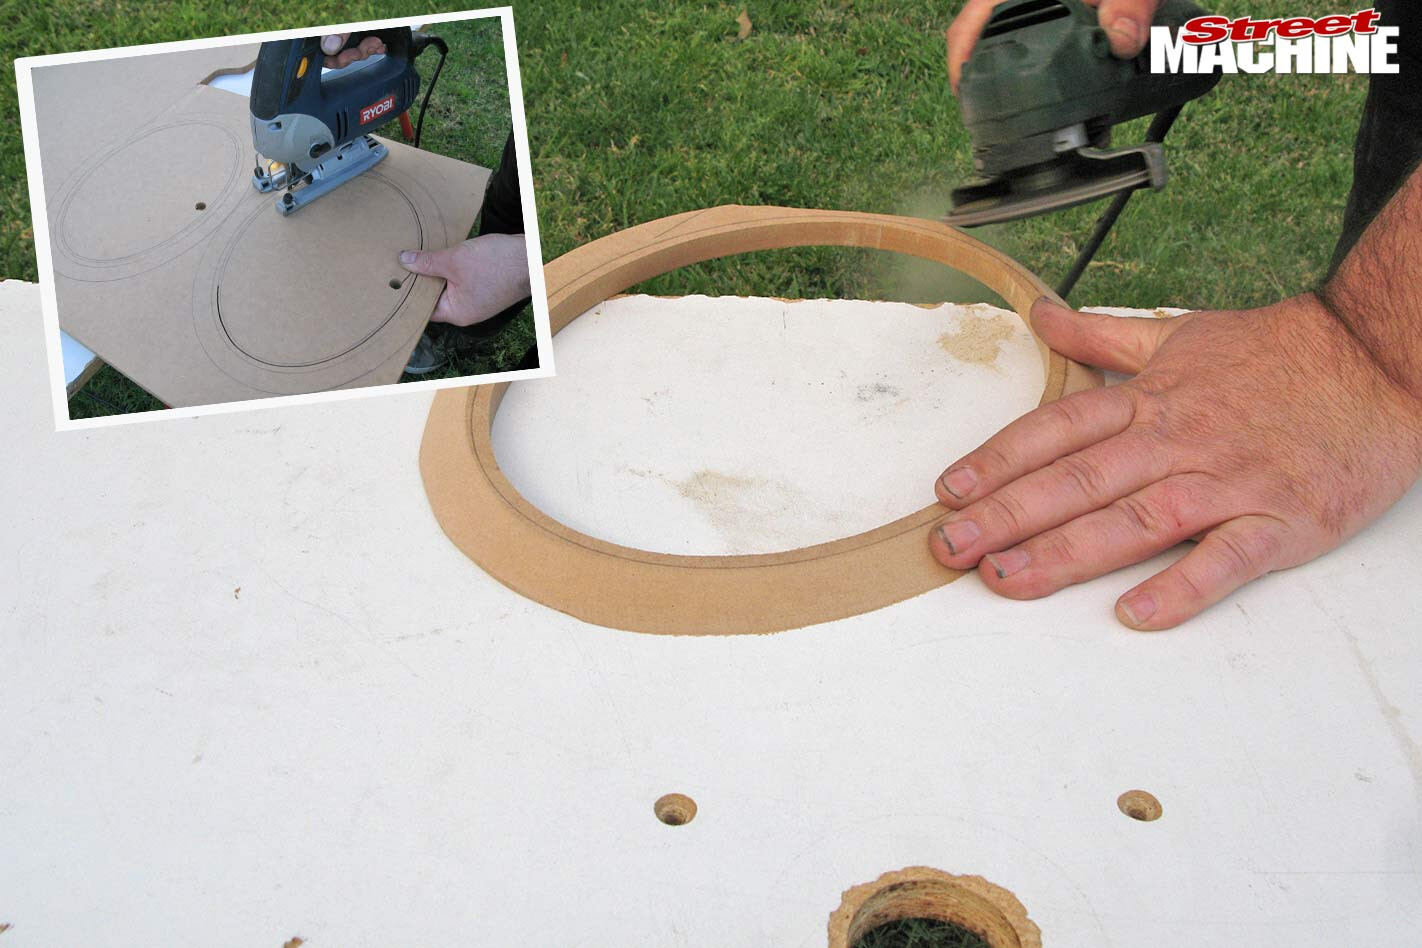
 7. Sit the 6×9 (complete with grille) in place, then fettle the position of the doughnut around it until you have a nice, even gap all ’round. Mark the outside line and put a few cross-hairs on the sides (arrow) to make it easy to realign the ring after you’ve adding a smear of PVA wood glue to the underside. You can simply let it sit overnight for the glue to dry, or you can glue and nail it in place. I nailed it and moved on.
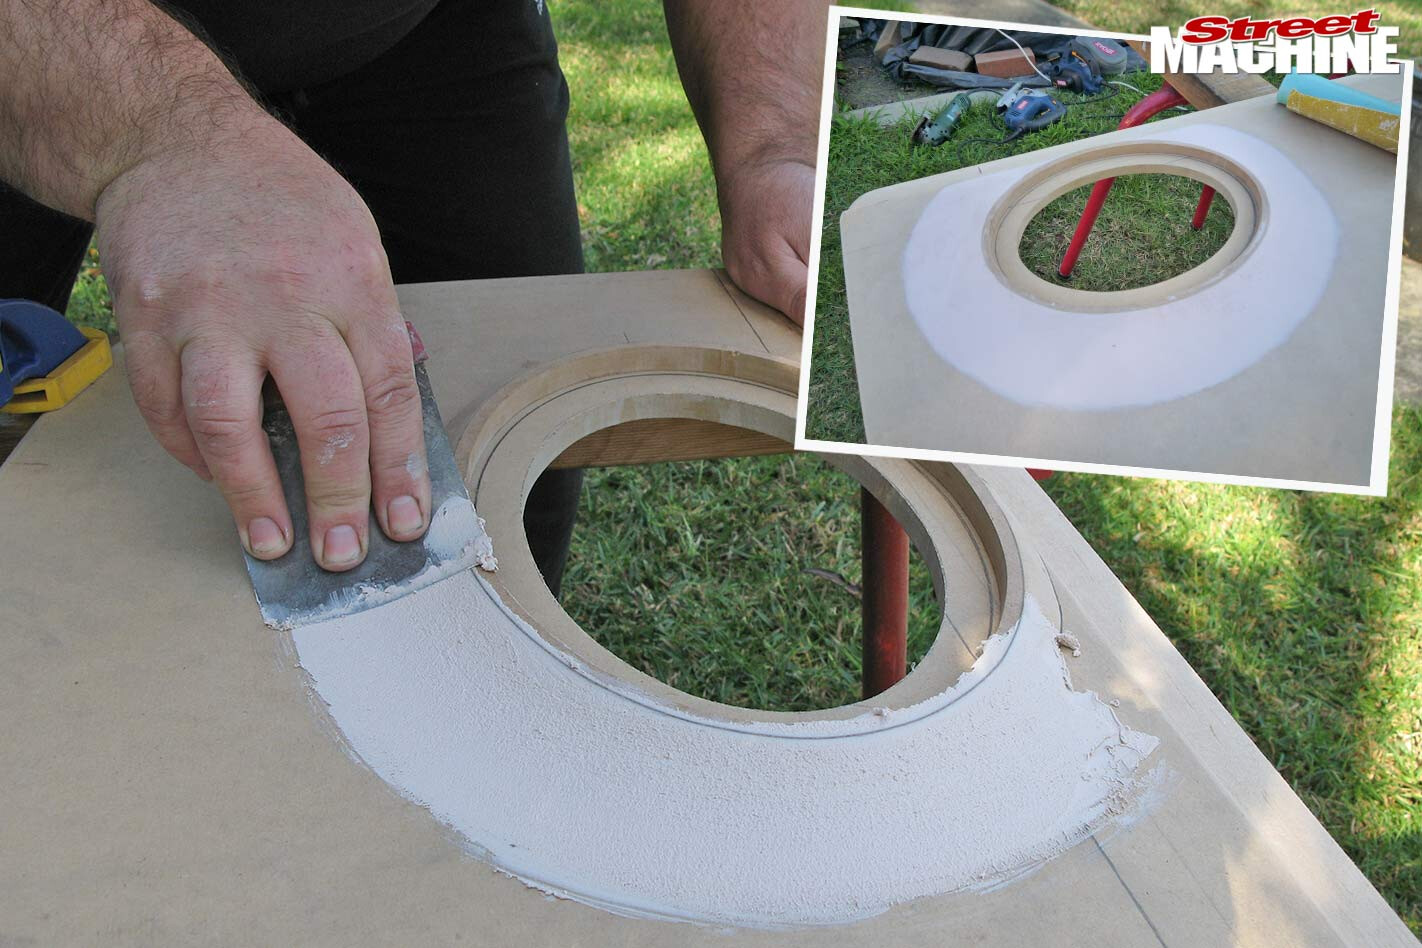 8. Mix up some bog and lay it up to form a nice flowing curve. Steel applicators are better than plastic applicators, as they hold their shape better. Get your technique right and it’ll need very little sanding. Once again, don’t be overly fussy. I finished it off with 80-grit sandpaper (rounding off all the edges at the very end), then gave it a squirt of black so the raw wood wouldn’t show between the grille and the carpet.
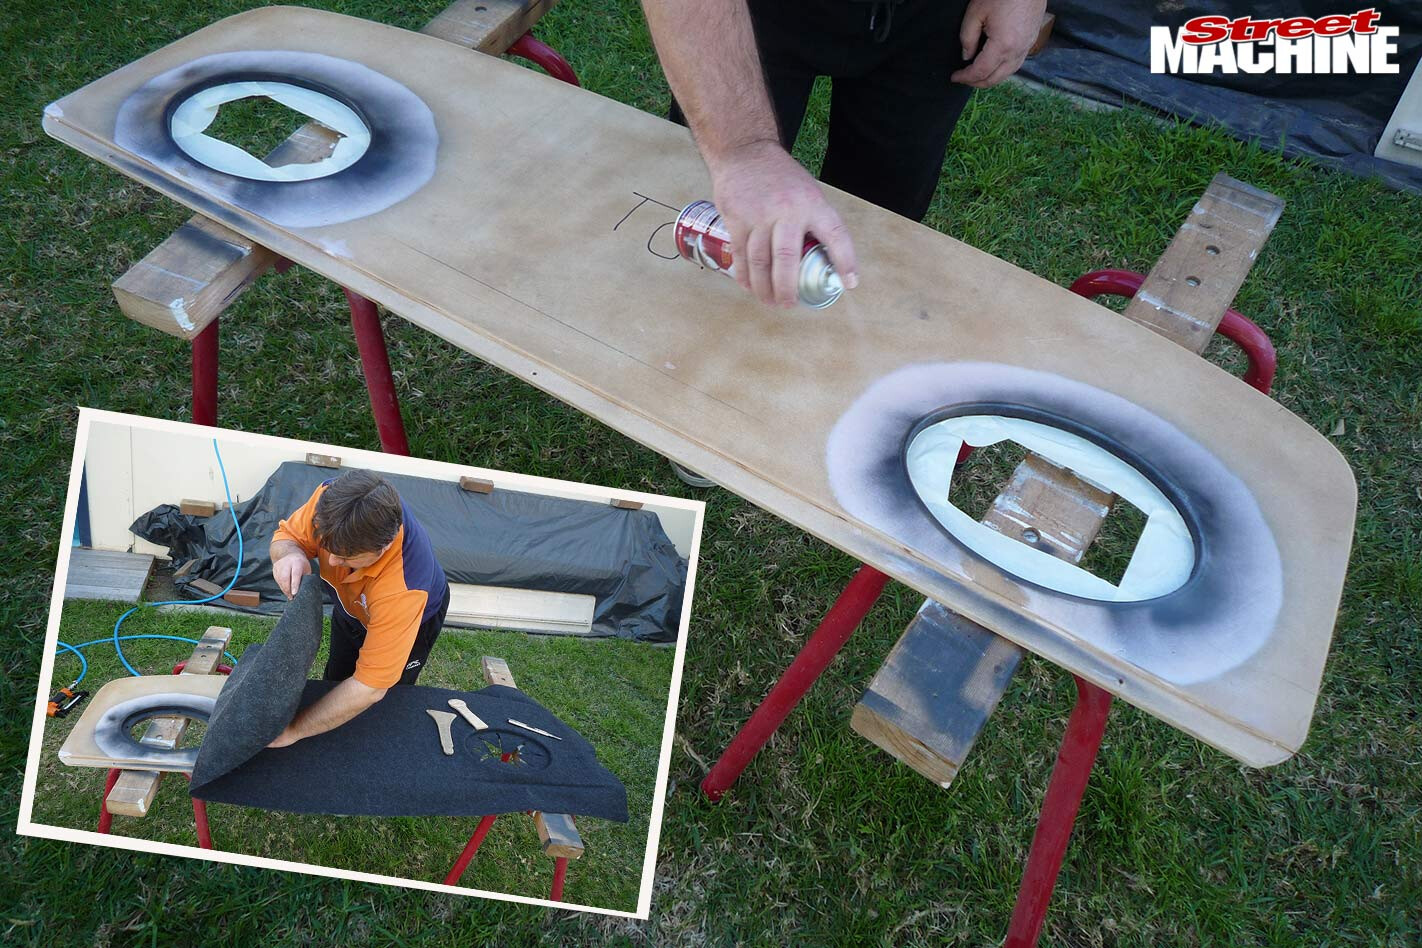 9. Pressure-pack spray contact will glue the carpet to the wood. You don’t want glue where the 6x9s sit, so mask off this surface – remove the tape after applying the glue. The carpet is very porous, so give it two generous coats – I used a full 500ml can of spray contact. Most car audio stores stock grey and black carpet (Doran Pro Audio, 02 9791 6311, supplied mine), alternatively try your local motor trimming supplies. Give the contact about five to 10 minutes to go off, then lay the carpet down, smoothing out wrinkles as you go.
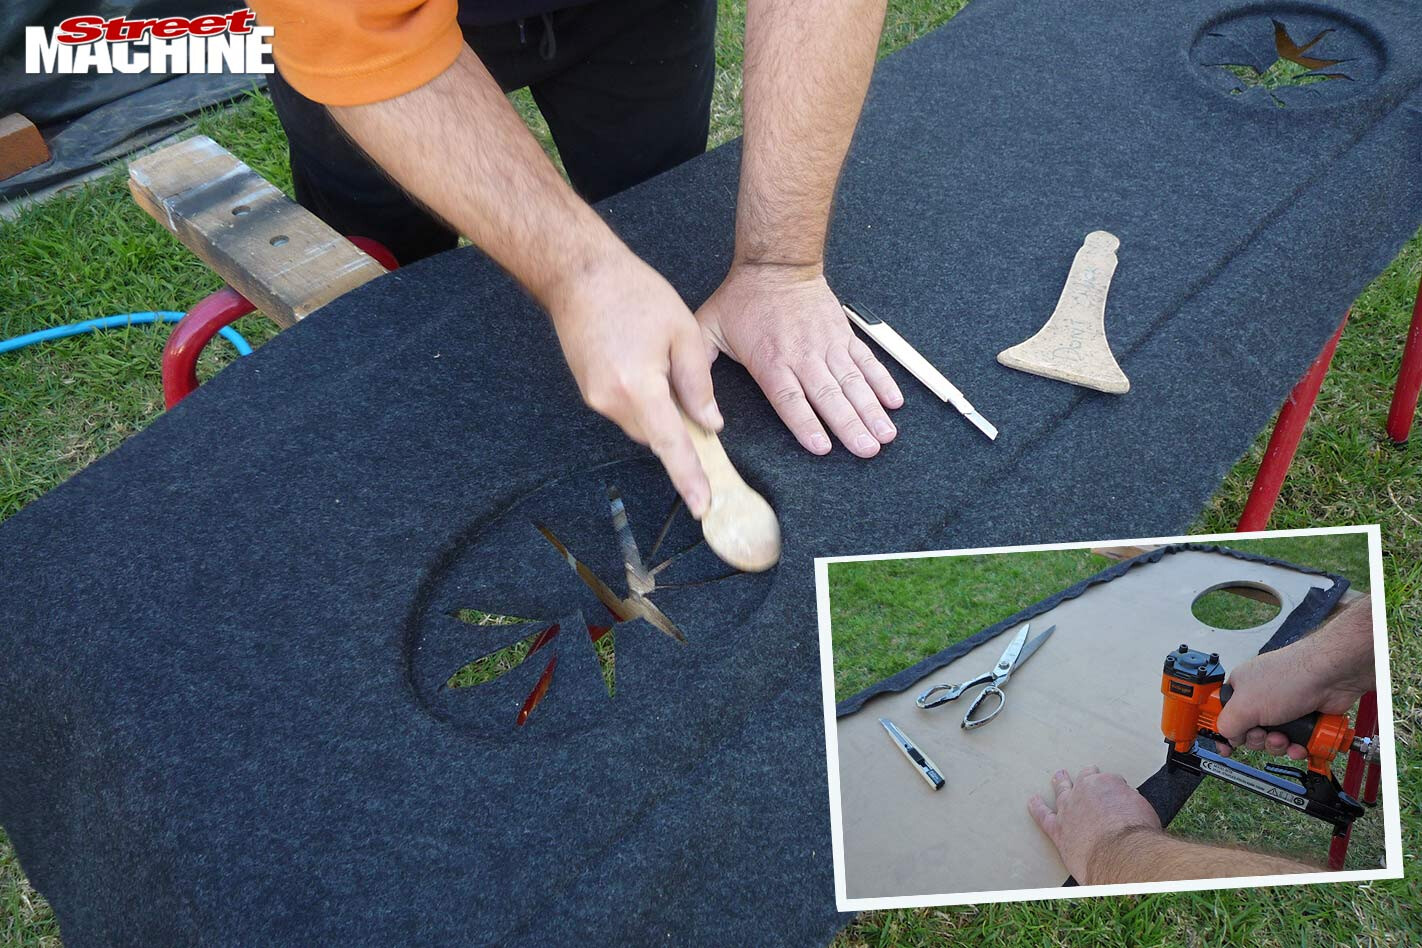 10. Be sure to apply plenty of contact to the inside lip of the cut out – as you need the carpet to hold fast where it wraps over the edge. Use a form to press the carpet out against the edges – as both surfaces need to be pressed firmly together to take hold. The 6×9 should sit on flat wood (never carpet), so use a sharp knife to trim the excess. Turning the parcel tray over, you can glue or staple the back. Either way, use the carpet’s stretch to avoid gathers in the corners – which would prop the shelf up and prevent it from sitting flat.
WRAP UP
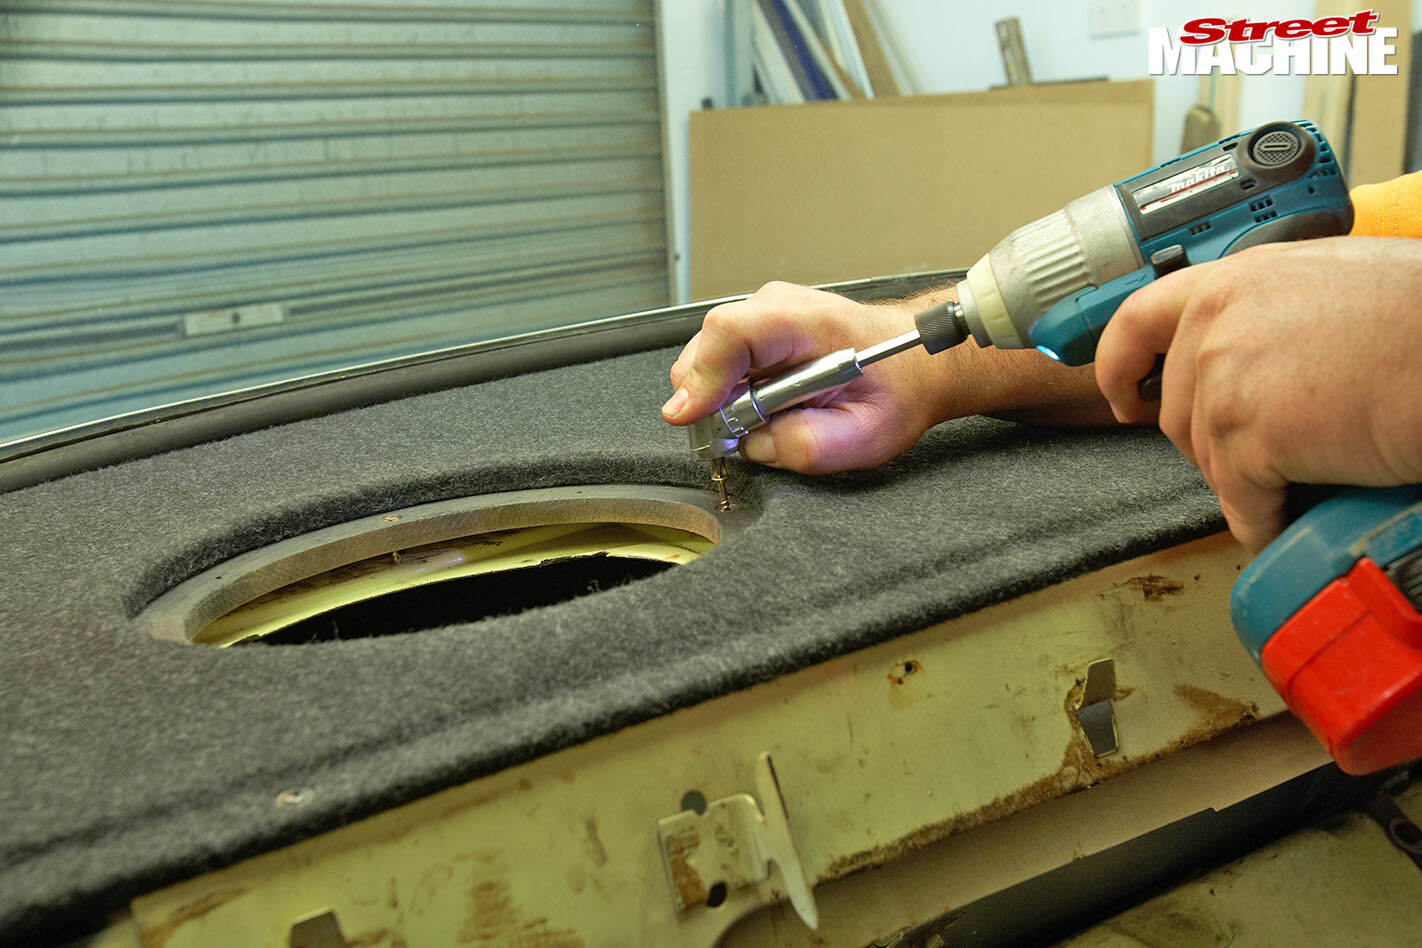
 It would be lethal if the parcel tray came adrift in an accident. To prevent this, I secured it to solid metal via three screws under each speaker and a couple across the front. Anything that makes noise other than the speaker will reduce bass response and impair sound quality. To dampen unwanted vibrations and rattles, cover the metal in sound-deadening material.
 After screwing the Alpine Type Rs into the 12mm MDF tray, I connected them to a 50WRMS per channel amplifier. True to Alpine’s spiel, the SPR-69’s diminutive neodymium magnets really delivered – pounding out nice, meaty bass combined with excellent tonality. A stylish-looking parcel tray and kick-ass tunes – talk about having your cake and eating it, too!

Comments