
DON’T know why, but filling your streeter’s guards to bursting point with fat rubber looks absolutely bitchin’. Unfortunately, most vehicle manufacturers don’t see things quite the same way. So when you start bolting up the aforementioned chubby rolling stock, clearance invariably becomes an issue. And the lower you drop the ride height, the worse the problem gets.
This article was first published in the April 2009 issue of Street Machine
 One area of concern is the guard lip — not only does it restrict the available space but if a tyre does kiss it, it invariably chews into the rubber. Worst still, the tyre can physically grab the guard’s lip and bend it down, causing quite an amount of panel distortion.
The easiest way to gain more room is to roll the offending lip up out of the way. Many of the larger wheel and tyre outlets own Universal Guard Rollers, which are specifically designed for doing this job. We dropped by the Sunshine outlet of The Tyre Factory where Dave Winch was rolling the rear guards on a customer’s lowered VZ SS ute.
STEP-BY-STEP
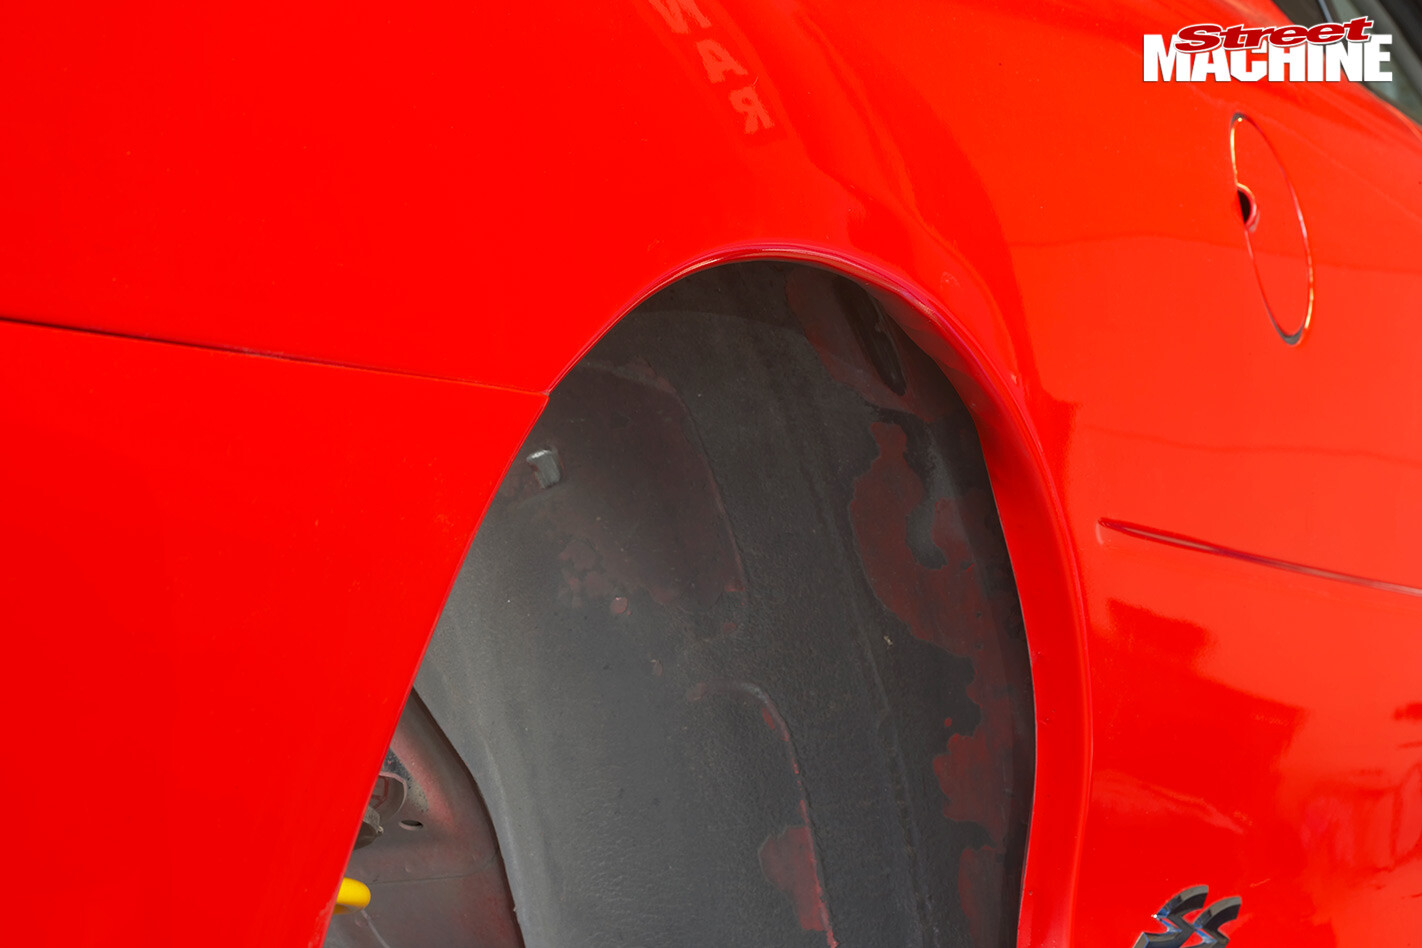
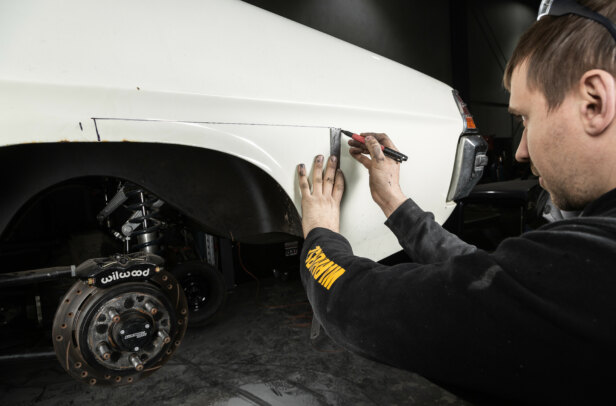
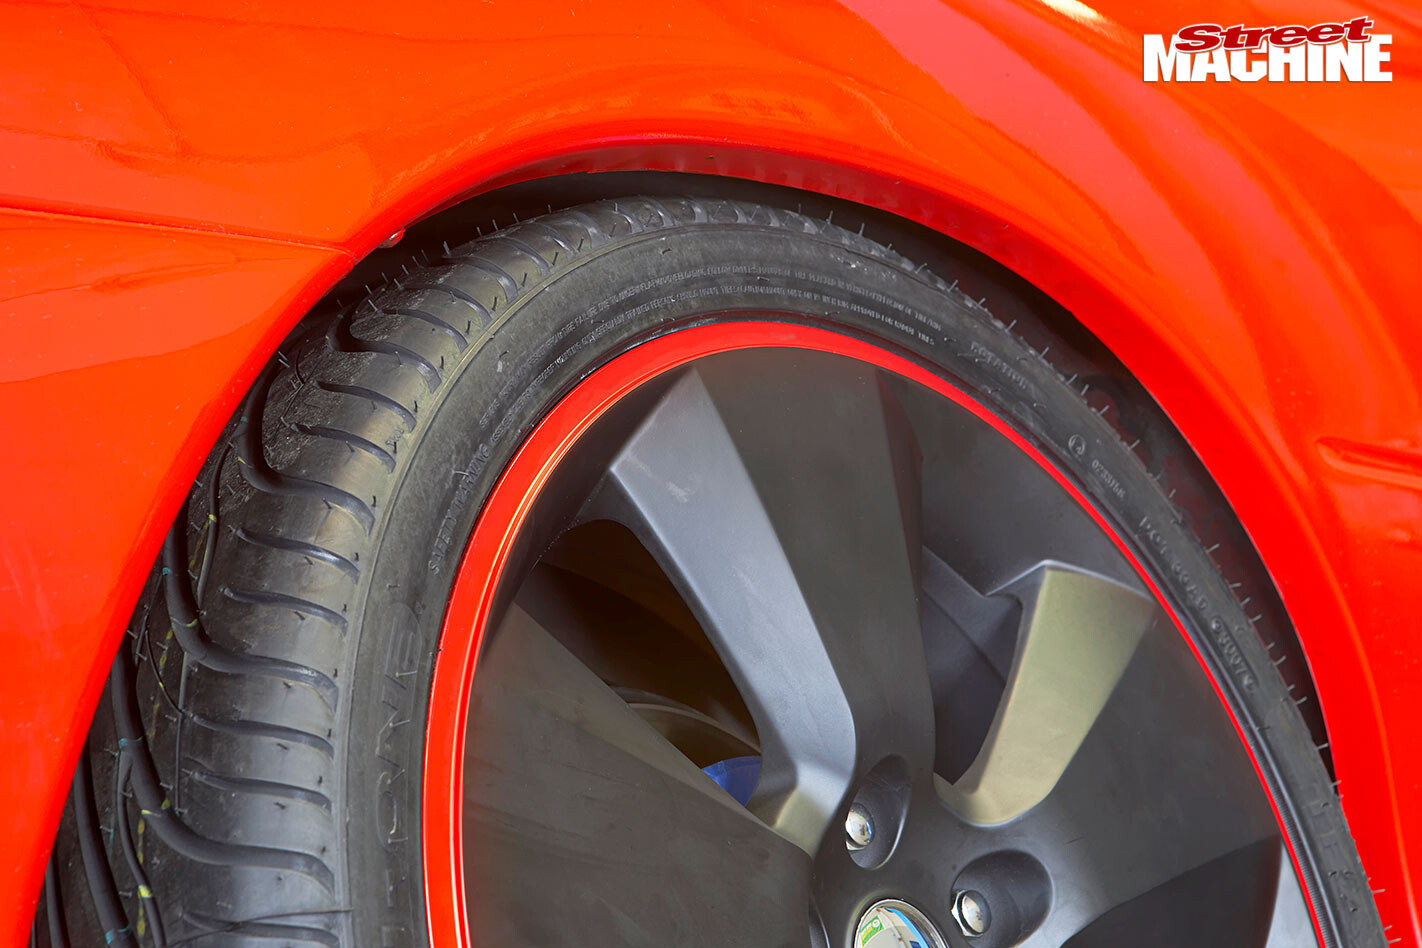 STEP 1. Now that’s what you call close. This is typical of what happens when you attempt to squeeze a meaty 255/35/19 tyre under the rear of a Commodore ute — especially one that’s been lowered 3.5 inches. It’s quite obvious that with as little as 15mm of bump travel, this tyre will wallop the factory lip, making it the perfect candidate for having its guards rolled.
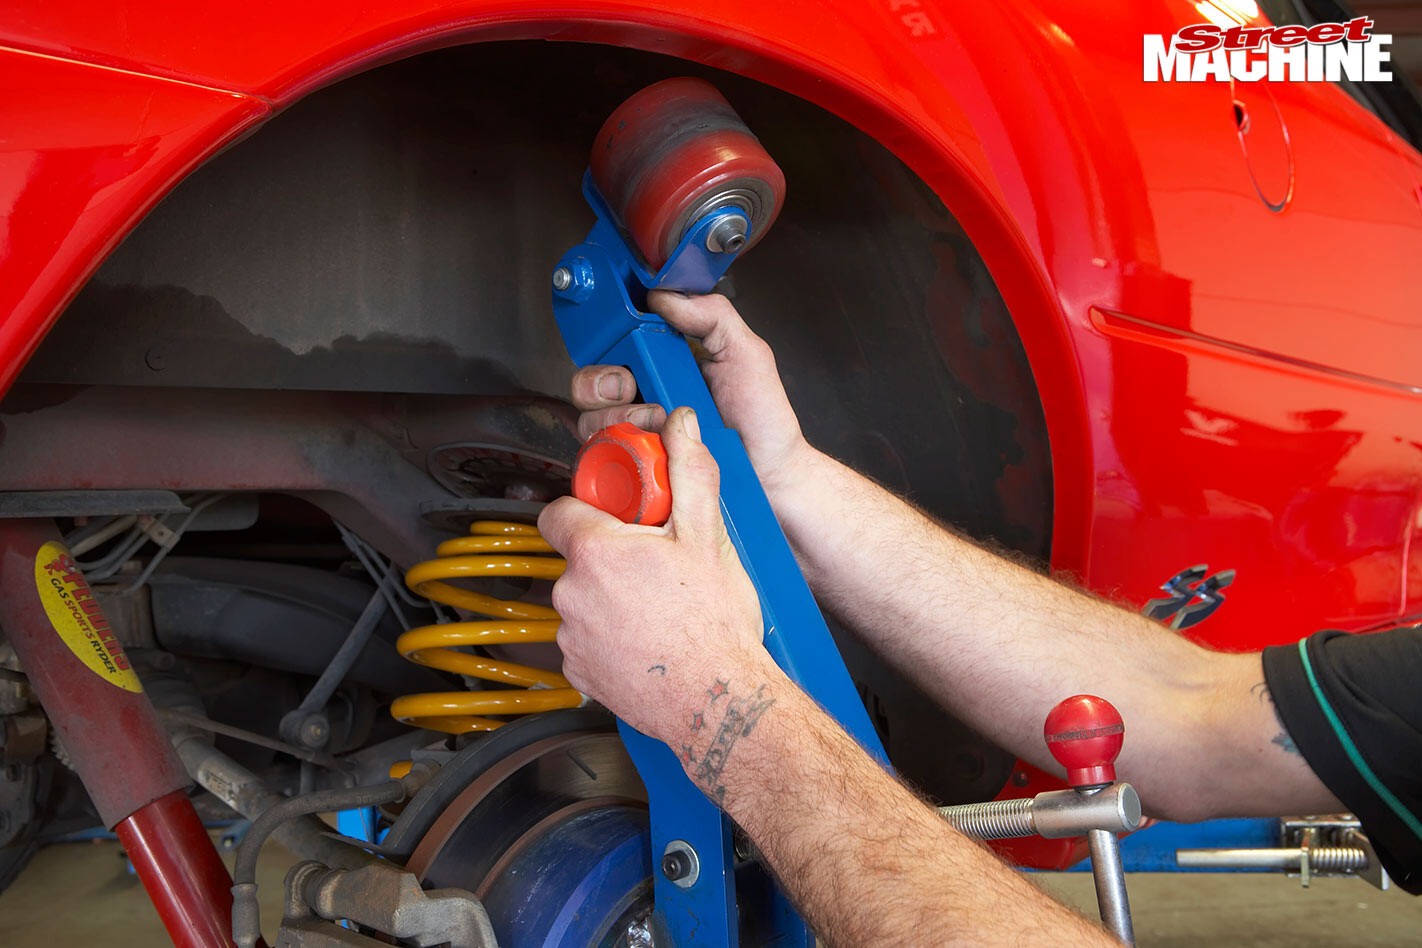
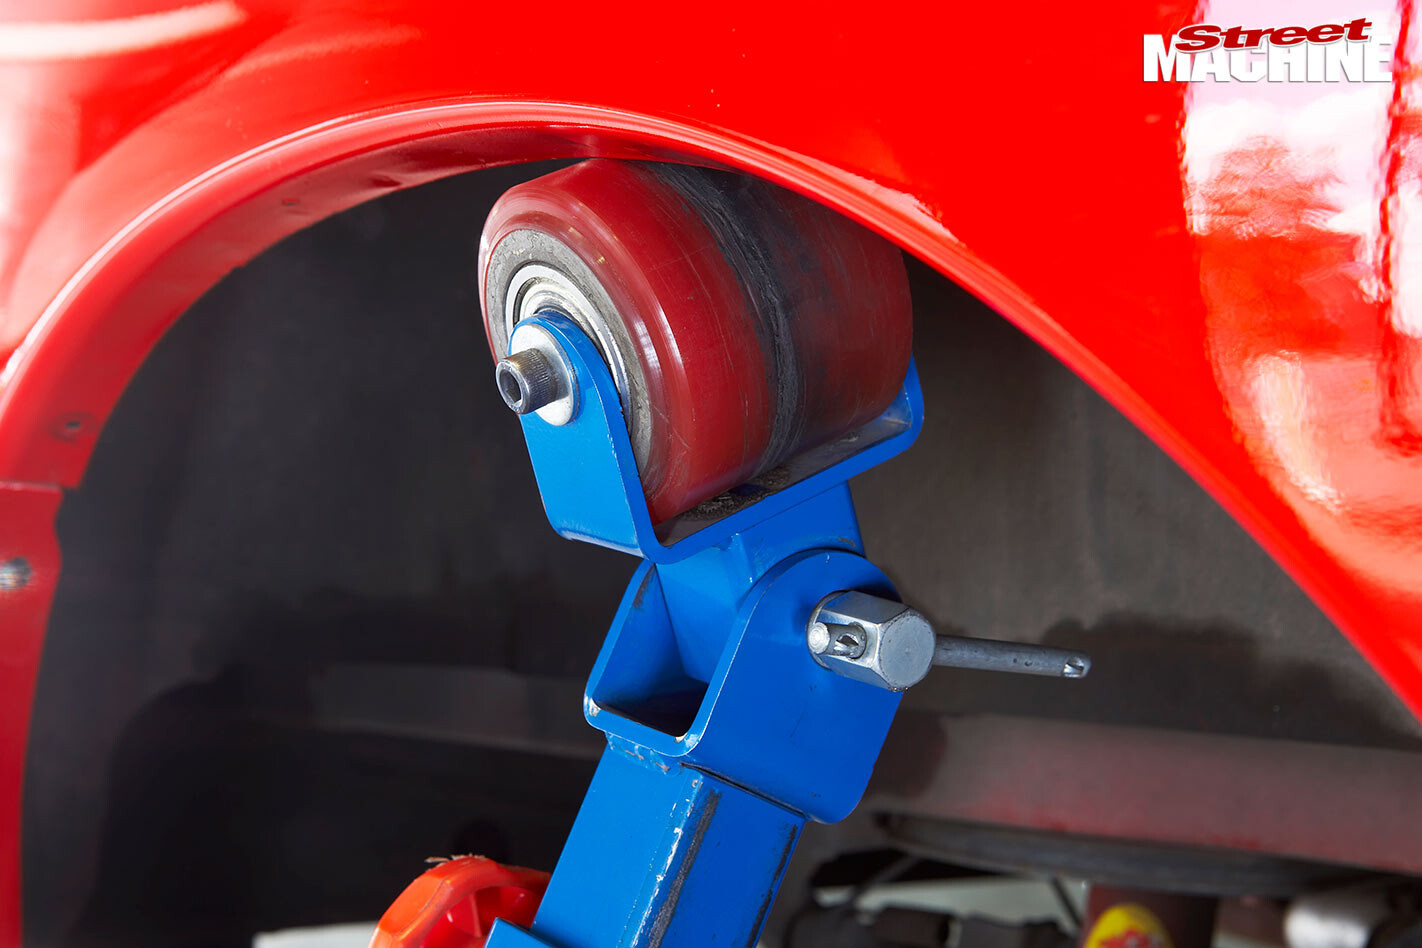
 STEP 2. The Tyre Factory’s Universal Guard Roller is typical of the tool found in many wheel and tyre outlets and is fully adjustable to suit various vehicles. With the mounting flange bolted securely to the hub face, you can see that by winding the screw mechanism (A) in, the roll-wheel (B) is forced out against the guard lip. As the lip rolls up, you wind it out a little further and so on.
 STEP 3. When starting, the roll-wheel needs to be at about 45 degrees to the lip (compare this to the angle in step 07). The trick is using just the right amount of pressure — attack it too aggressively and instead of rolling the lip, you’ll quickly bow the guard. Attaining a nice result takes a fair amount of feel. Some areas need more clearance than others and will require more attention.
 STEP 4. Careful pre-inspection is required to identify repairs or body filler, which will crack during the rolling process. Cut ’n’ shut guards will be hard around the weld and may distort or crease when rolling. Paint adhesion and paint coverage can also be suspect on resprayed guards. Resprays tend to be harder and quite thick, both of which increases the risk of the paint flaking.
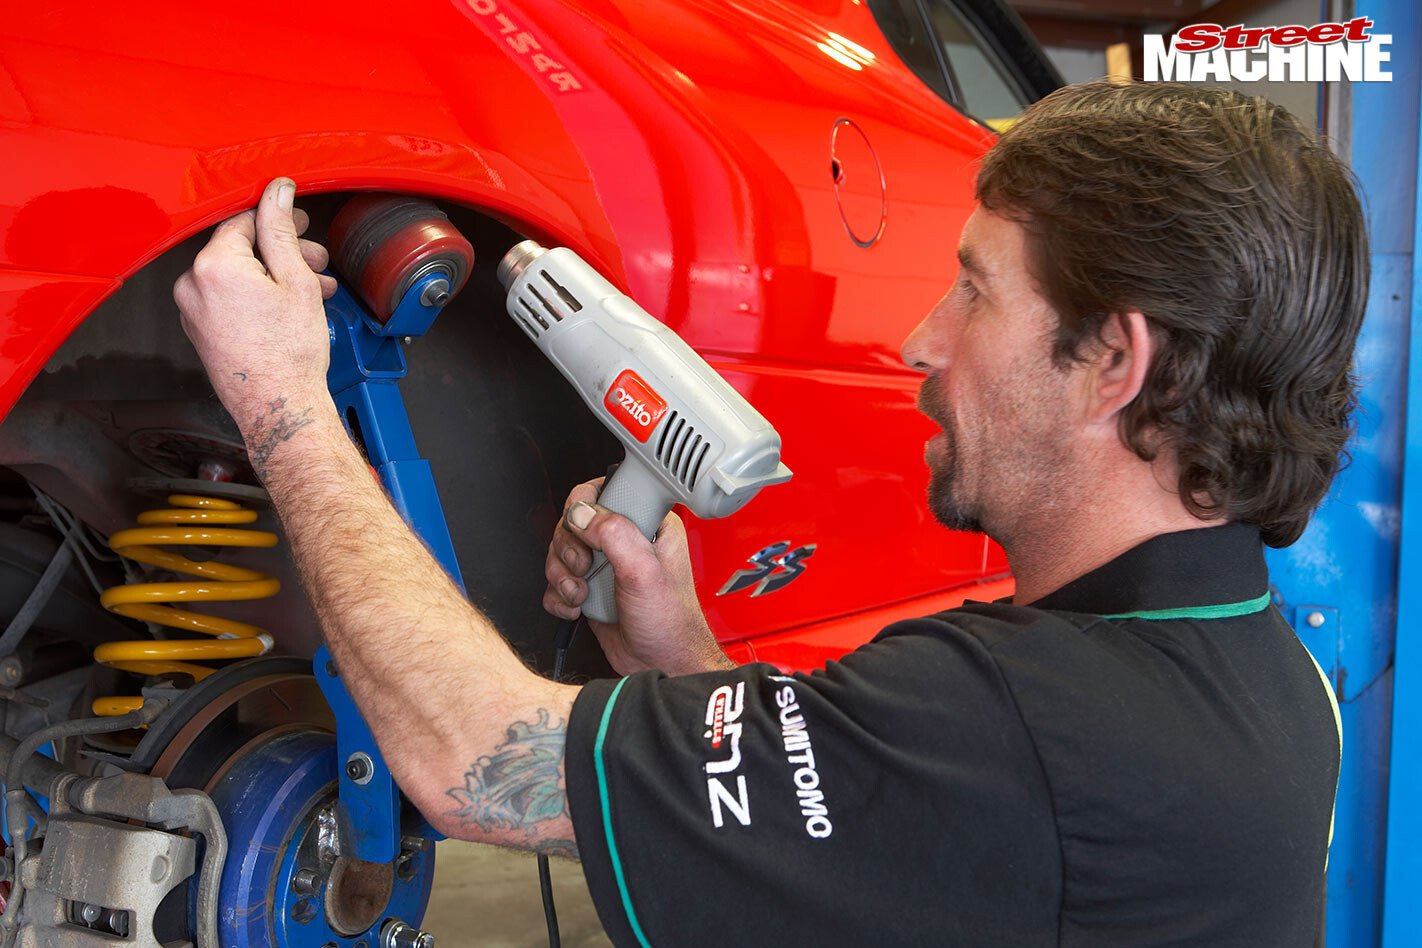 STEP 5. A heat gun is used to warm and soften the paint, making it more pliable and far less prone to cracking or flaking. This is a delicate process, as excessive heat will blister or scorch the paint. While keeping the gun about 50mm away from the paint work, slowly and methodically heat up just the lip until it’s hot to touch but not scalding. Dave continually checks the temperature by feel as he goes.
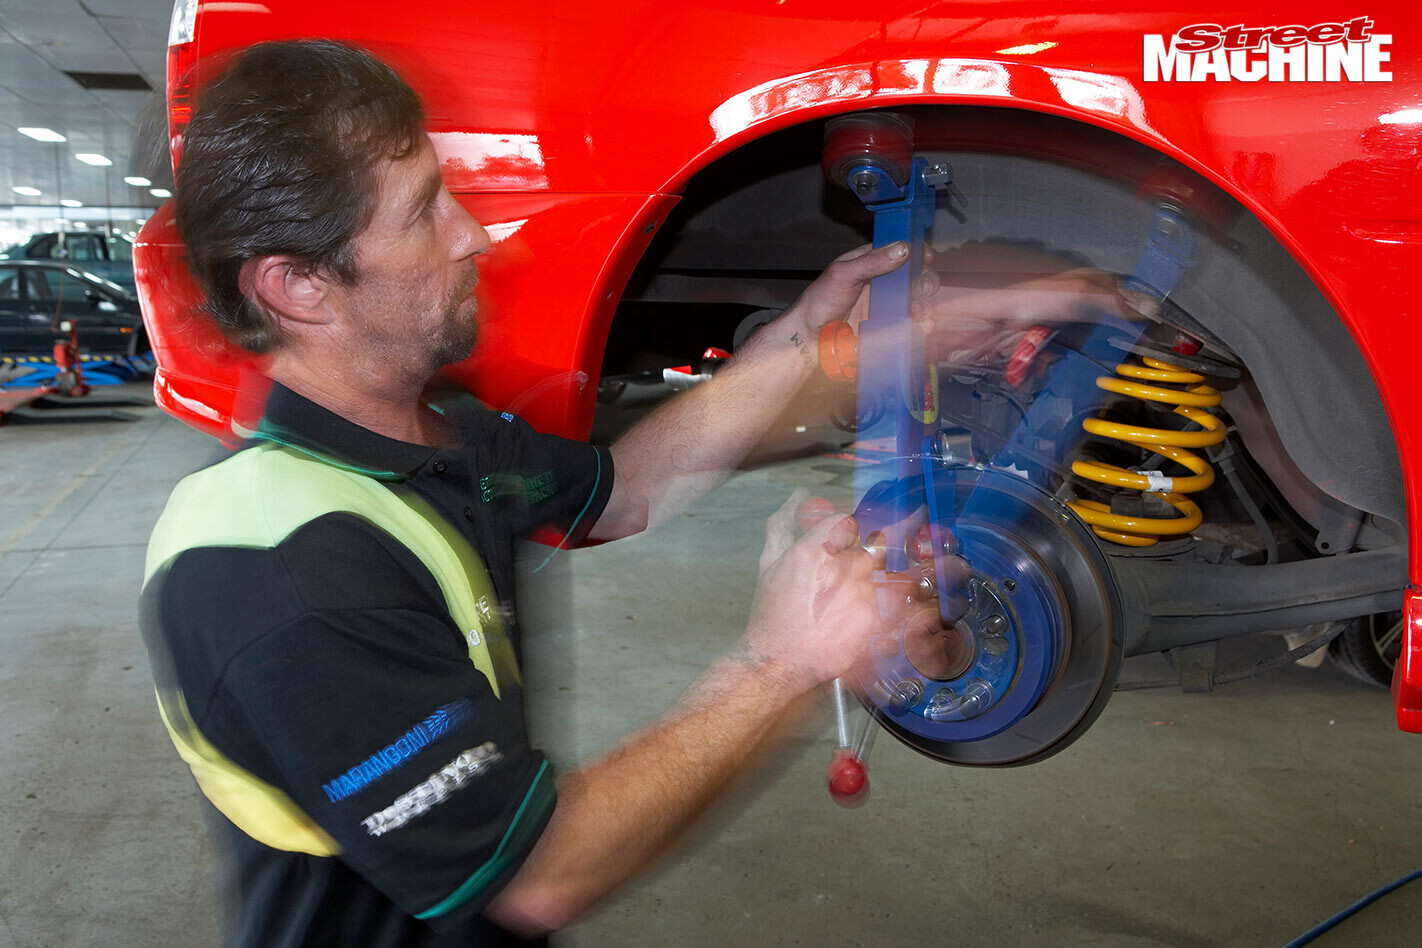 STEP 6. As the rolling machine is rotated back and forth, the roll-wheel bends the lip up out of the way. After a couple of sweeps the lip will have rolled up a small amount; continuous adjustment of the screw mechanism is required so that the roll-wheel maintains sufficient pressure on the lip. It’s hard work, as it takes a reasonable amount of effort to force the roller back and forth when under pressure.
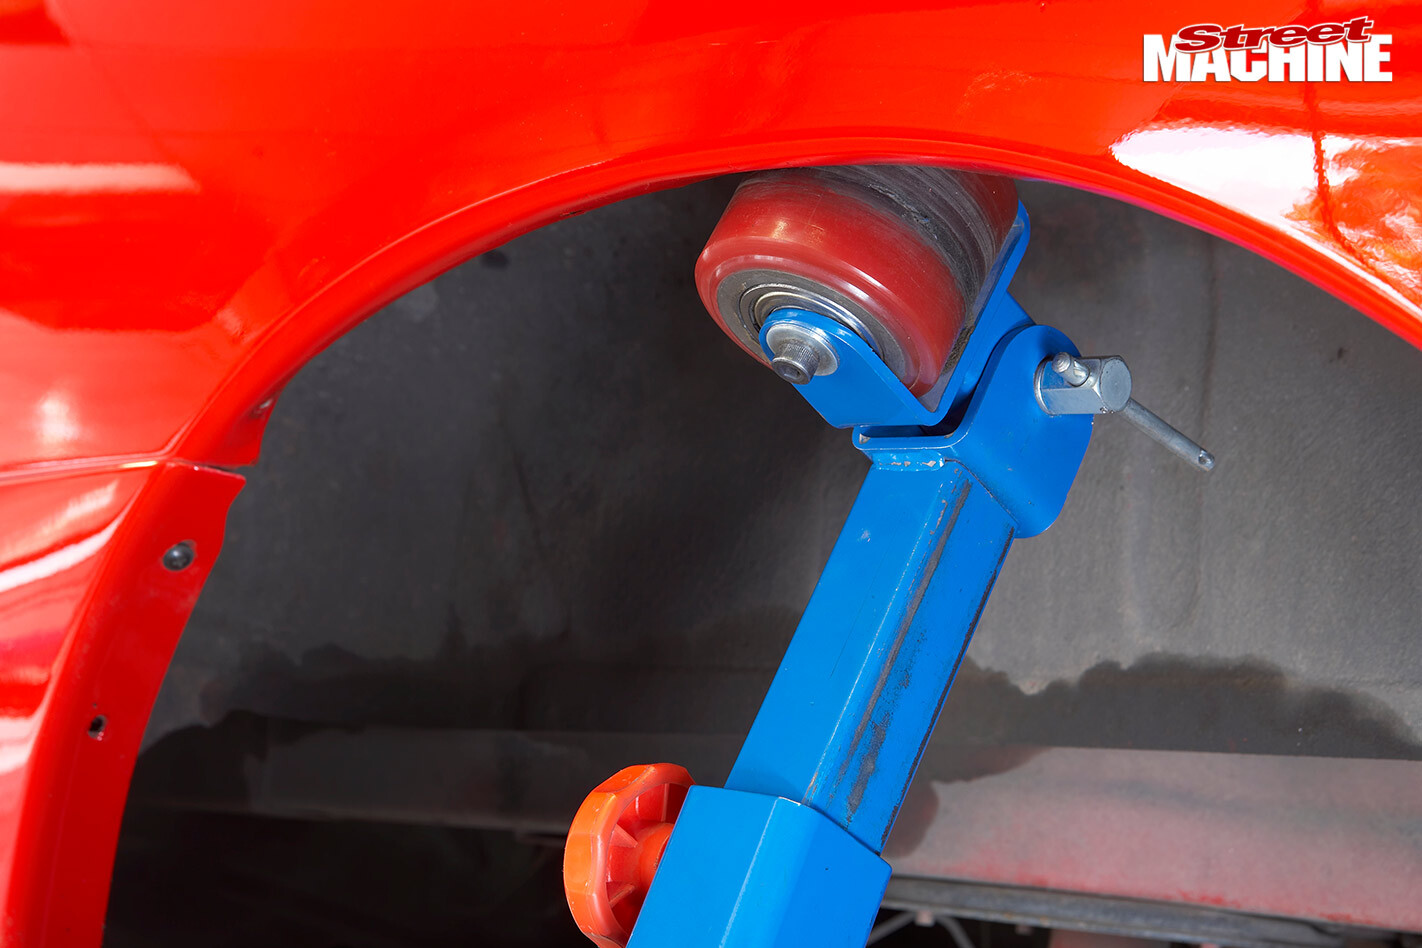 STEP 7. Each successive set of sweeps works the lip further and further up. Heat is reapplied after each set of sweeps to keep the paint adequately soft. It takes around three or four sets of sweeps to sufficiently reshape the lip. As the lip begins folding up, the angle of the roll-wheel needs to be adjusted so that it applies pressure at the optimal angle for folding the metal up out of the way.
 STEP 8. The biggest danger is creasing the guards. Here you can see that Dave has stopped rolling where the swage line meets the wheel opening — such swage lines heighten the risk of creasing. Older cars feature thicker steel and multiple layers all spot-welded together. It is still possible to roll them but they are harder to deal with, taking more passes, more time and more effort.
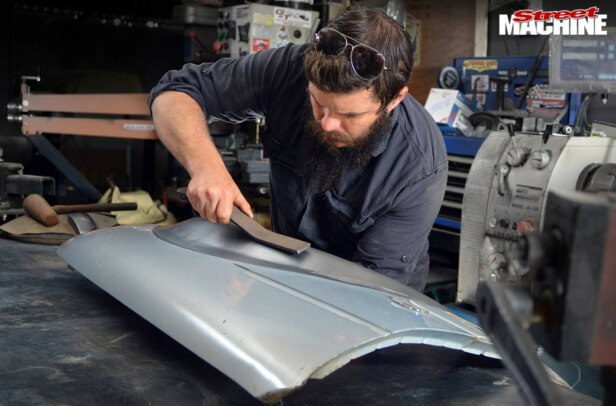
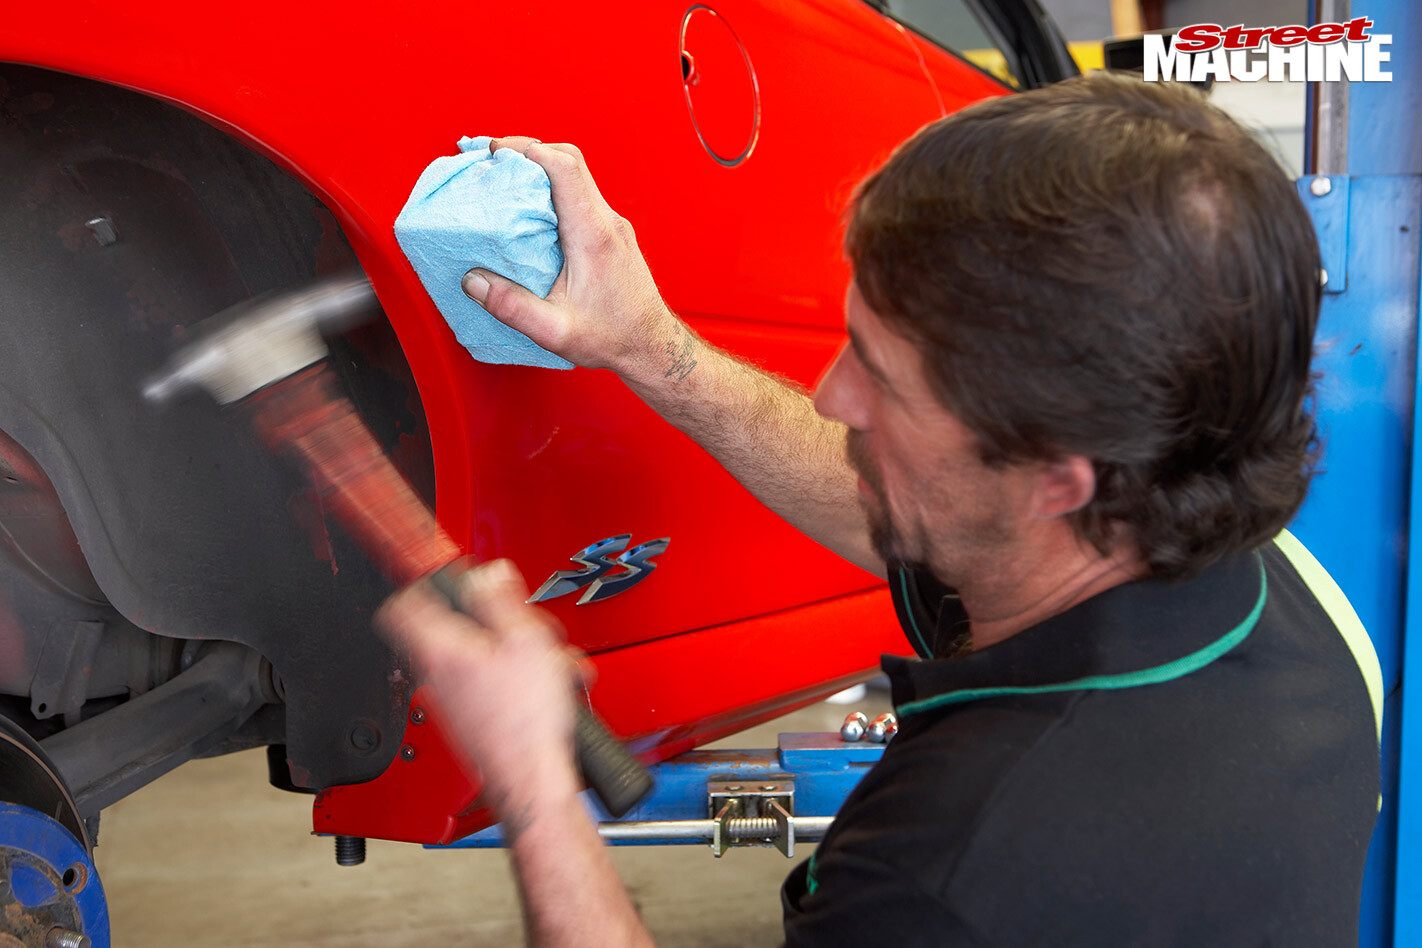 STEP 9. Dave worked the problem area around the swage line by hand, using a cloth-covered rubber block and a hammer. Once again, the potential for distorting the guard is high, so this process requires a fair bit of feel. On older guards with very strong lips, you sometimes have to tap them up a little using this method to get them started before switching to the rolling machine.
 STEP 10. Obviously you can’t roll plastic bumpers. If they foul the tyre, they’ll need to be trimmed back using either an air-saw or a cut-off wheel. This will normally leave a black edge, which may need touching up. Other problems include screws in the guard lip and thick blocks cast into plastic guard liners — many of these can be trimmed away with a knife but there are some that can’t.
WRAP UP
Now that’s a whole lot better. The freshly rolled guards will allow for considerably greater bump travel. Mind you, when tyre clearances are tight, suspension deflection may still allow some rubbing. However, with the lip rolled up, any rubbing will be far less aggressive and the tyre is much less likely to grab the lip and bend the living daylights out of your guard.
The crew at The Tyre Factory have a lot of experience and quote about an hour per corner. That means rolling the guards can make a big difference for a reasonably modest outlay.
 Using this method, you’ll never fold the lip completely flat back on itself; to achieve that you’d need to get the guards properly panel-beaten and resprayed. Rolling does not change the shape of the opening either, so if your tyres are fouling the front and rear of the arches, it’s unlikely rolling will solve your clearance issues — this is another job for a panel beater.
While risky, it is possible to use the guard roller to pump or stretch the guards. Around 10 to 12mm is safe-ish but if you go any further, unwanted distortion or paint cracking will almost certainly result.
THANKS to The Tyre Factory for helping us put this feature together
Comments