Reviews
Gallery15
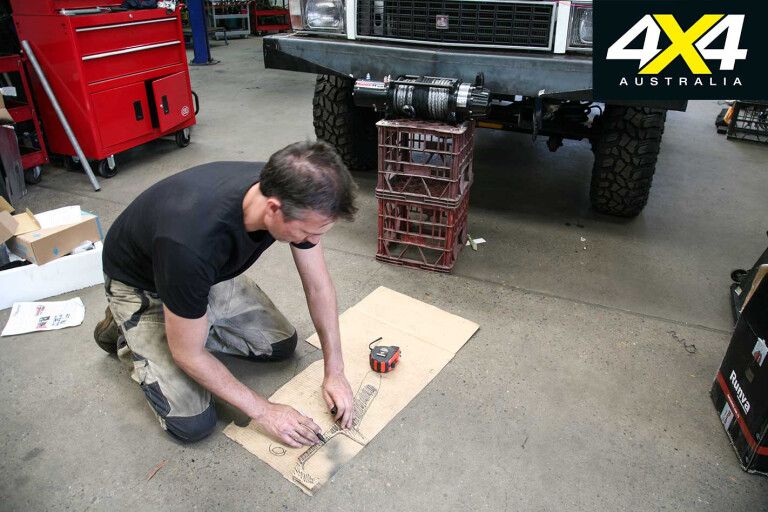
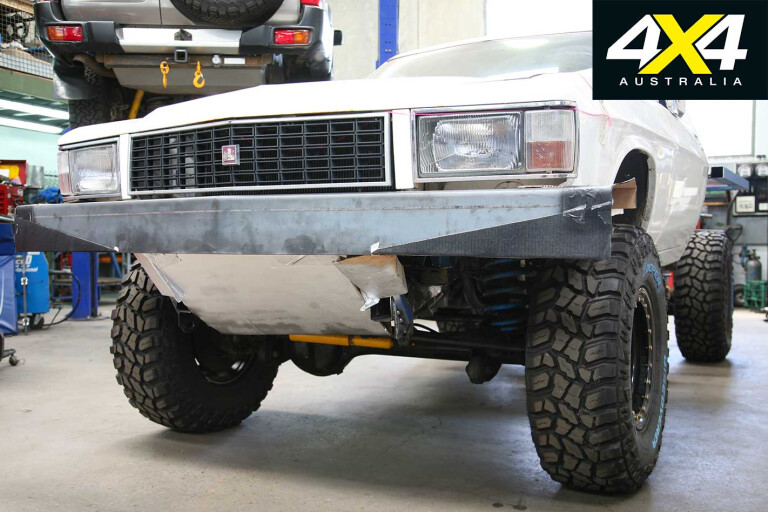
THE STYLE of my Tonner bullbar has been one of the hardest decisions for me to make. It’ll totally transform the looks from both the front and sides of the vehicle, for better or worse.
Genuine Holden Overlanders, country utes, tradies and general Holdens of the era utilised four- or five-poster style bars, while some others incorporated two posts with curved outer loops. A look around a fair-dinkum country town will see some huge examples of bars that may help frontal protection from animal strikes with their oversized dimensions, but simply don’t cater for off-road use.
15
Jason at Total Care 4WD was willing to make pretty much anything I wanted and, given there were no airbags or other safety issues restraining us, I started doodling my perfect bar.
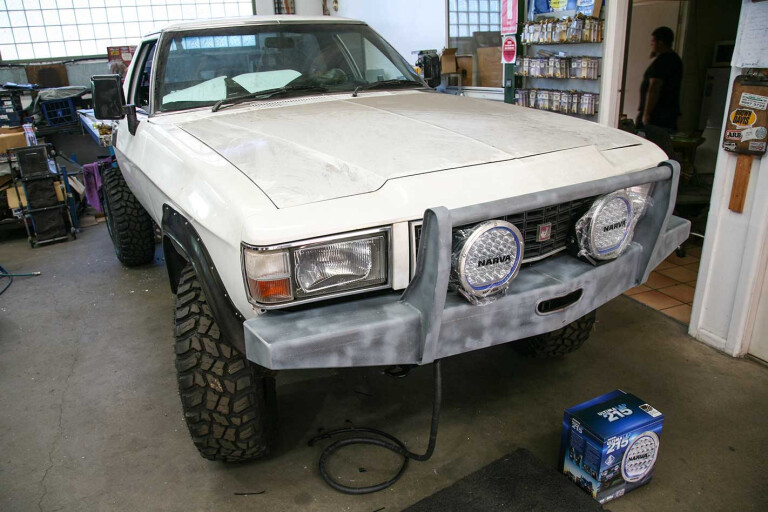
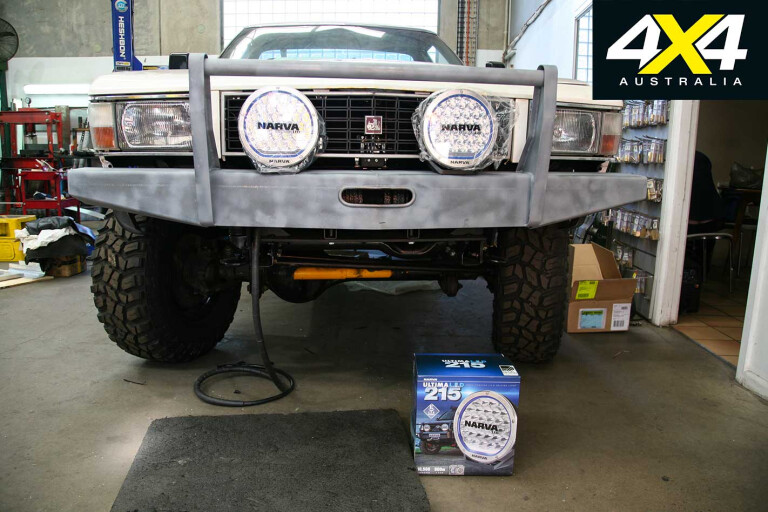
While animal strike protection and off-road approach angles would need to be catered for, so was fitting an electric winch and decent-sized driving lights. The winch would be recessed into the bar and behind the Holden grille, so having the Runva 11,000 pounder on-hand during the build was vital.
I’ve gone for a set of the newly released Narva Ultima LED 215 driving lights to grace the Tonner. While I know they’ll chuck a heap of light on the road, both far and wide, they also have a nice, shallow body that’ll fit perfectly into my custom bullbar. We’ve also incorporated a couple of top-mounted tabs for sand flags, UHF antennas and the like.
15
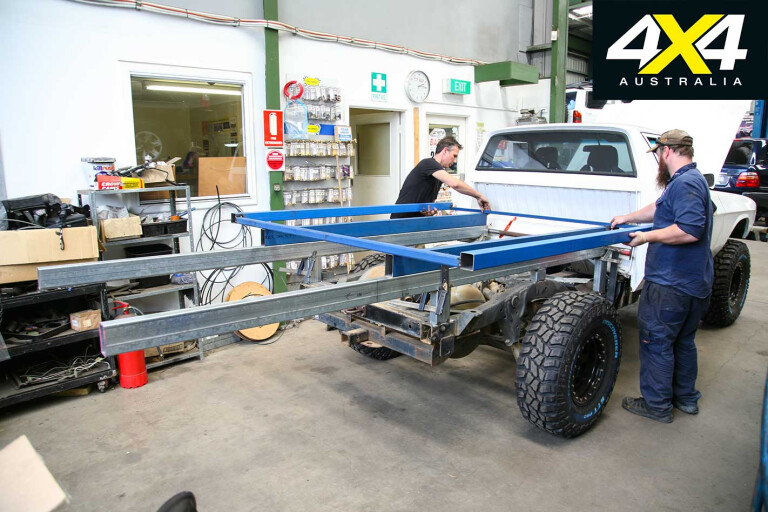
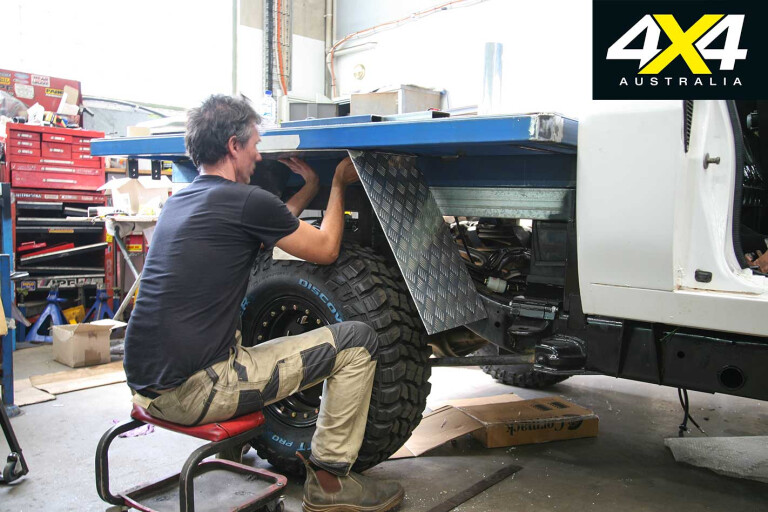
At the rear end, the build of the tray is to be relatively simple, with a rectangular section of steel outer lined with alloy checker plate on top to provide a totally flat surface. Three fold-down, removable side-boards and a pair of 3.5-inch round stainless steel hoops at the front and rear of the tray, with the rear one being removable, makes for a multifunctional system.
Day-to-day driving will see the tray empty, other than perhaps a pair of removable storage boxes that’ll no doubt be home to recovery gear, a few ropes and general tools. Later, if space permits, I’ll add a couple of under-tray tool boxes at both the front of the tray and perhaps a tapered set at the rear.
Being able to remove the side-boards and rear hoop will allow a removable canopy to be used for more covered and secured storage, or even some form of slide-on camper setup. That’s for when I nick off on extended trips and don’t have to cart dirt, bricks, sand or household goods for every man and his dog … because most ute owners seem to get roped into moving stuff.
15
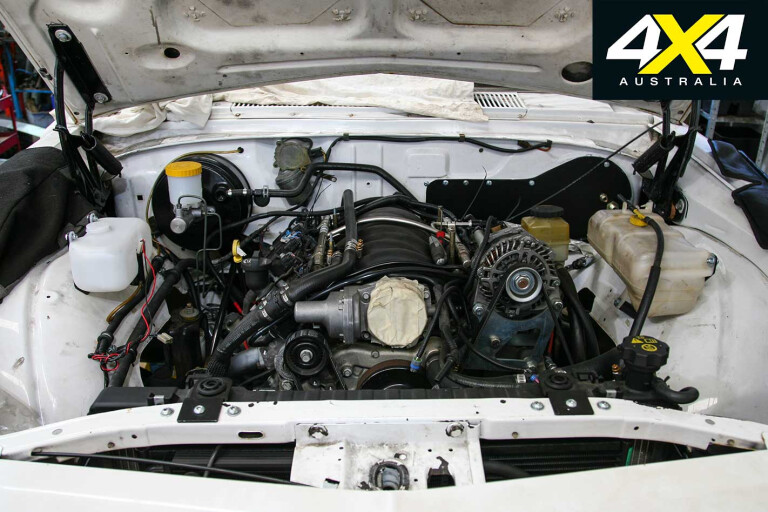
My initial radiator plans were to utilise an adaptor kit from Marks 4WD Adaptors to use a viscous coupling fan, and source an off-the-shelf radiator from a Cruiser or Patrol. Unfortunately, no matter how much swearing, how many different radiators and even changing to a shorter water pump snout on the front of the LS3, the sloping shape of the front of the Tonner bonnet and the slight angle the engine sits at wouldn’t allow fitment without butchering.
So, off with the viscous coupling kit and in with the standard Maloo radiator with twin thermo fans, making for plenty of room – luckily we kept it all from the donor R8 Maloo ute. We figured if that radiator kept the behemoth engine cool in the Commodore engine bay, it should do so in the ol’ WB’s.
Reliability-wise, the most I’ll do is carry a spare thermo fan motor just in case one spits the dummy after a mud or water run. Not what I wanted, but sacrifices in custom builds will always pop up from time to time … so we dealt with it.

15
A few people suggested sticking with the standard Patrol rear diff, given it’s one of the best LSD types available. While my Tonner won’t be a comp vehicle, it still needs to (read: I want it to) be ultra-capable for playtime and general 4x4ing, and my reply was, “If it’s not locked, it’s not locked, and no amount of tightening an LSD will compare.” So, I’ve dished out for a rear TJM Pro Locker, plus a LOKKA auto locker from 4WD Systems for the front diff.
I’ve used TJM Pro Lockers in my old 105 Series Land Cruiser for about eight years, and to say I was happy with them is an understatement. Flick that switch and ya locked and ready to rumble through almost any terrain. Flick that switch again and you’re back to easy open-diff driving for both on- and off-road. The front auto locker allows far more steering ability compared to a manual front locker, plus it is bucket loads cheaper to purchase and install.
15
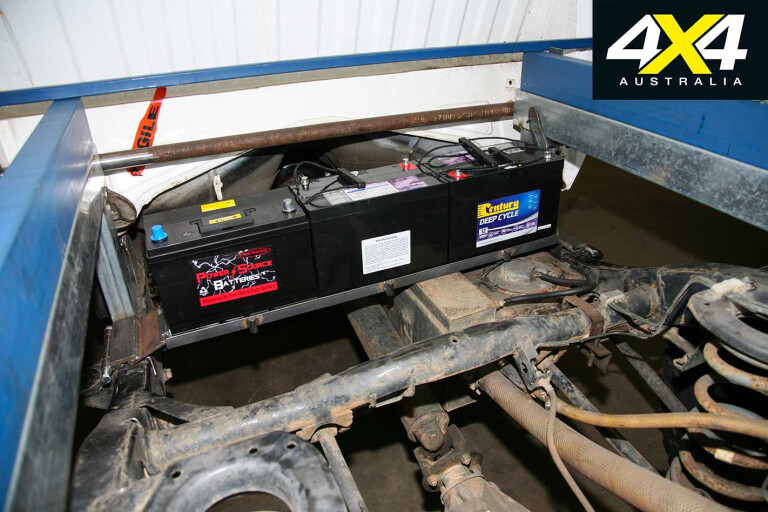
Given I wanted to fit dual air cleaners with flat panel filters (from a 70 Series Land Cruiser) behind each headlight, that then feed into the induction system in the centre of engine block, there was no real estate left for a starter battery, let alone an auxiliary unit.
That got the fabricators at Total Care 4WD knocking up a triple battery tray that rests between the chassis rails, directly behind the Tonner cab. This keeps the weight central, low-mounted, cool (from engine bay heat) and easily accessible if needed.
MORE1 Tonner build
The triple-battery setup (one starter and two auxiliaries) will be controlled via a Projecta DC/solar charger system that will see both auxiliary batteries treated as one large battery, which can be charged via the alternator and/or solar while driving and via solar while parked at camp. Obviously, the starter battery is automatically disconnected once the engine is flicked off, so as not to discharge it.
15
How to mount the spare wheel has been giving me a headache for more weeks than I can recall. I didn’t want it poking out the rear on a carrier, I didn’t want it recessed in the centre of the tray were I couldn’t access it, and no, I didn’t want it on top of the cabin or taking up valuable space in the tray; although, that would have been the easy way out.
Long Ranger managed to modify a GQ Patrol long-range tank with a flat top surface that allowed the whole spare wheel to lie on. A few well-positioned straps and a locking device should keep the Cooper 33-inch mud terrains and steel Dynamic imitation beadlock rims in place.
Over the last few months of building my perfect 4x4, I’ve had dozens of people asking me how much fuel the 6.2-litre LS3 will use. Short answer is: “Stuffed if I know, but it’ll return plenty of smiles per gallon.”
15
I’ve got a few mates running the 6.0-litre LS2 in Commodores and they all concur that they suck bucket loads with a heavy boot on the cranky pedal, but driven sensibly at highway speeds returns 10 litres per 100km or better.
The 6.2L is reported to use less than the 6.0L, but, given weight changes of the whole vehicle, different diff ratios, larger diameter rubber, and changed aerodynamics of my mutant Tonner, I revert back to my first answer of “stuffed if I know”. I’ll get back to you once I have tucked a few thousand kays of hardtop, dirt, mud and sand trips under my belt.
The Tonner has weighed in at 2008kg, which is down from 2050kg as the Tare weight on my GQ (wagon) paperwork; albeit, that’s with the bullbar, long-range tank, second tank and everything else in place, which would be on top of a standard vehicle. That has allowed me to finalise specs with Tough Dog to wrangle the correct weight coil springs under the Tonner. We’ve also got a custom 3.5-inch exhaust system dangling off the Marks Adaptors extractors … yep, music to the ears!
15
The tray has been finalised with some neat alloy mudguards, and side-steps have been formed to marry with the front flares and finish up just past the rear of the cab to enable use as a step-up into the high tray. At the time of writing, all the custom metal work has been removed and sent for spray painting … frog green it will not be.
Hopefully this time next month it’ll all be back together, the engineer has signed off and it’ll have a nice set of NSW number plates. So be sure to clock back in for the grand finale that is my perfect 4x4: a 1 Tonner on ’roids.
Please enable JavaScript to view the comments powered by Disqus.
COMMENTS