Gear
Gallery35
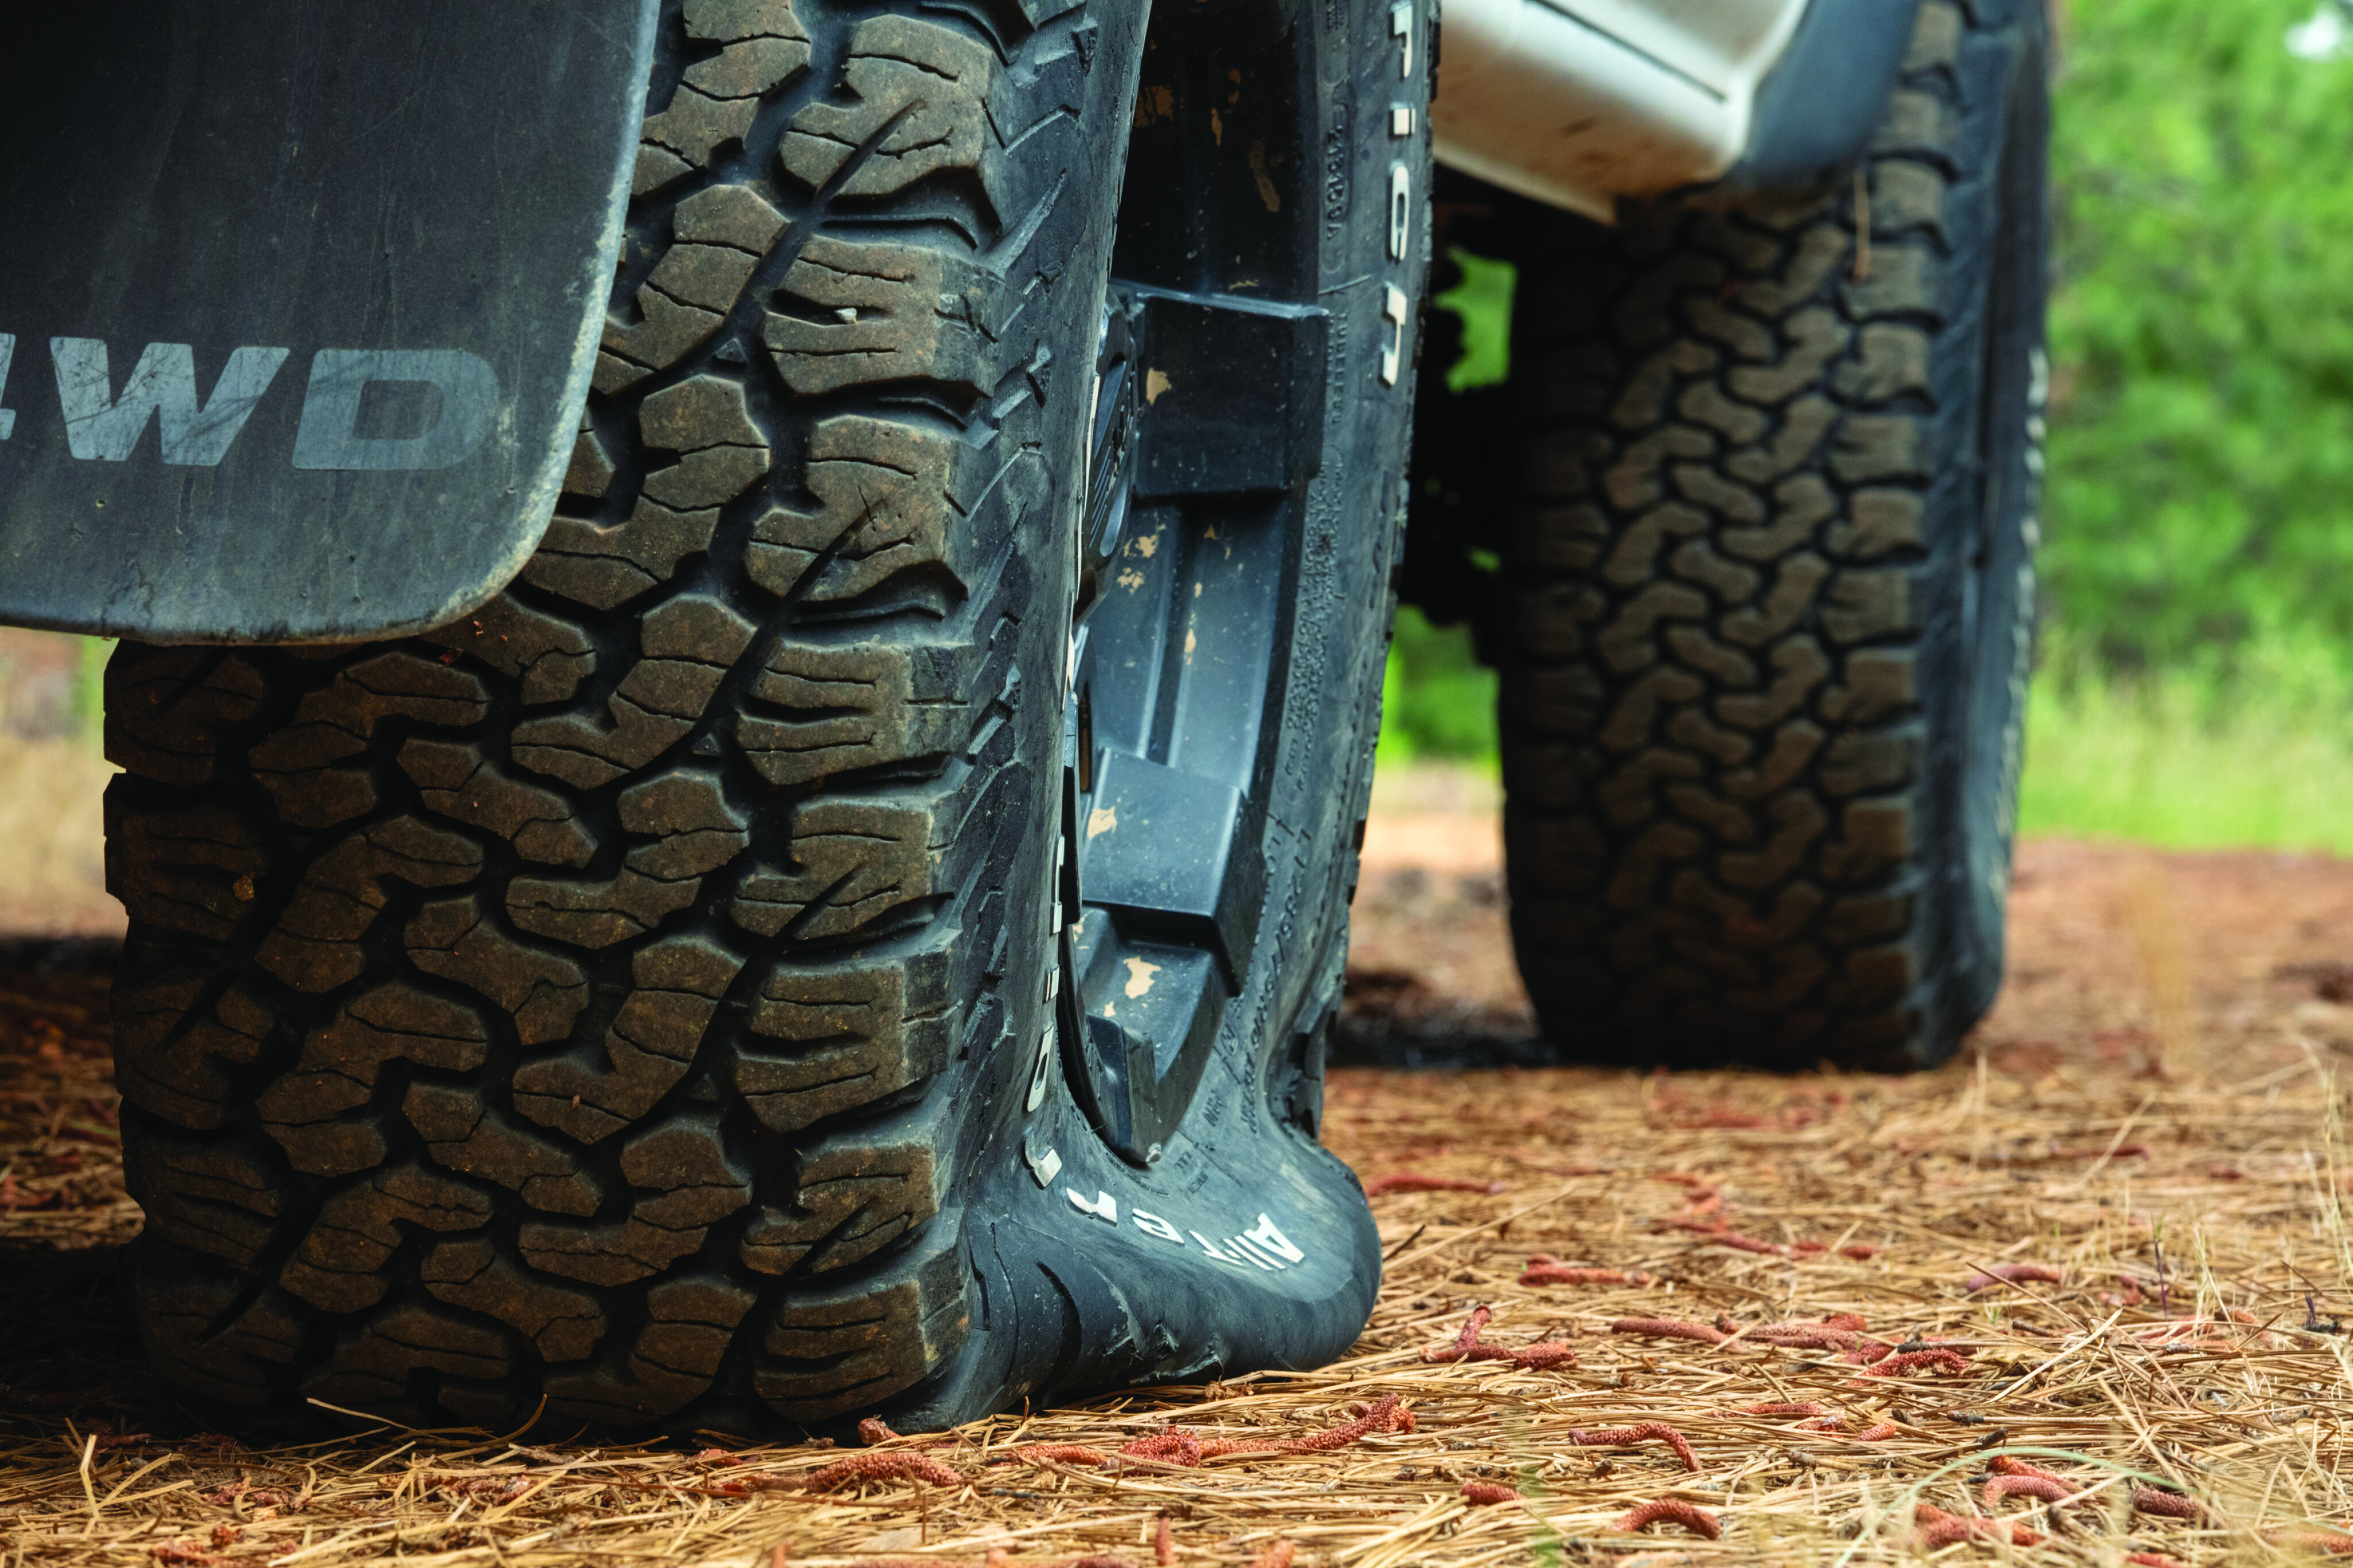
What are the odds of finding a stray pushrod in the middle of the desert? Pretty thin, right? And the odds of it laying in such a position to pierce a hole in your tyre?
Well, you probably have a better shot at finding a Bitcoin in your backyard, but there we were pulling the offending metal shaft from my mate’s tread block. Back then (the late 80s) we didn’t carry tyre plugs or patches, so we swapped in his spare and continued… now spareless.
35
But times they are a changin’, and with the tools now available to repair a tyre in the field, running spareless should be a thing of the past.
This month we review a few high-quality tyre repair kits, then dive into everything from simply plugging a nail hole to performing major surgery.
35
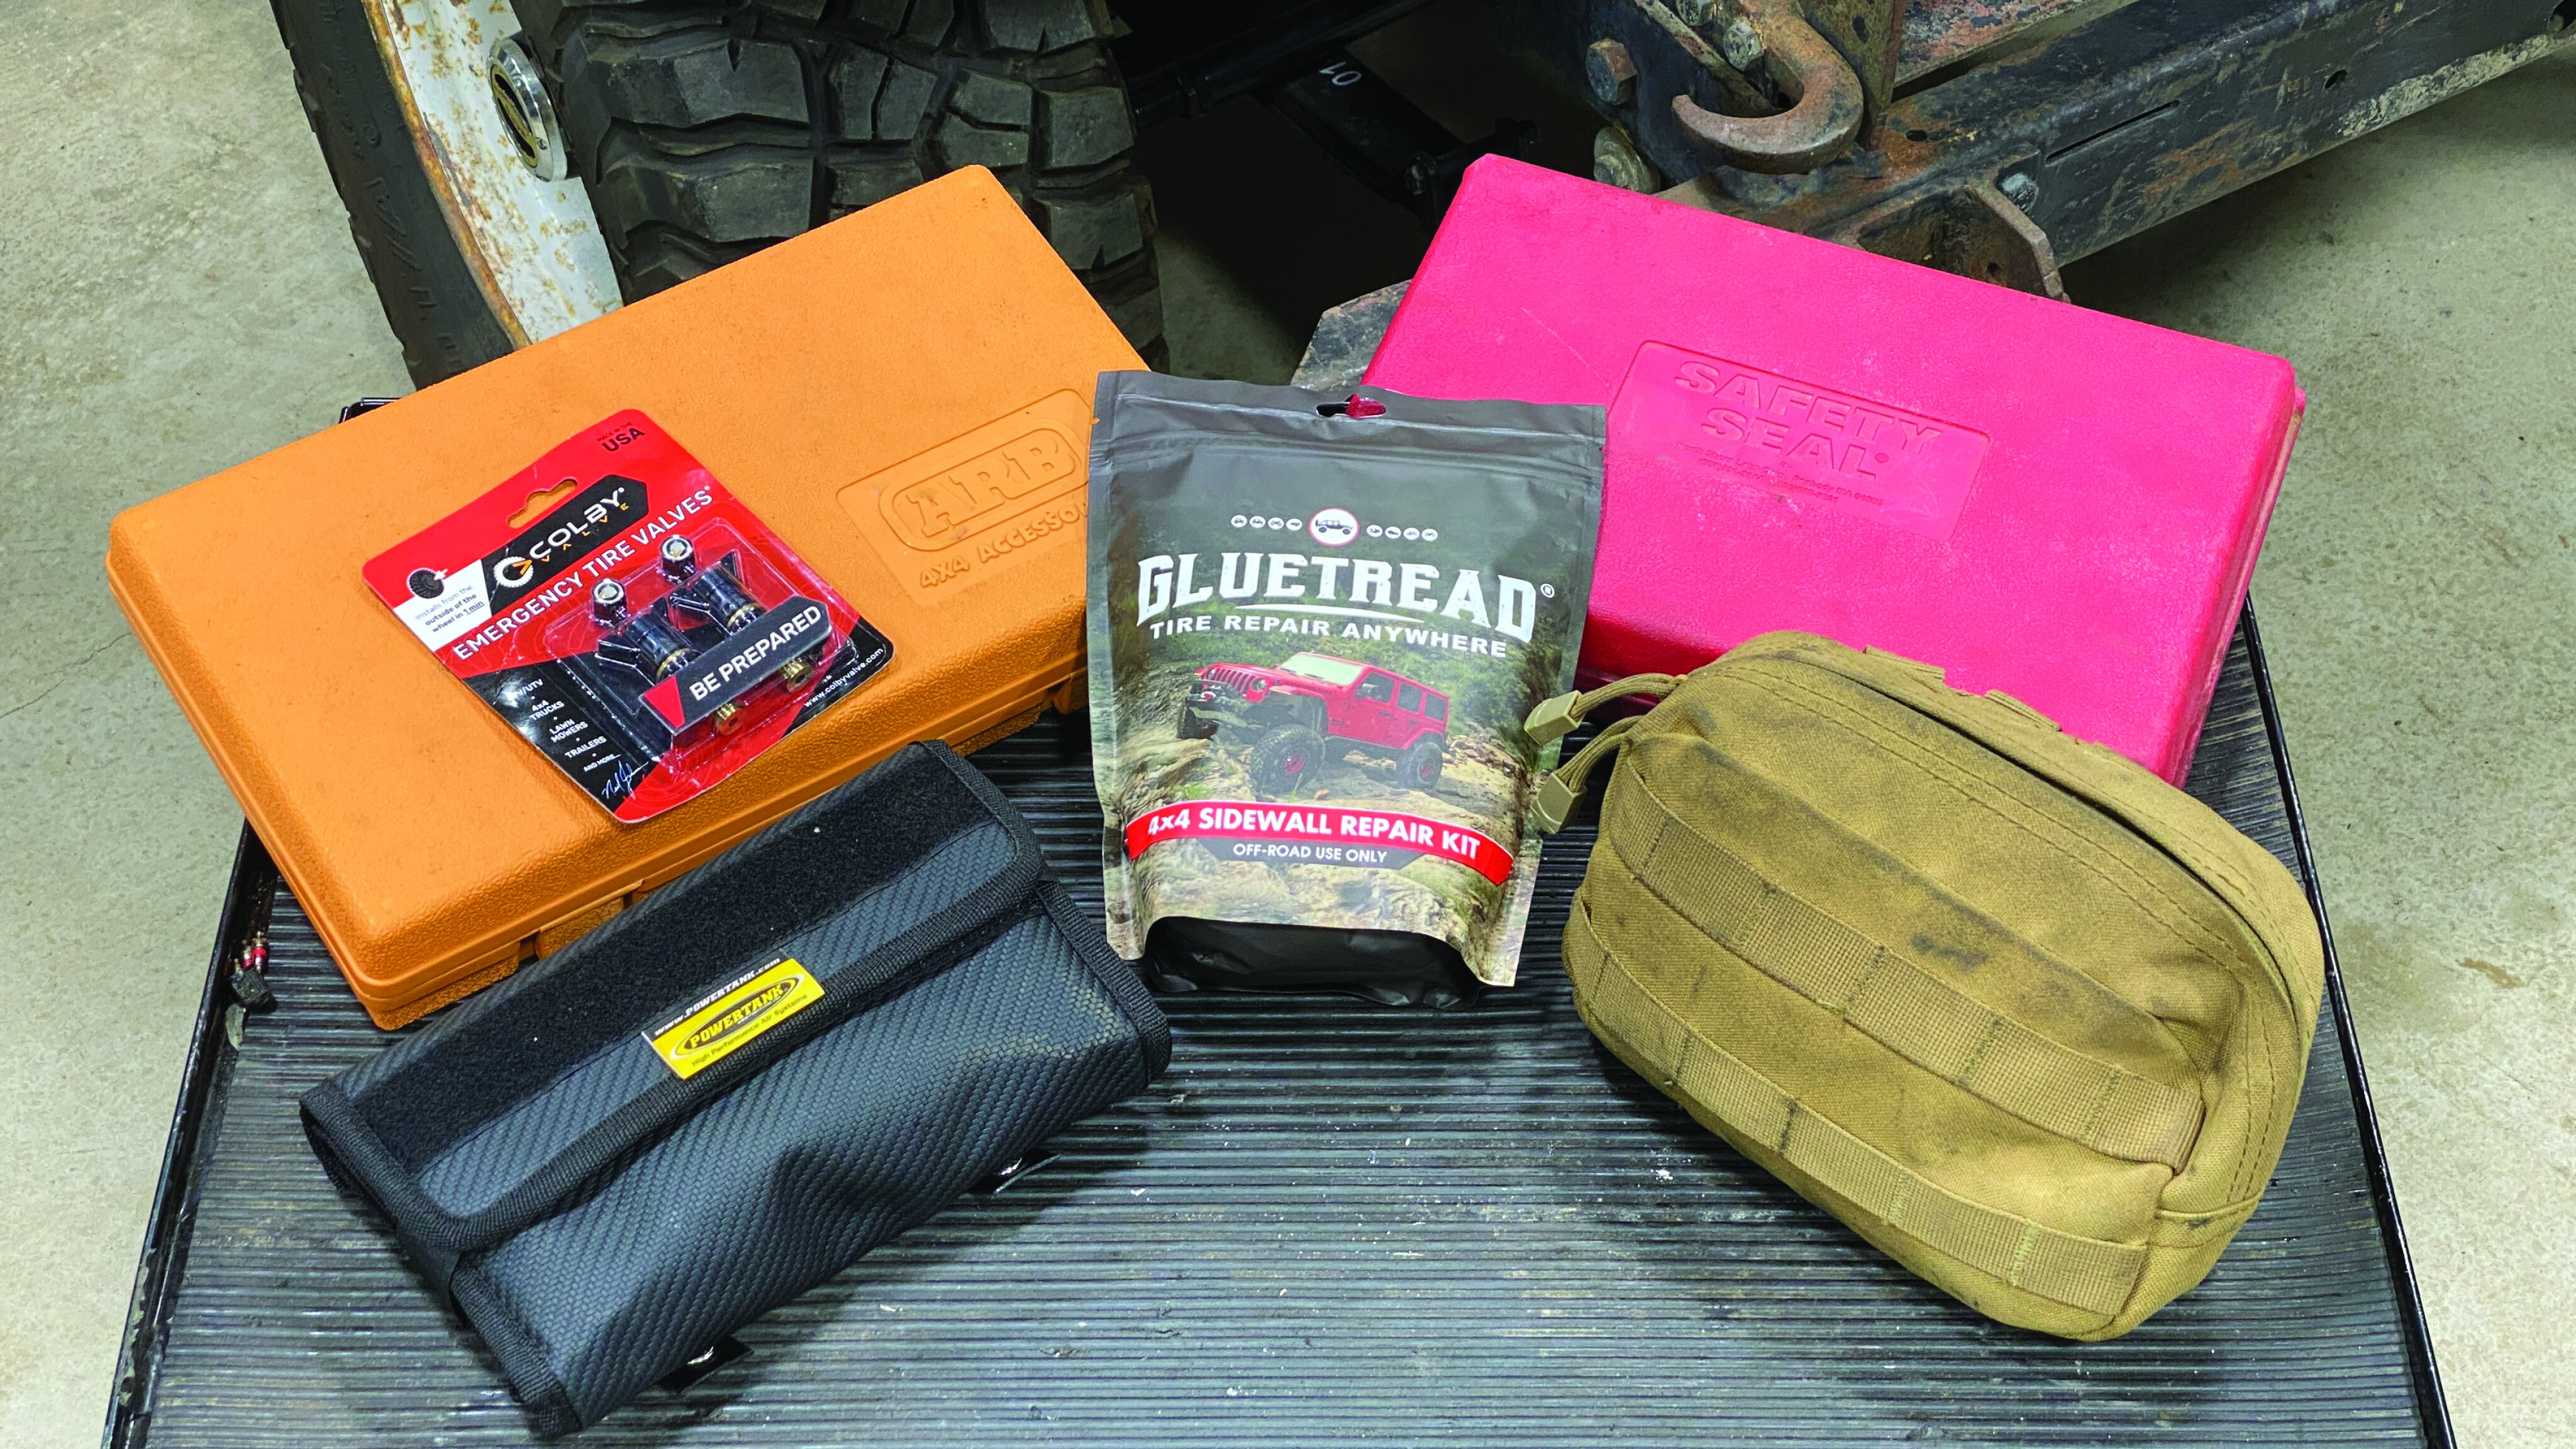
Repair kits in this review are from Extreme Outback Products, ARB, Power Tank, Safety Seal and GlueTread.
The Gear
In 1964, Alec W. Niconchuk developed the first self-vulcanising tyre-repair system.
His company was called Safety Seal, and his plug method became the model for which countless others have emulated. While there are many companies boasting a better or cheaper mousetrap, I would strongly avoid the el cheapo $10 units found at discount stores, as you may spend more coin at the ER when the plastic handle breaks and you shish kebab your hand.
The kits I carry (for my multiple rigs) are from ARB, Power Tank, Extreme Outback Products and Safety Seal. GlueTread is the new kid on the block, and is now included in my tyre repair kit. Let’s take a look.
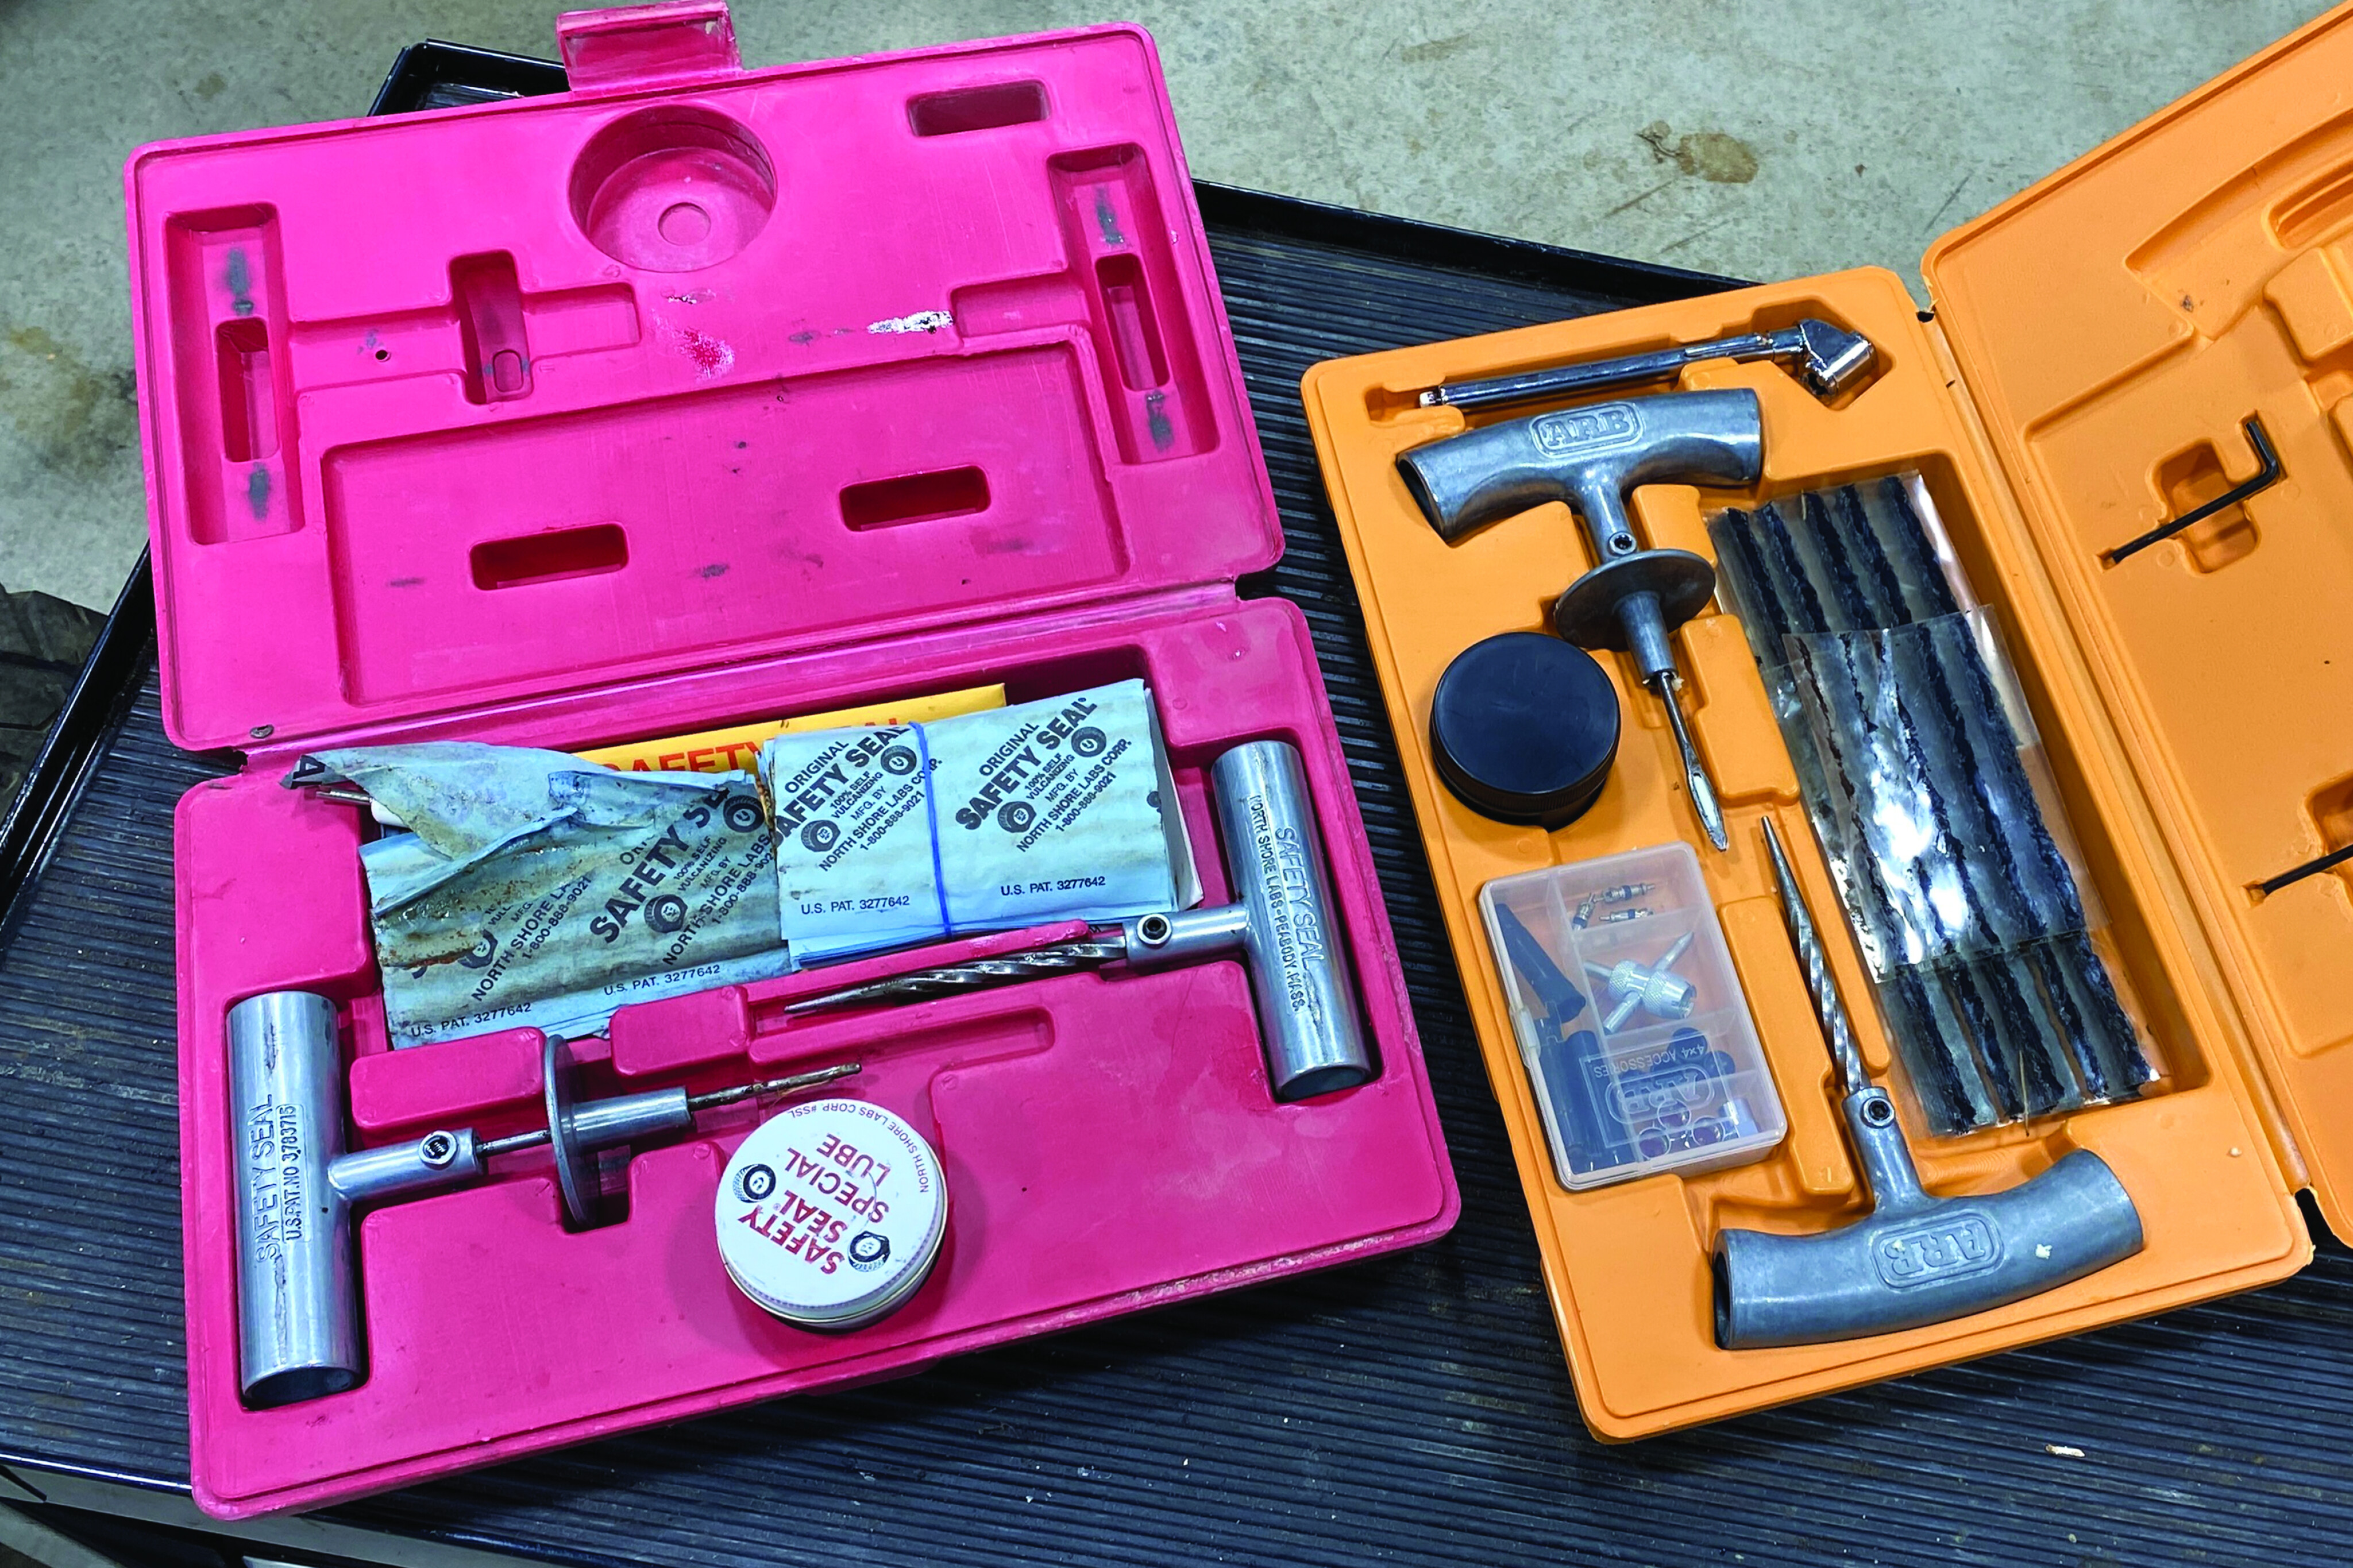
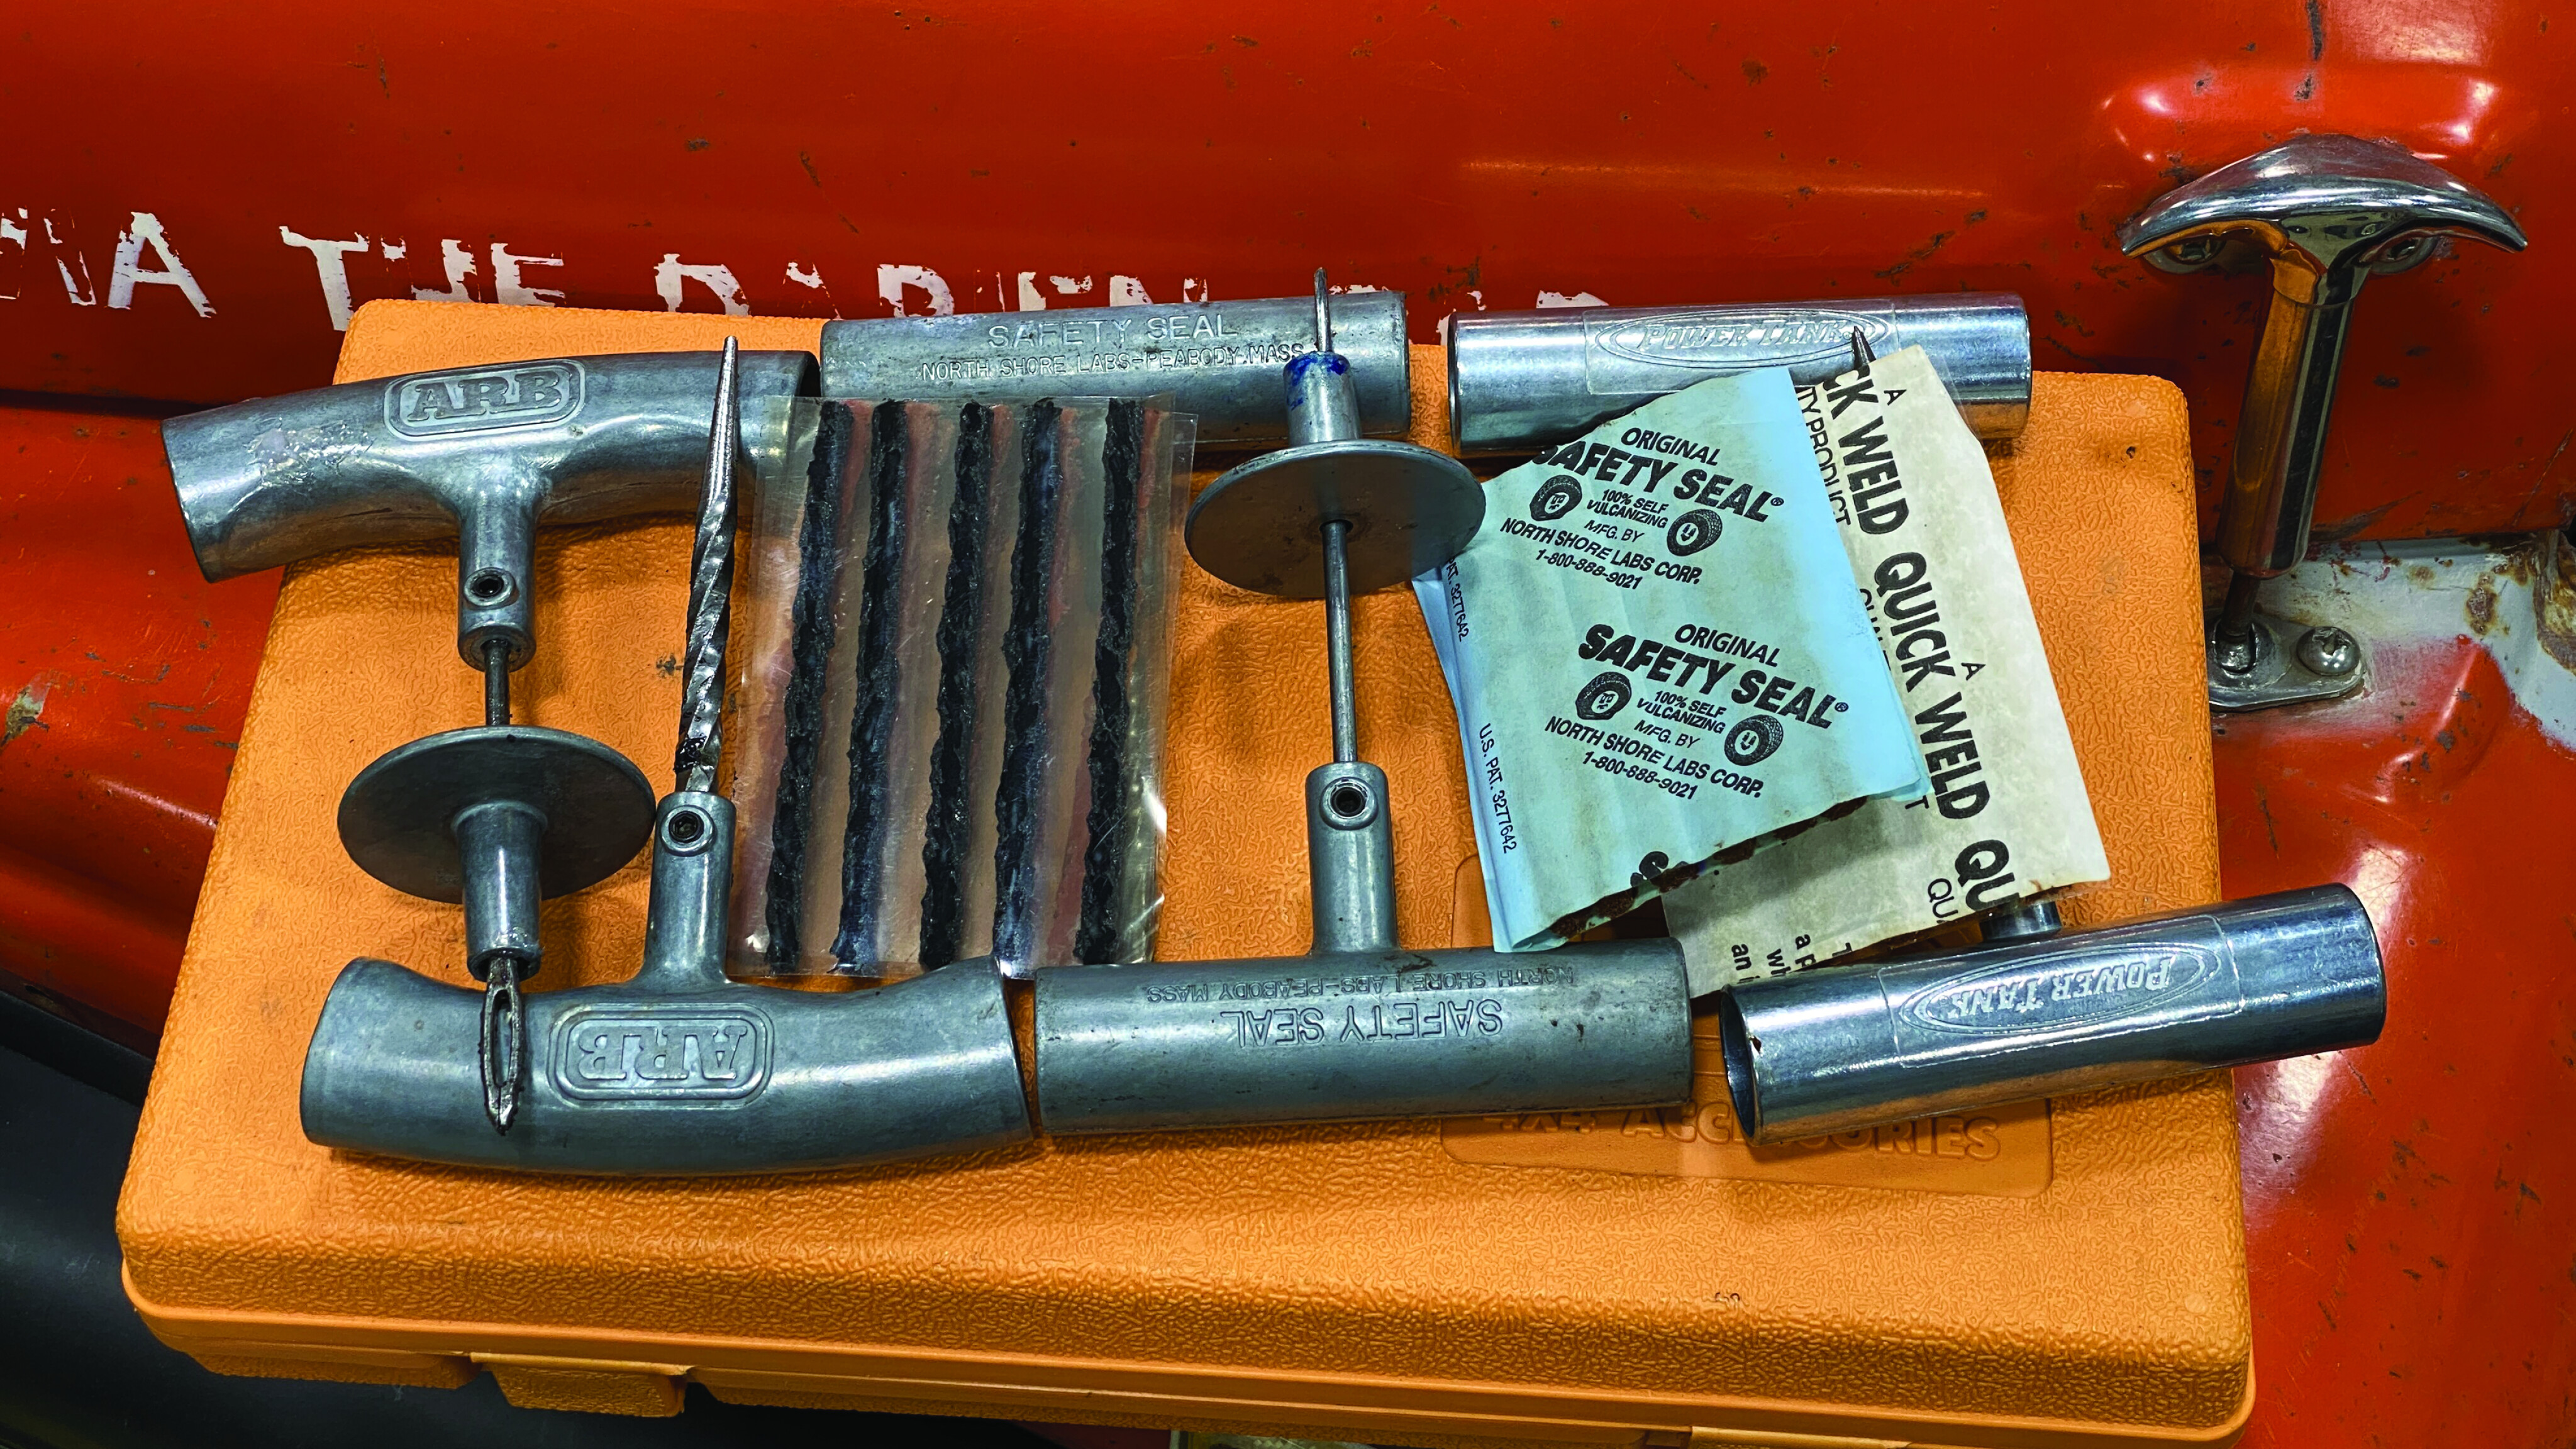
Safety Seal and ARB
35
These products come in a durable plastic case containing repair cords, insertion and reaming tools, a razor blade, and lubricant. You will note the sliding plug retainer on both insertion tools, and ARB expands the roster with an air gauge and assortment of valve stem accessories. Both are high-quality units and will handle most puncture repairs
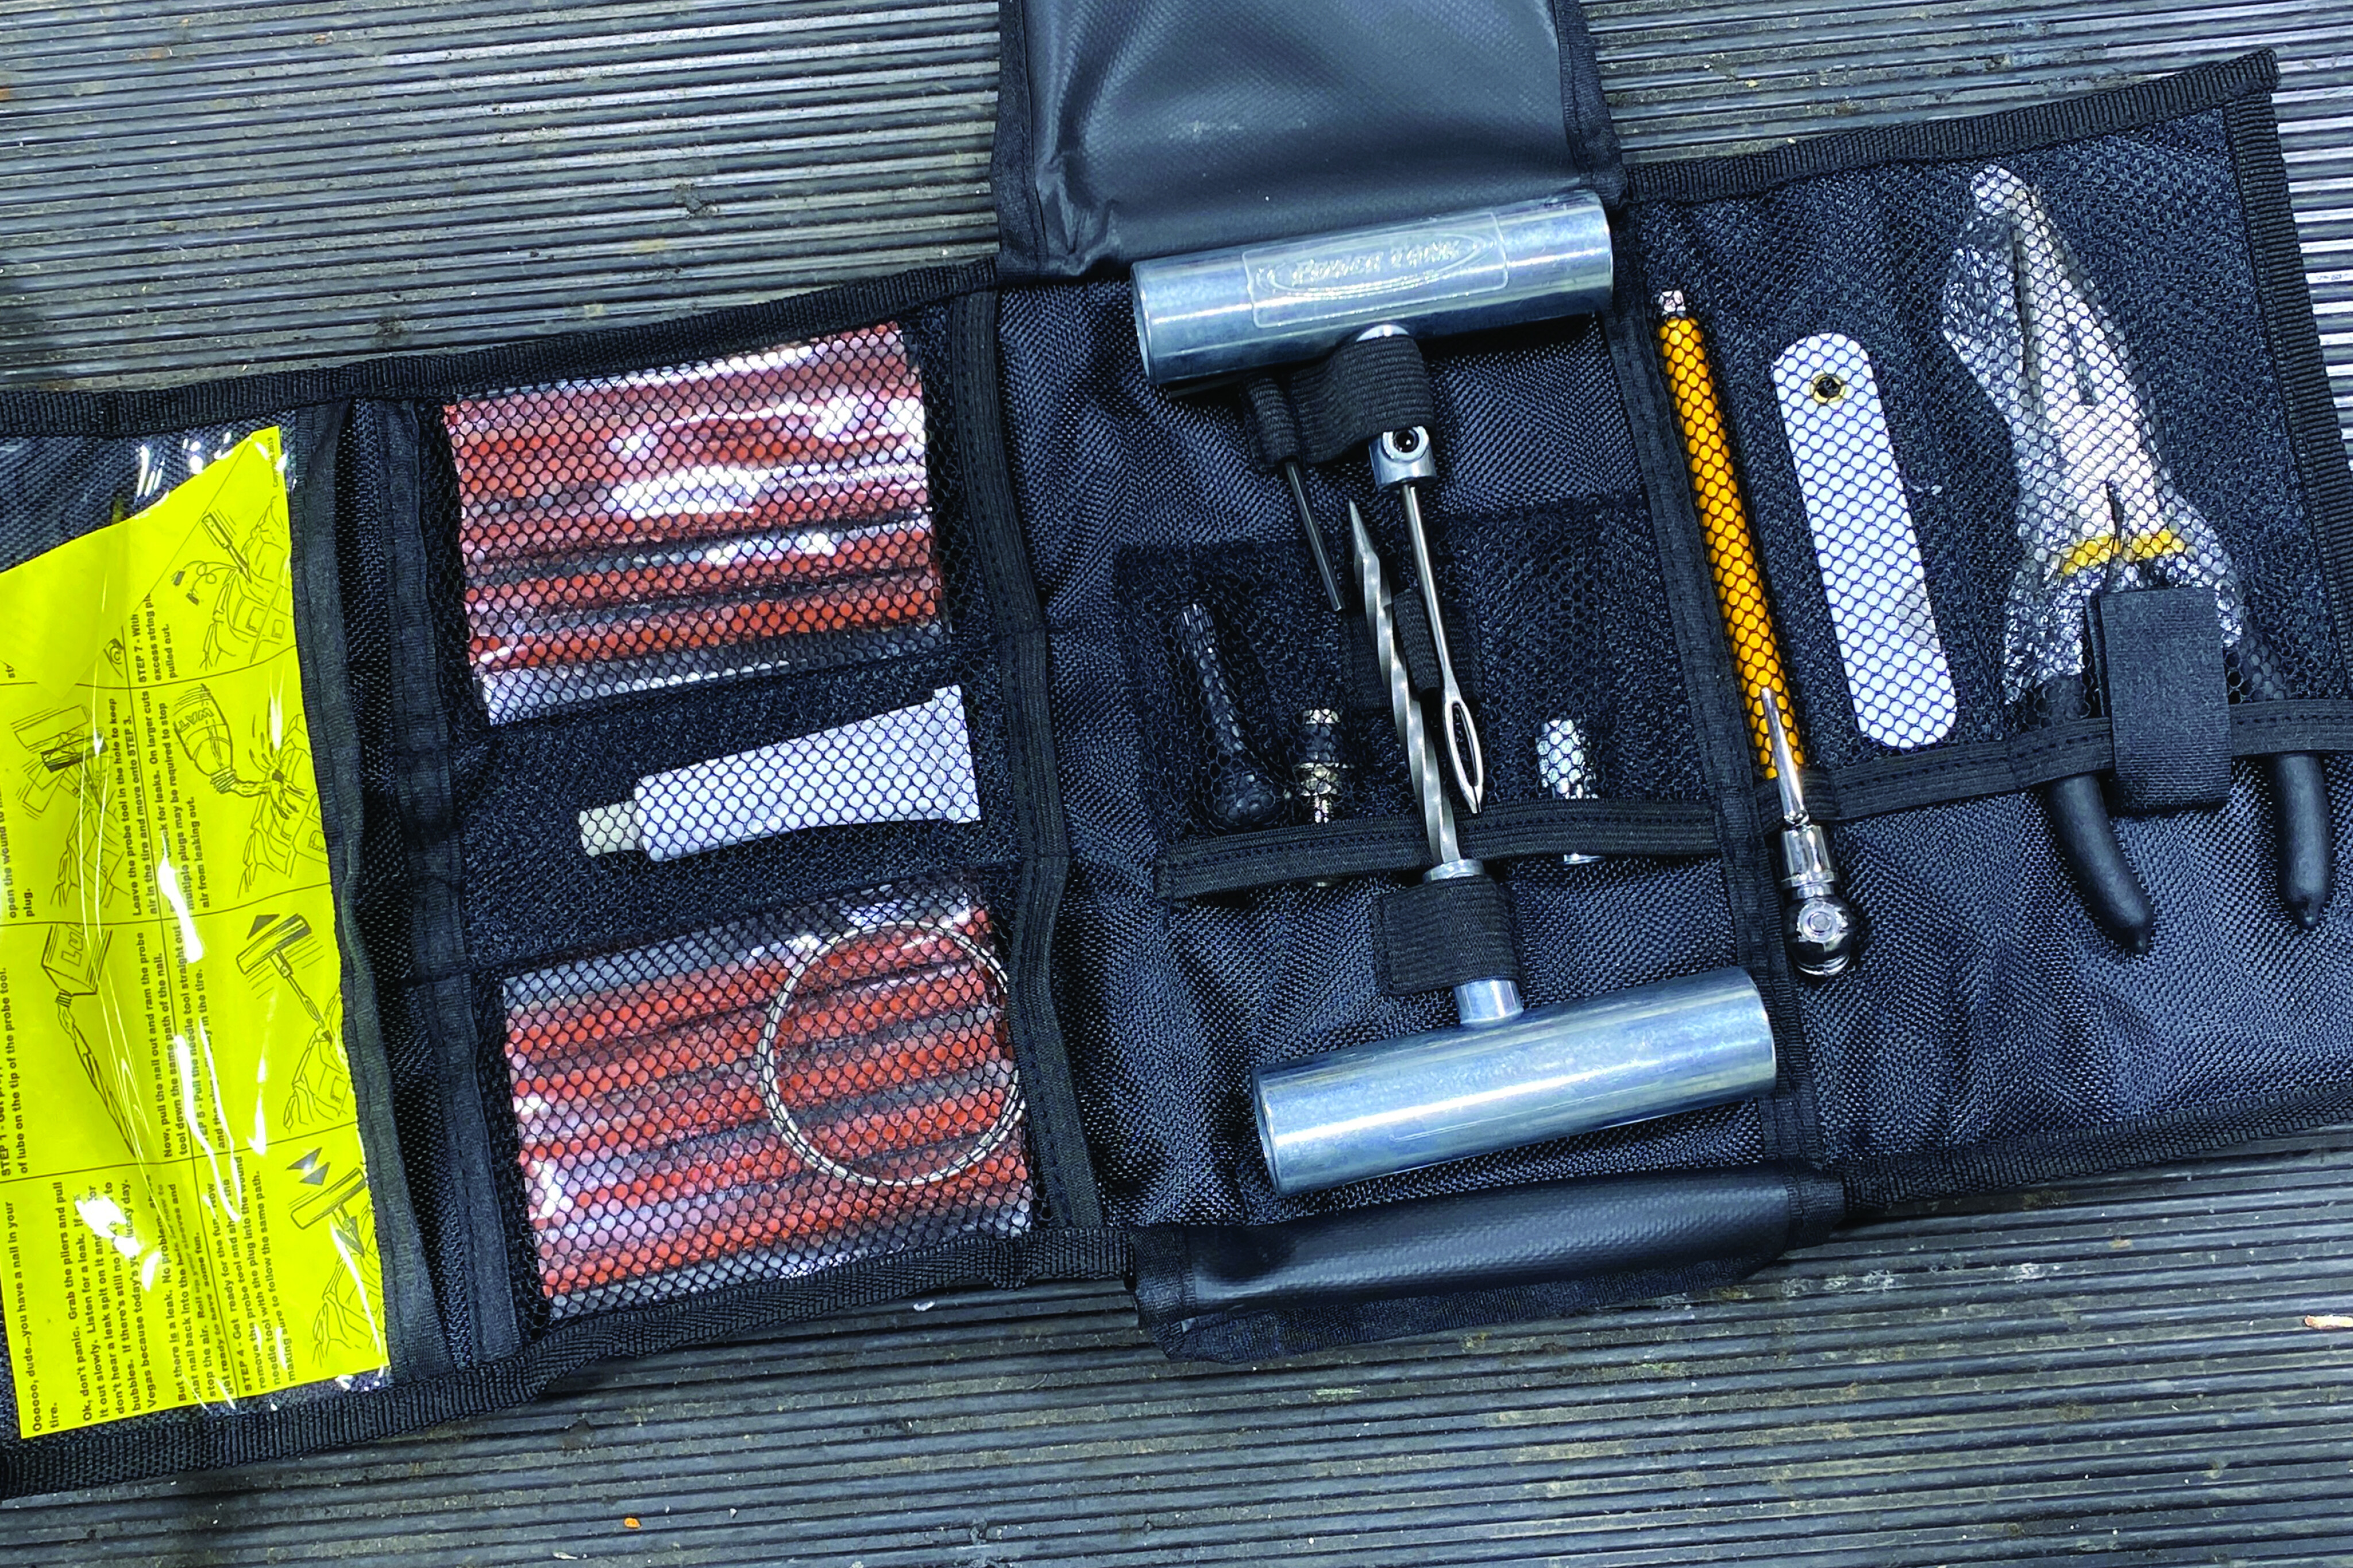
Power Tank
35
As the purveyor of CO2 on-board air systems, it is only natural that Power Tank offers a repair kit. It includes premium cords, steel reamer/insertion tools, needle nose pliers, air gauge, and their Rescue Valve emergency valve stem. Also included is a length of steel wire for… well, we’ll get to its purpose later. Everything is wrapped in a ballistic nylon roll with MOLLE attachment points.
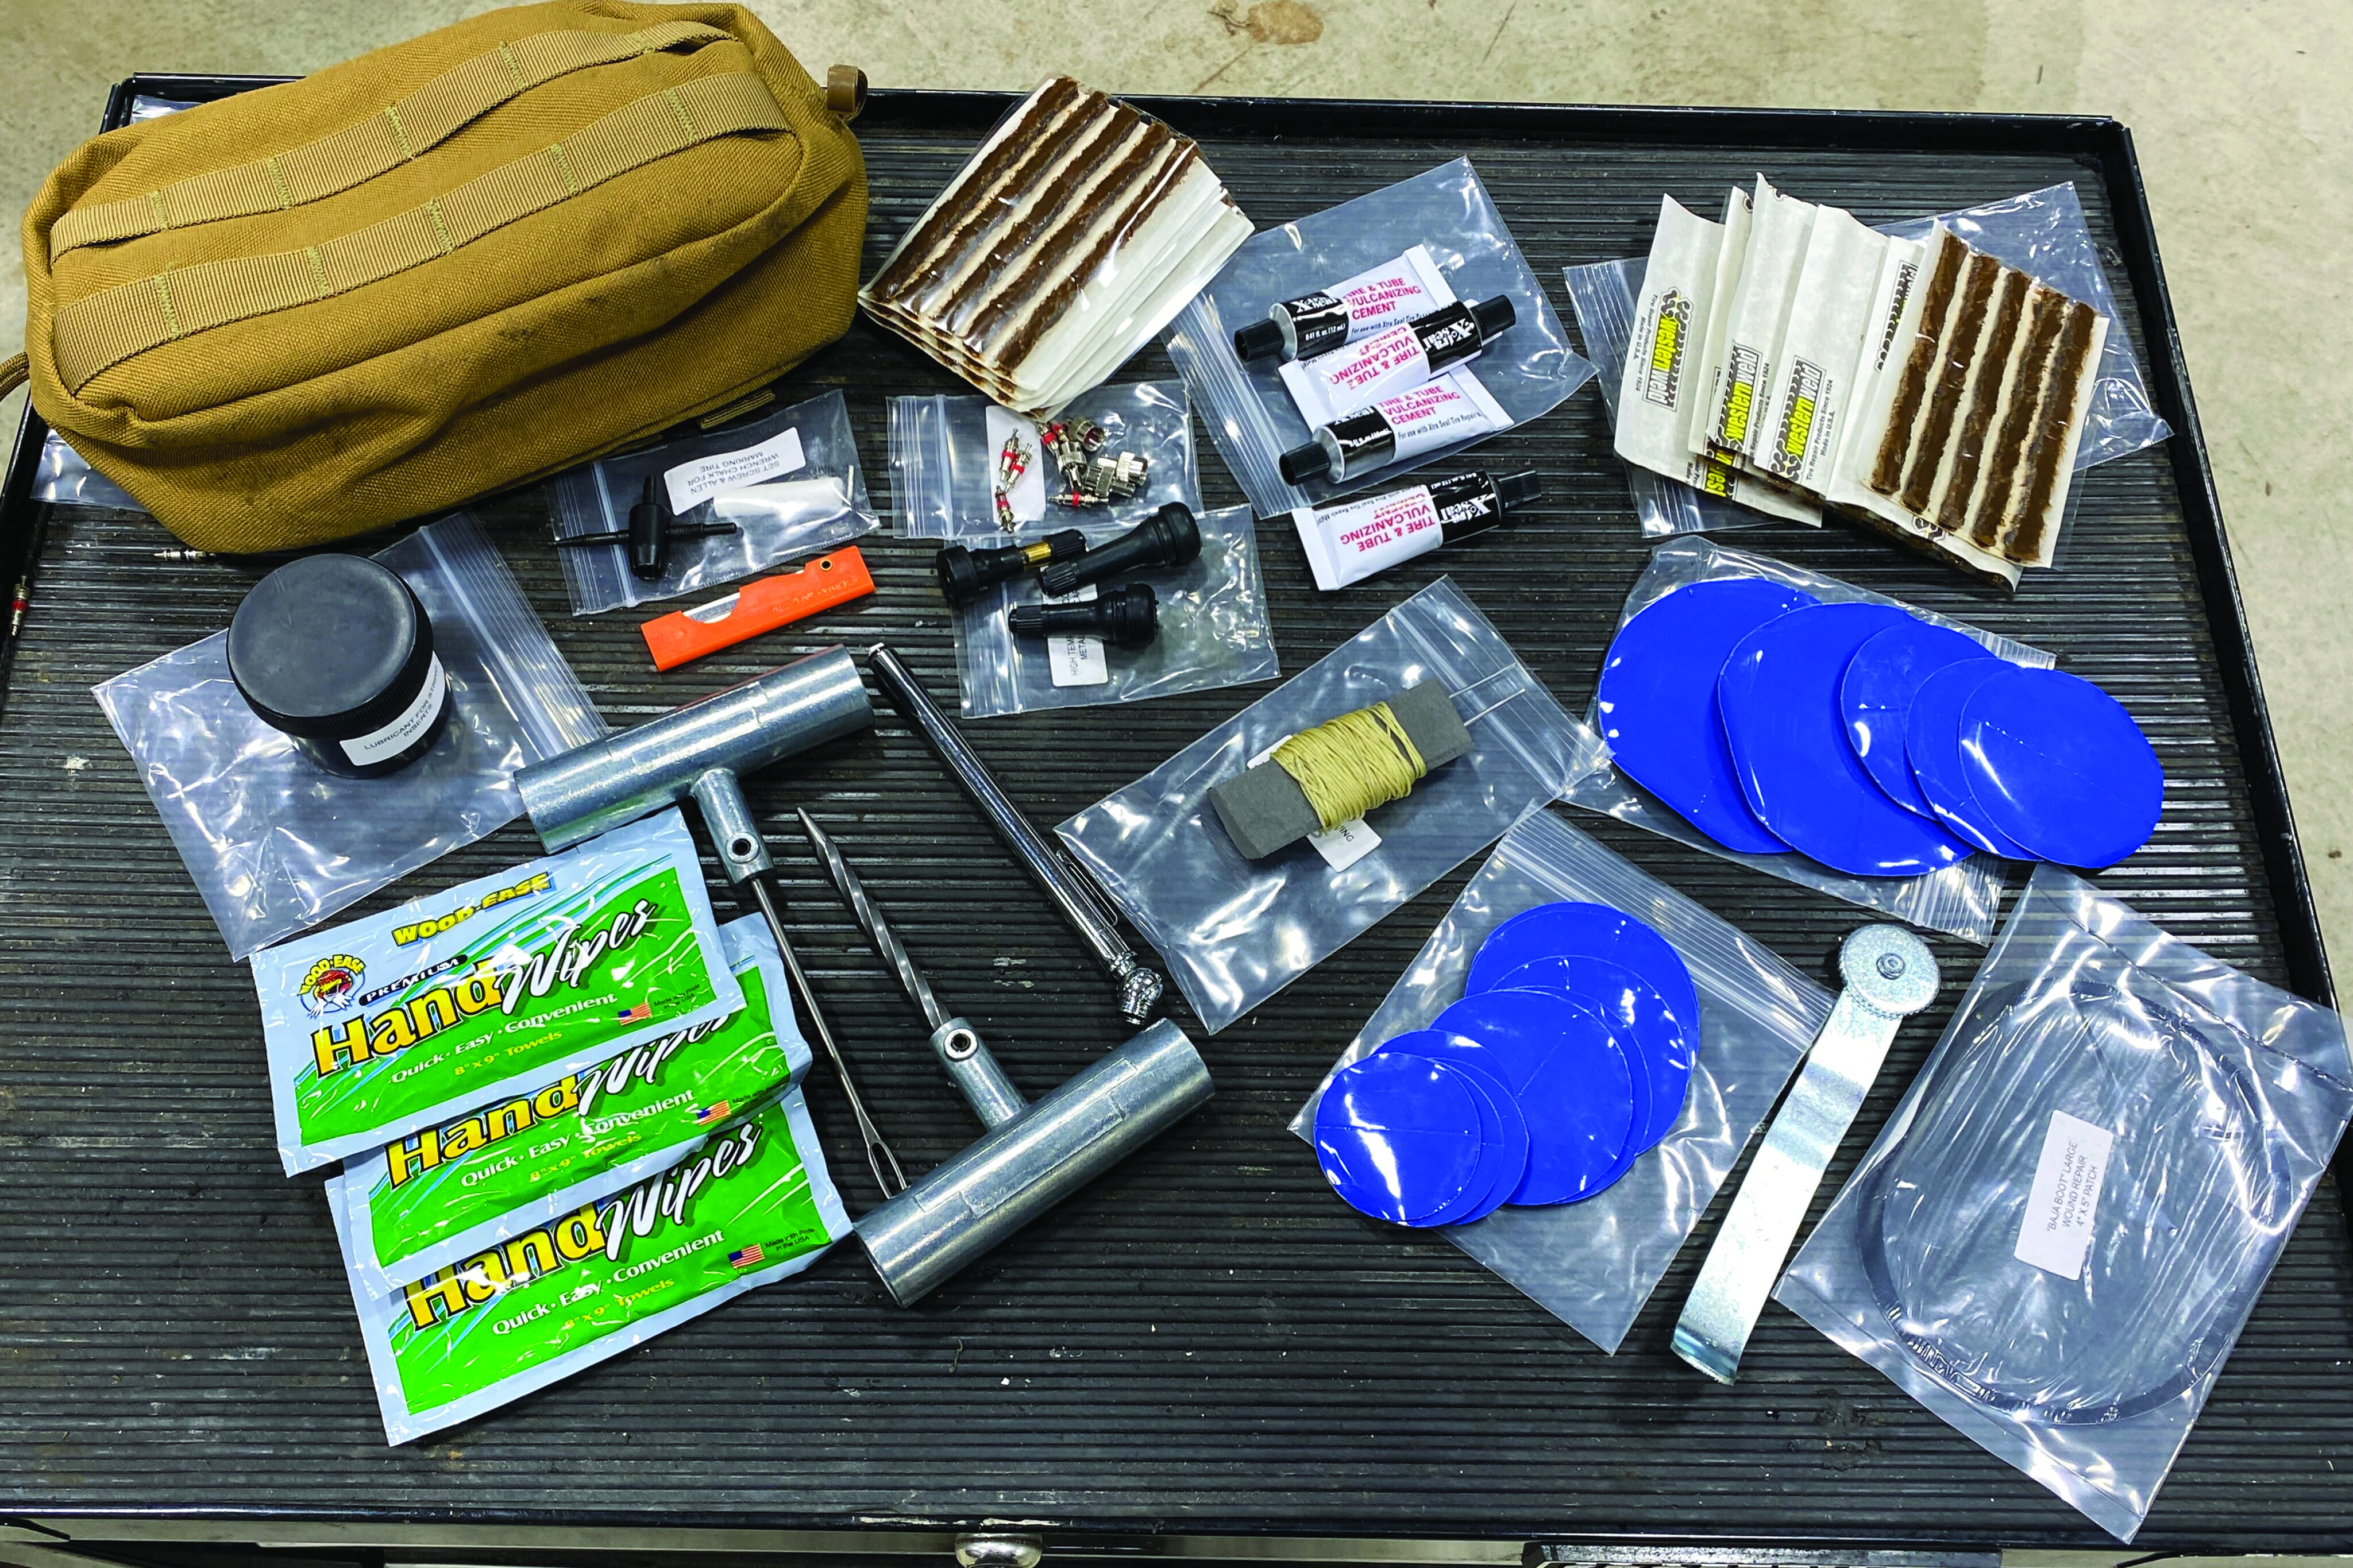
Extreme Outback Products
35
Extreme Outback takes things to the next level with its Ultimate Puncture Repair Kit. Not only is each component sourced from the best manufacturers, but there are enough consumables to keep you on high ground during a trip of nearly of any duration. The durable canvas bag includes a variety of patches, a buffer/roller, waxed polyester thread and needles, air gauge, rubber cement, hand wipes, valve cores, and accessories.
TIP: Repairing a tyre is serious business. Don’t cheap out with discount store tools.
35
A high-quality self-vulcanising plug kit will handle most trail punctures.
The Plug
Plugging a tyre is the simplest of trail repairs and can usually be done without removing the wheel.
If you notice a low tyre and don’t hear a hiss, first ensure that the valve core is not leaking. Put a little saliva on your finger, lightly place it on the opening, and look for bubbling.
Also look for any debris that might be jammed between the bead and the wheel. If the cause is a nail, you’ll need to roll the vehicle until the offending object is accessible.
35
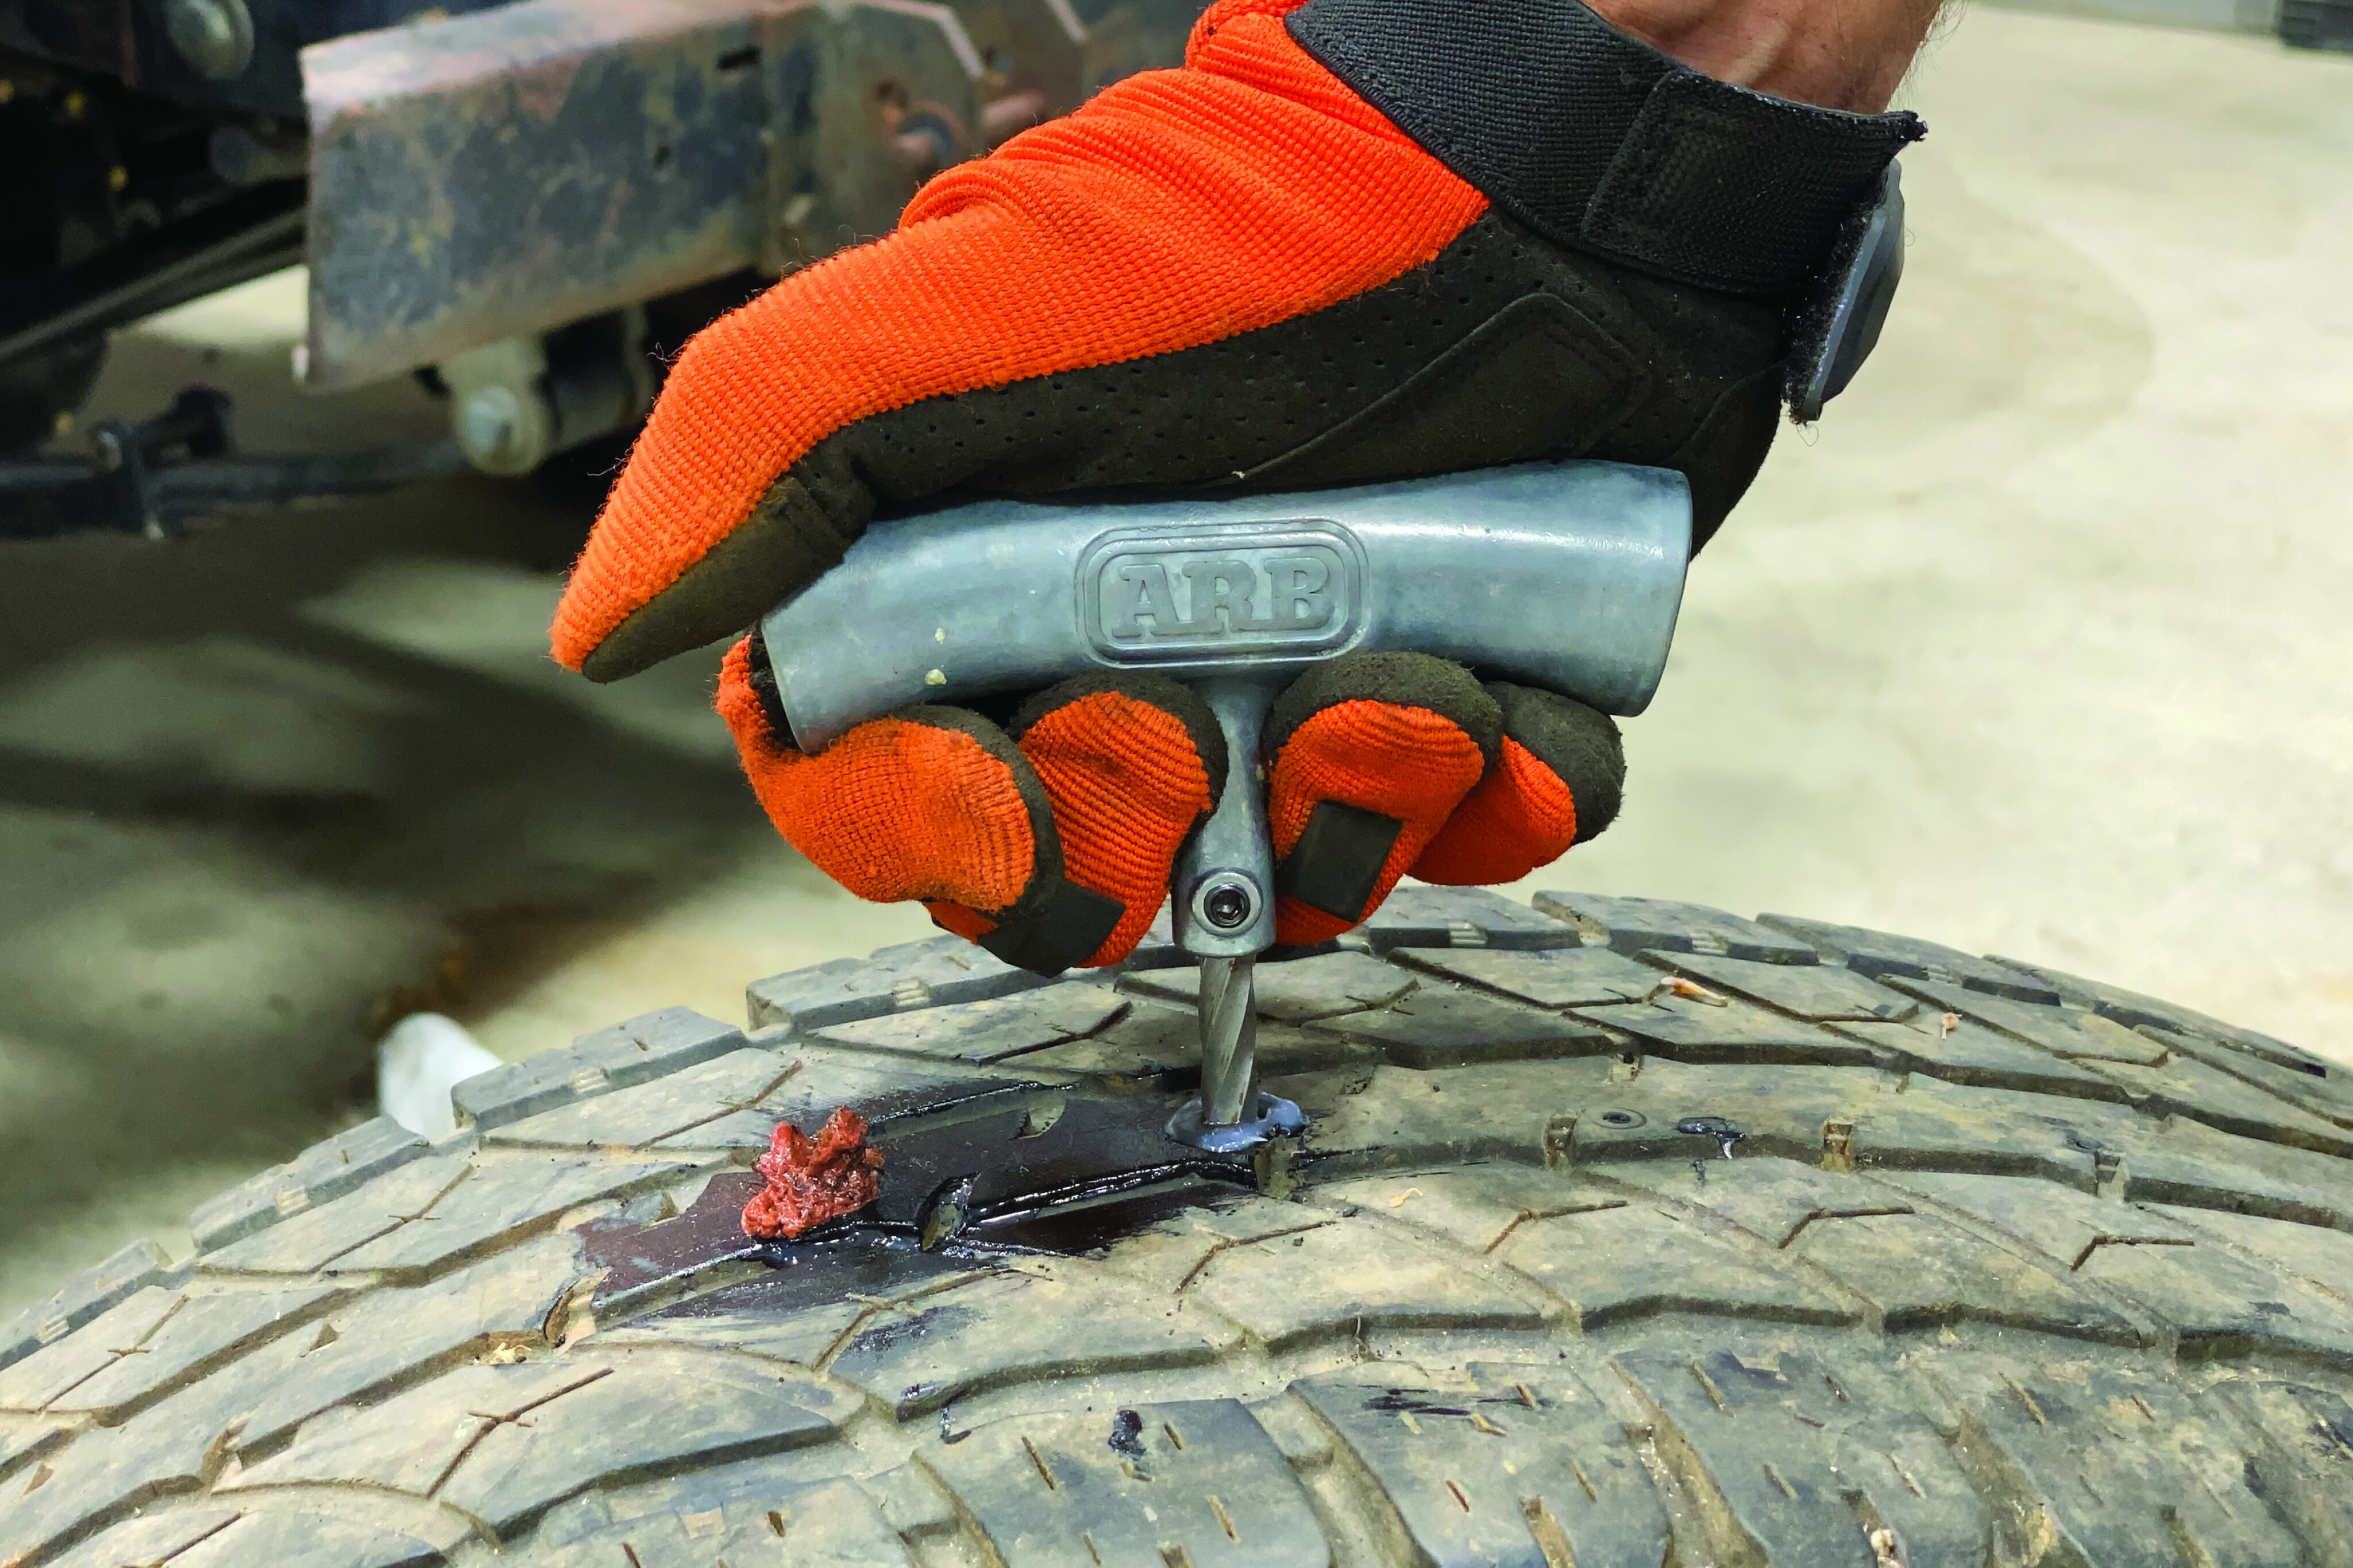
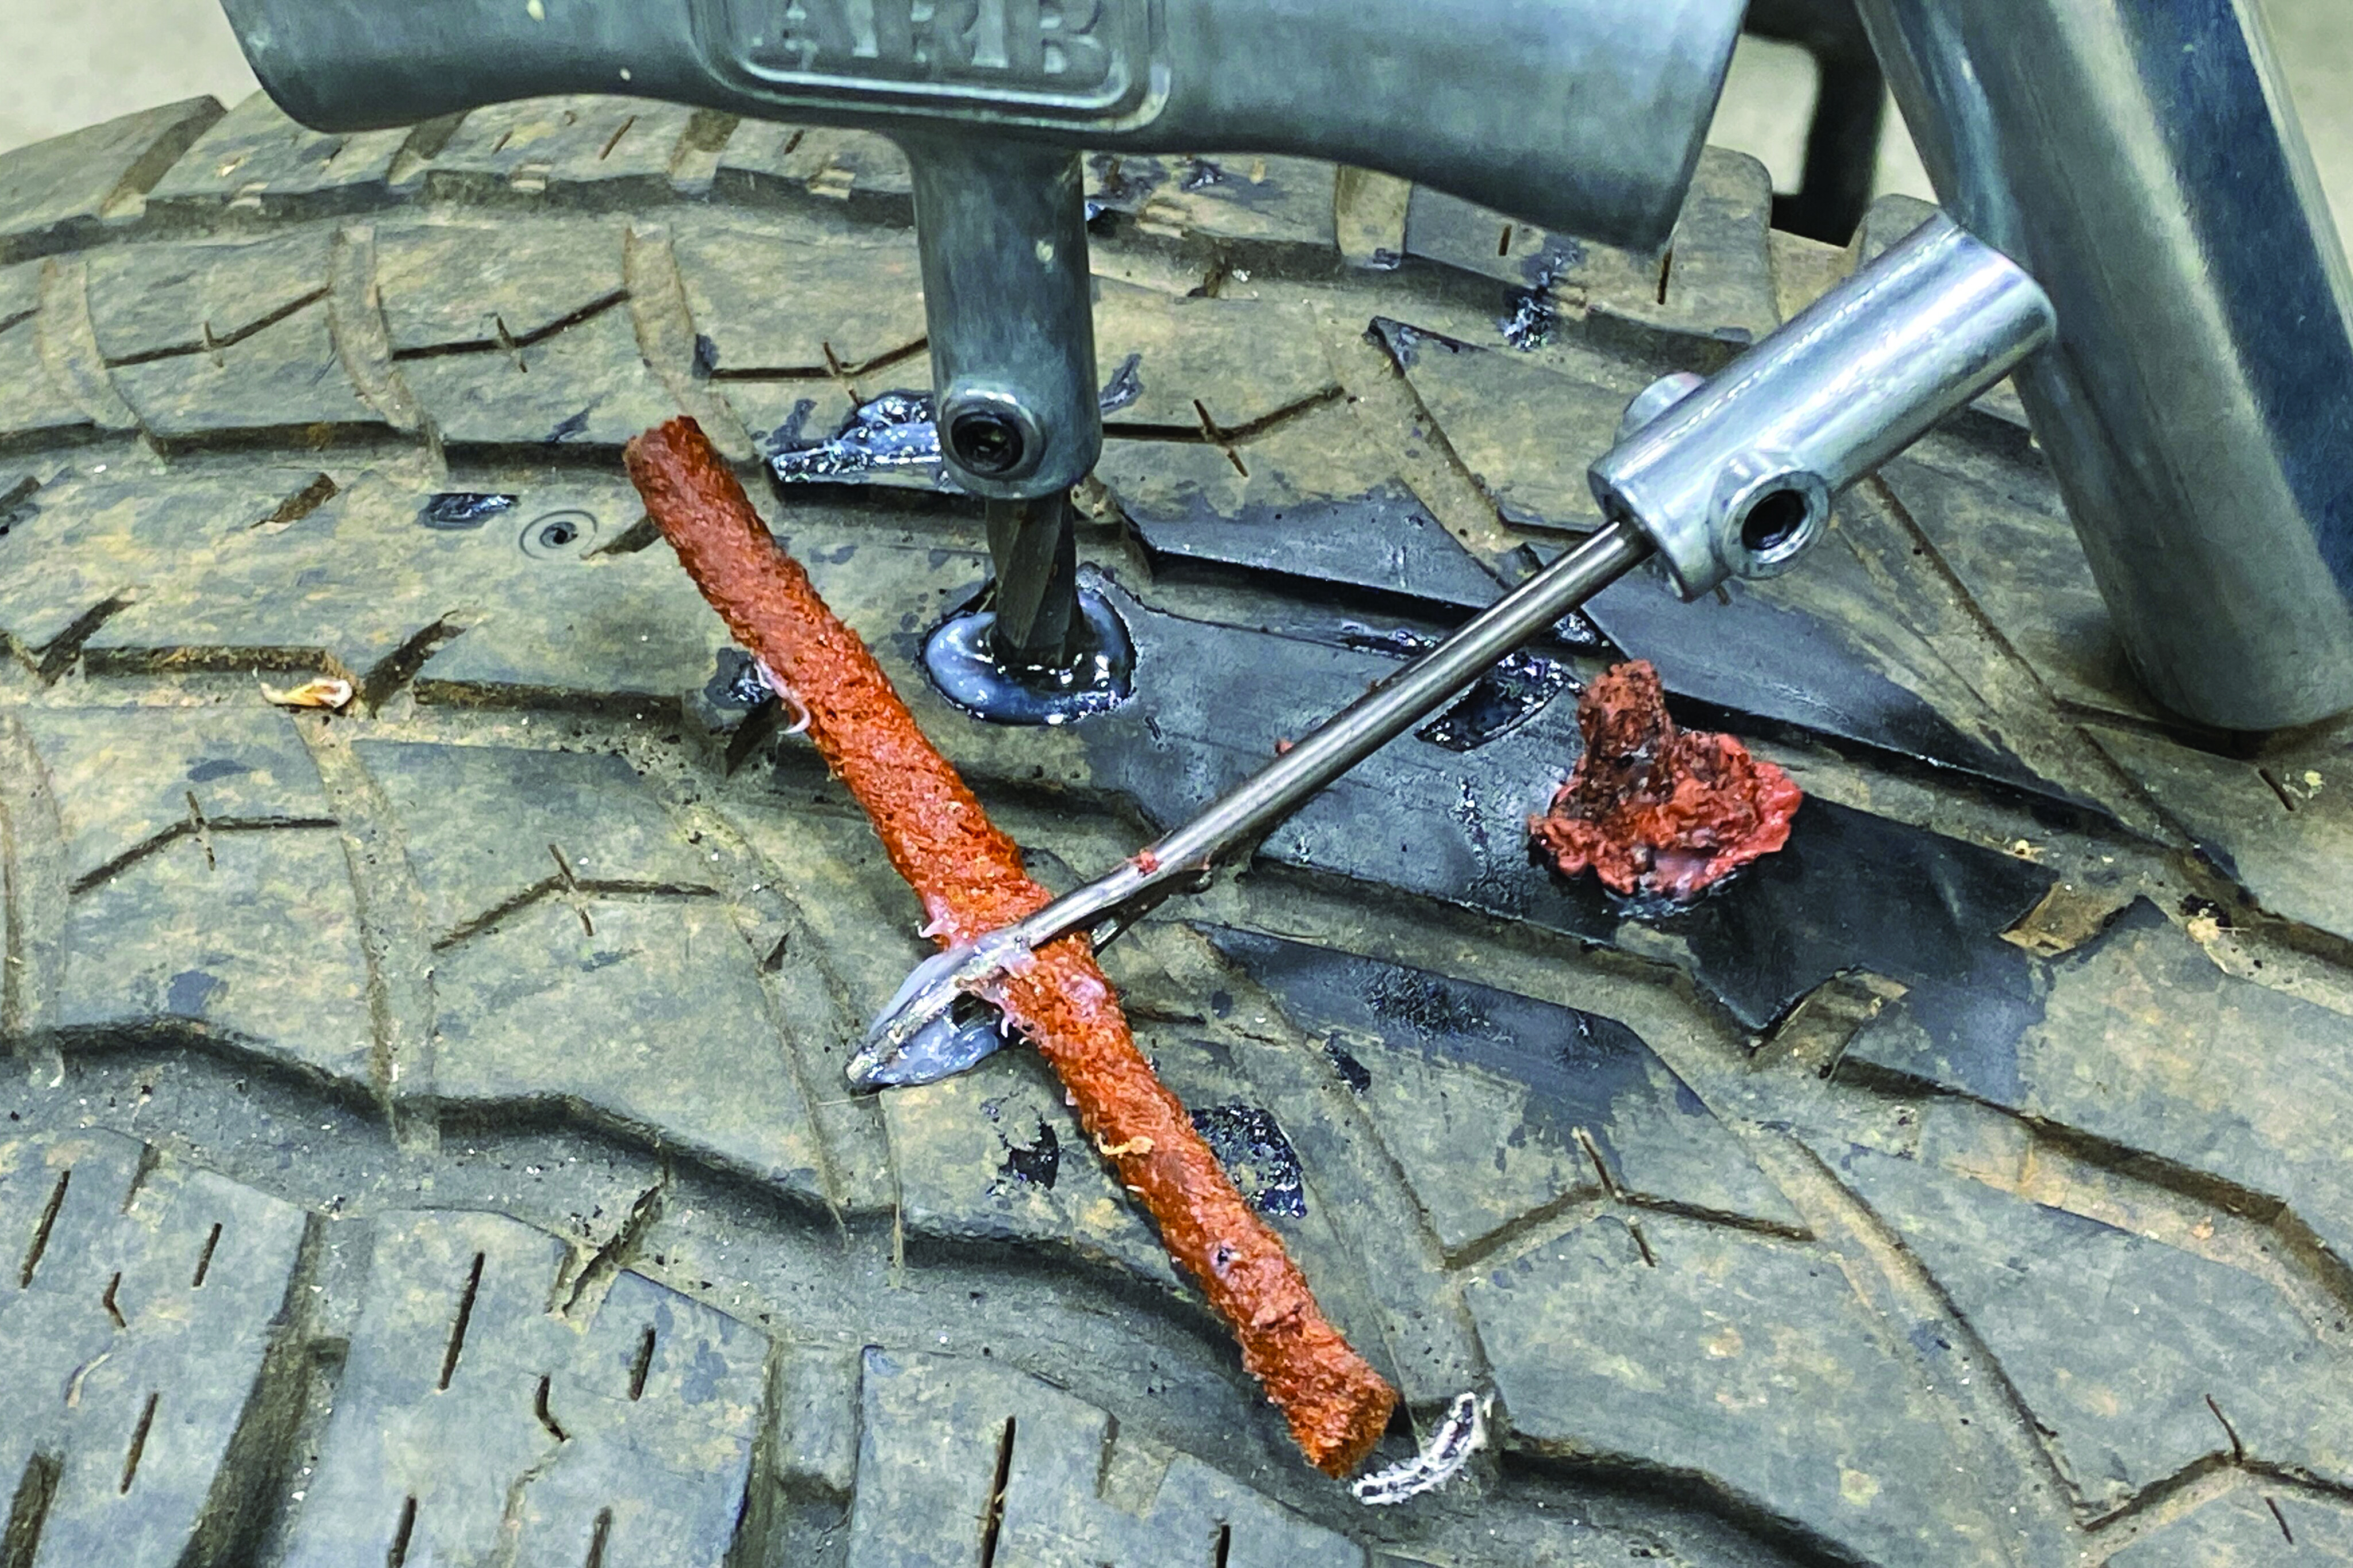
Pull the projectile out, paying attention to the angle in which it entered. This is important because you don’t want to cause additional damage by driving your reamer straight in when the hole is on an angle. Dip the business end of the reamer in lube and drive it in the hole, then slide it in and out a number of times while rotating the handle.
TIP: Make sure to insert the reamer on the same angle as the offending object entered the tyre.
35
Thread the end of a repair cord through the eyelet of the insertion tool, pull it halfway through and dip the tip in lube.
35
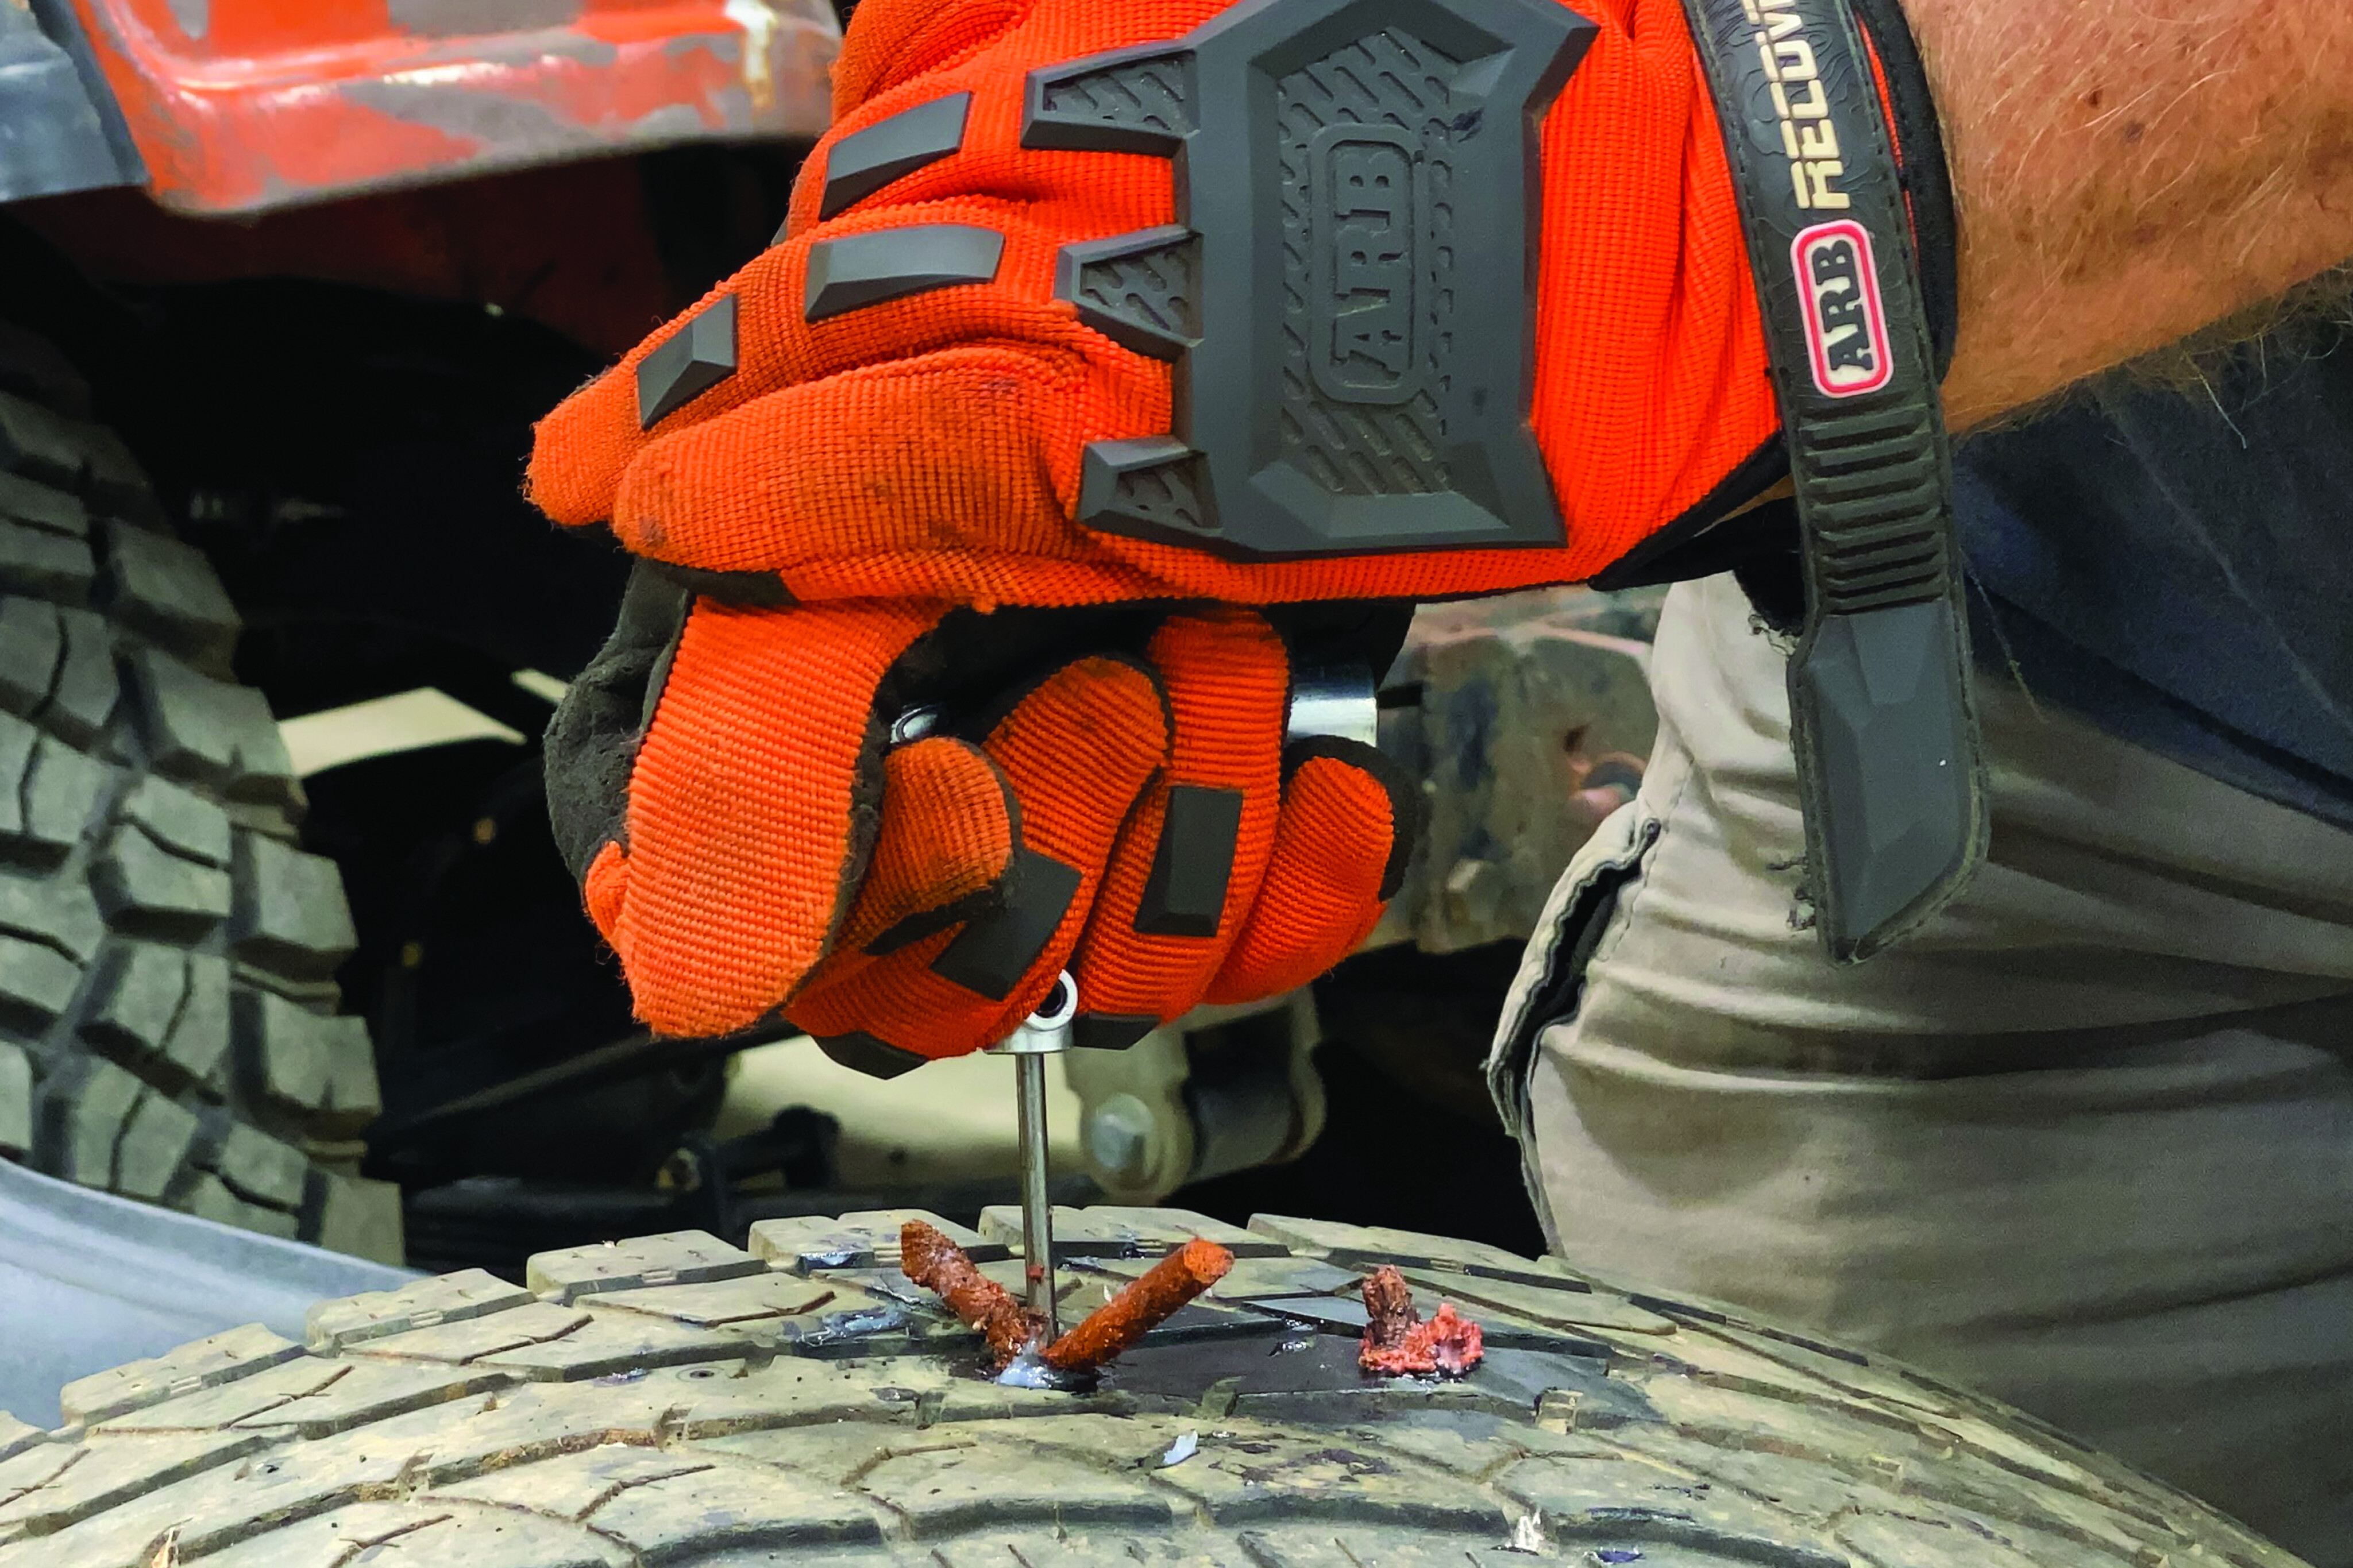
Pull the reamer and drive the cord in until only 1-2cm is exposed. Tyres are tough, and this might take a fist full of elbow grease.
35
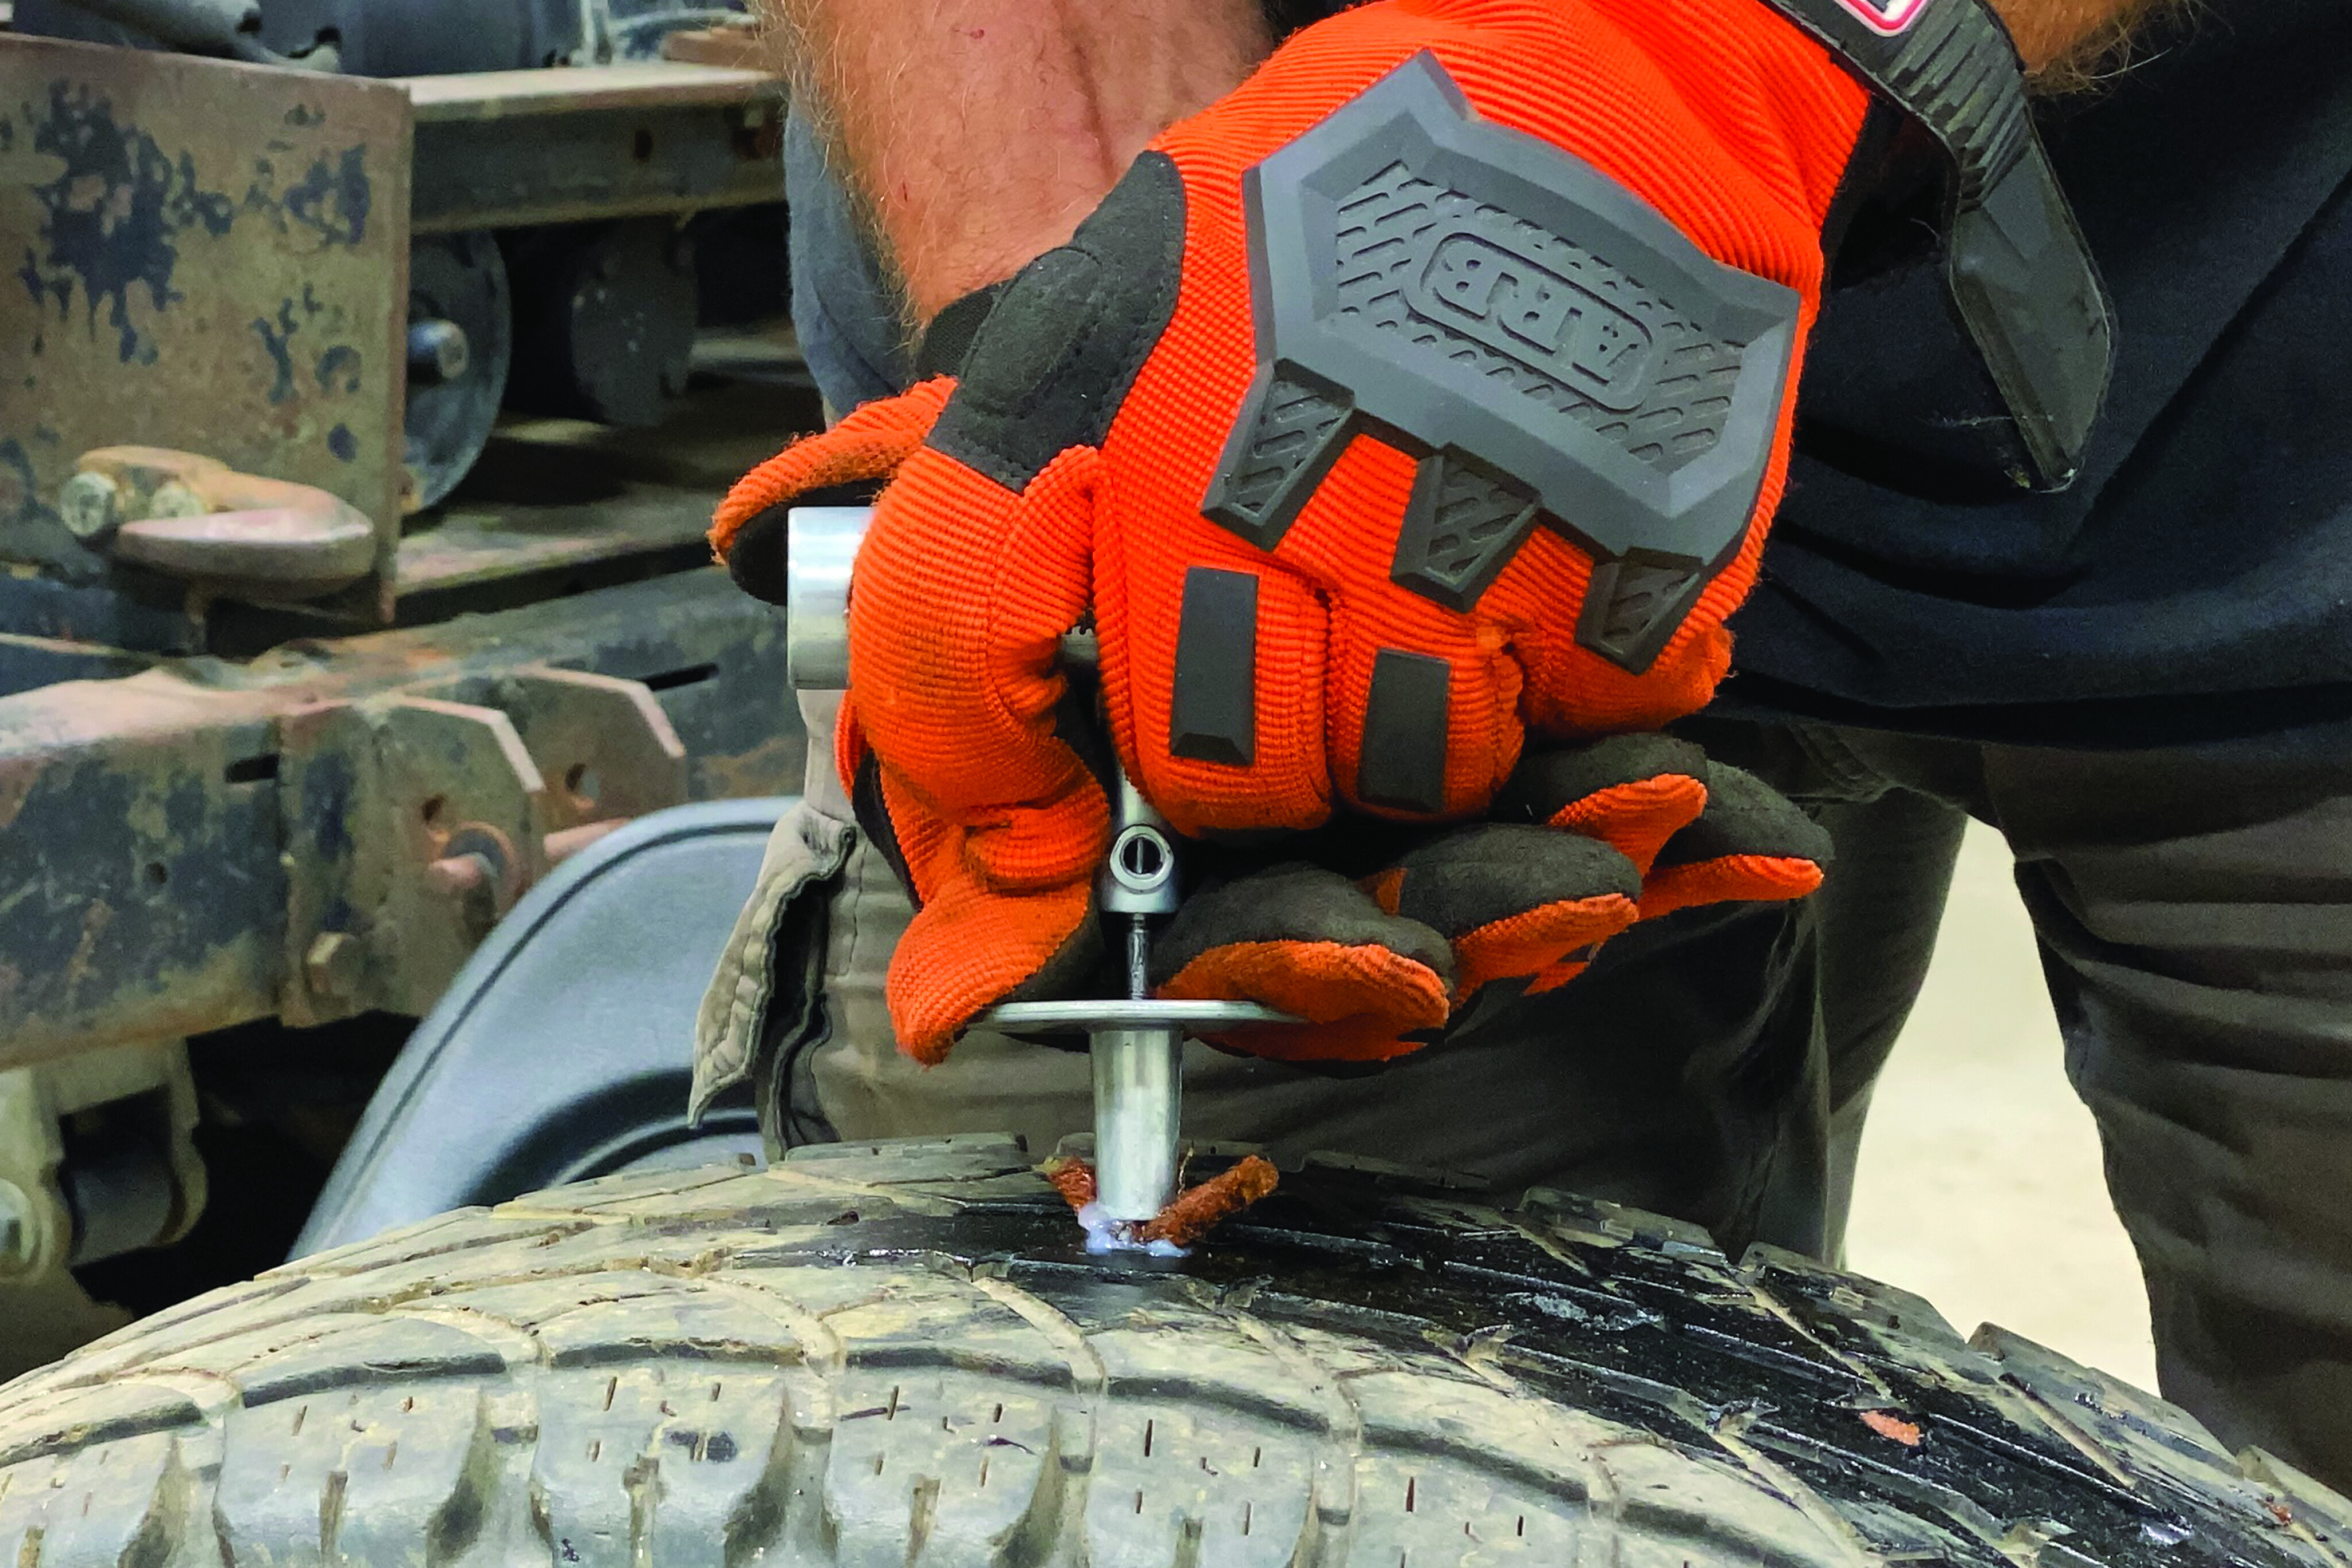
Plugs usually stay put as you remove the insertion tool, but if it has a retainer, press it against the exposed cord as you pull back on the handle. Trim off the exposed cord with a razor and voilà, you are ready to air up.Most punctures only require one repair cord, but a larger hole might require two or three.
TIP: After any tyre repair, pour water over it to check for leaks (bubbling).
35
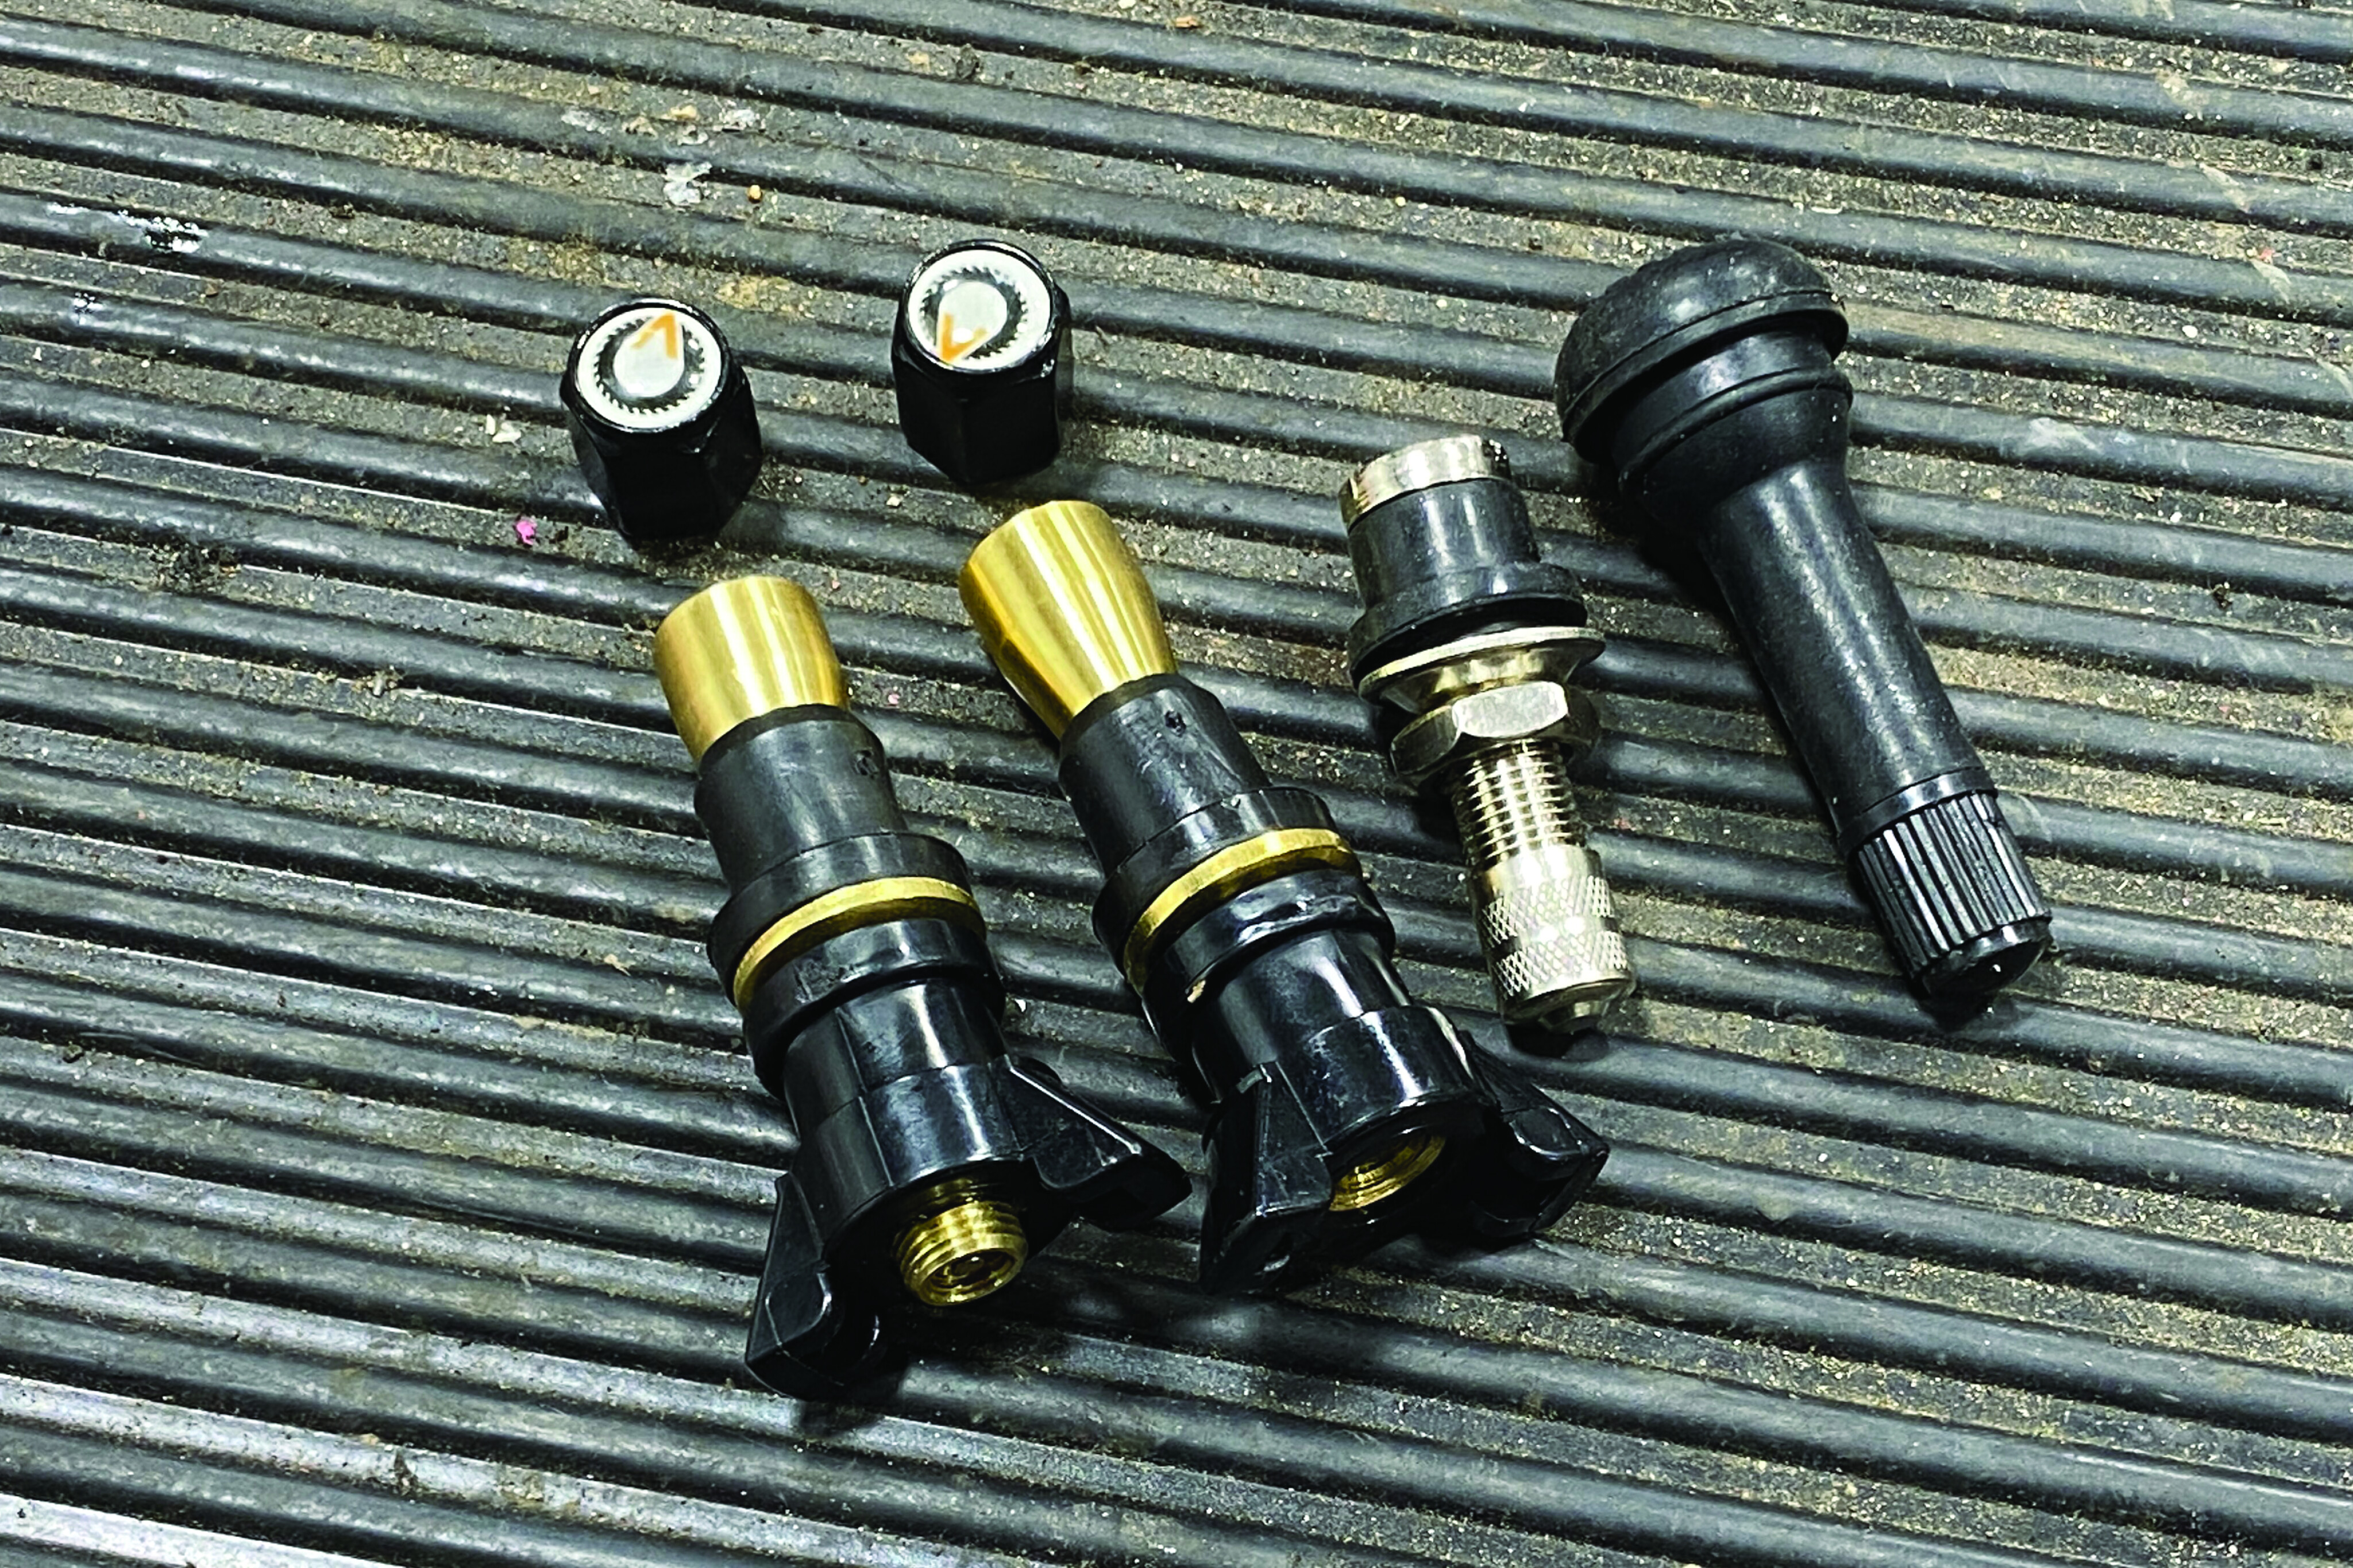
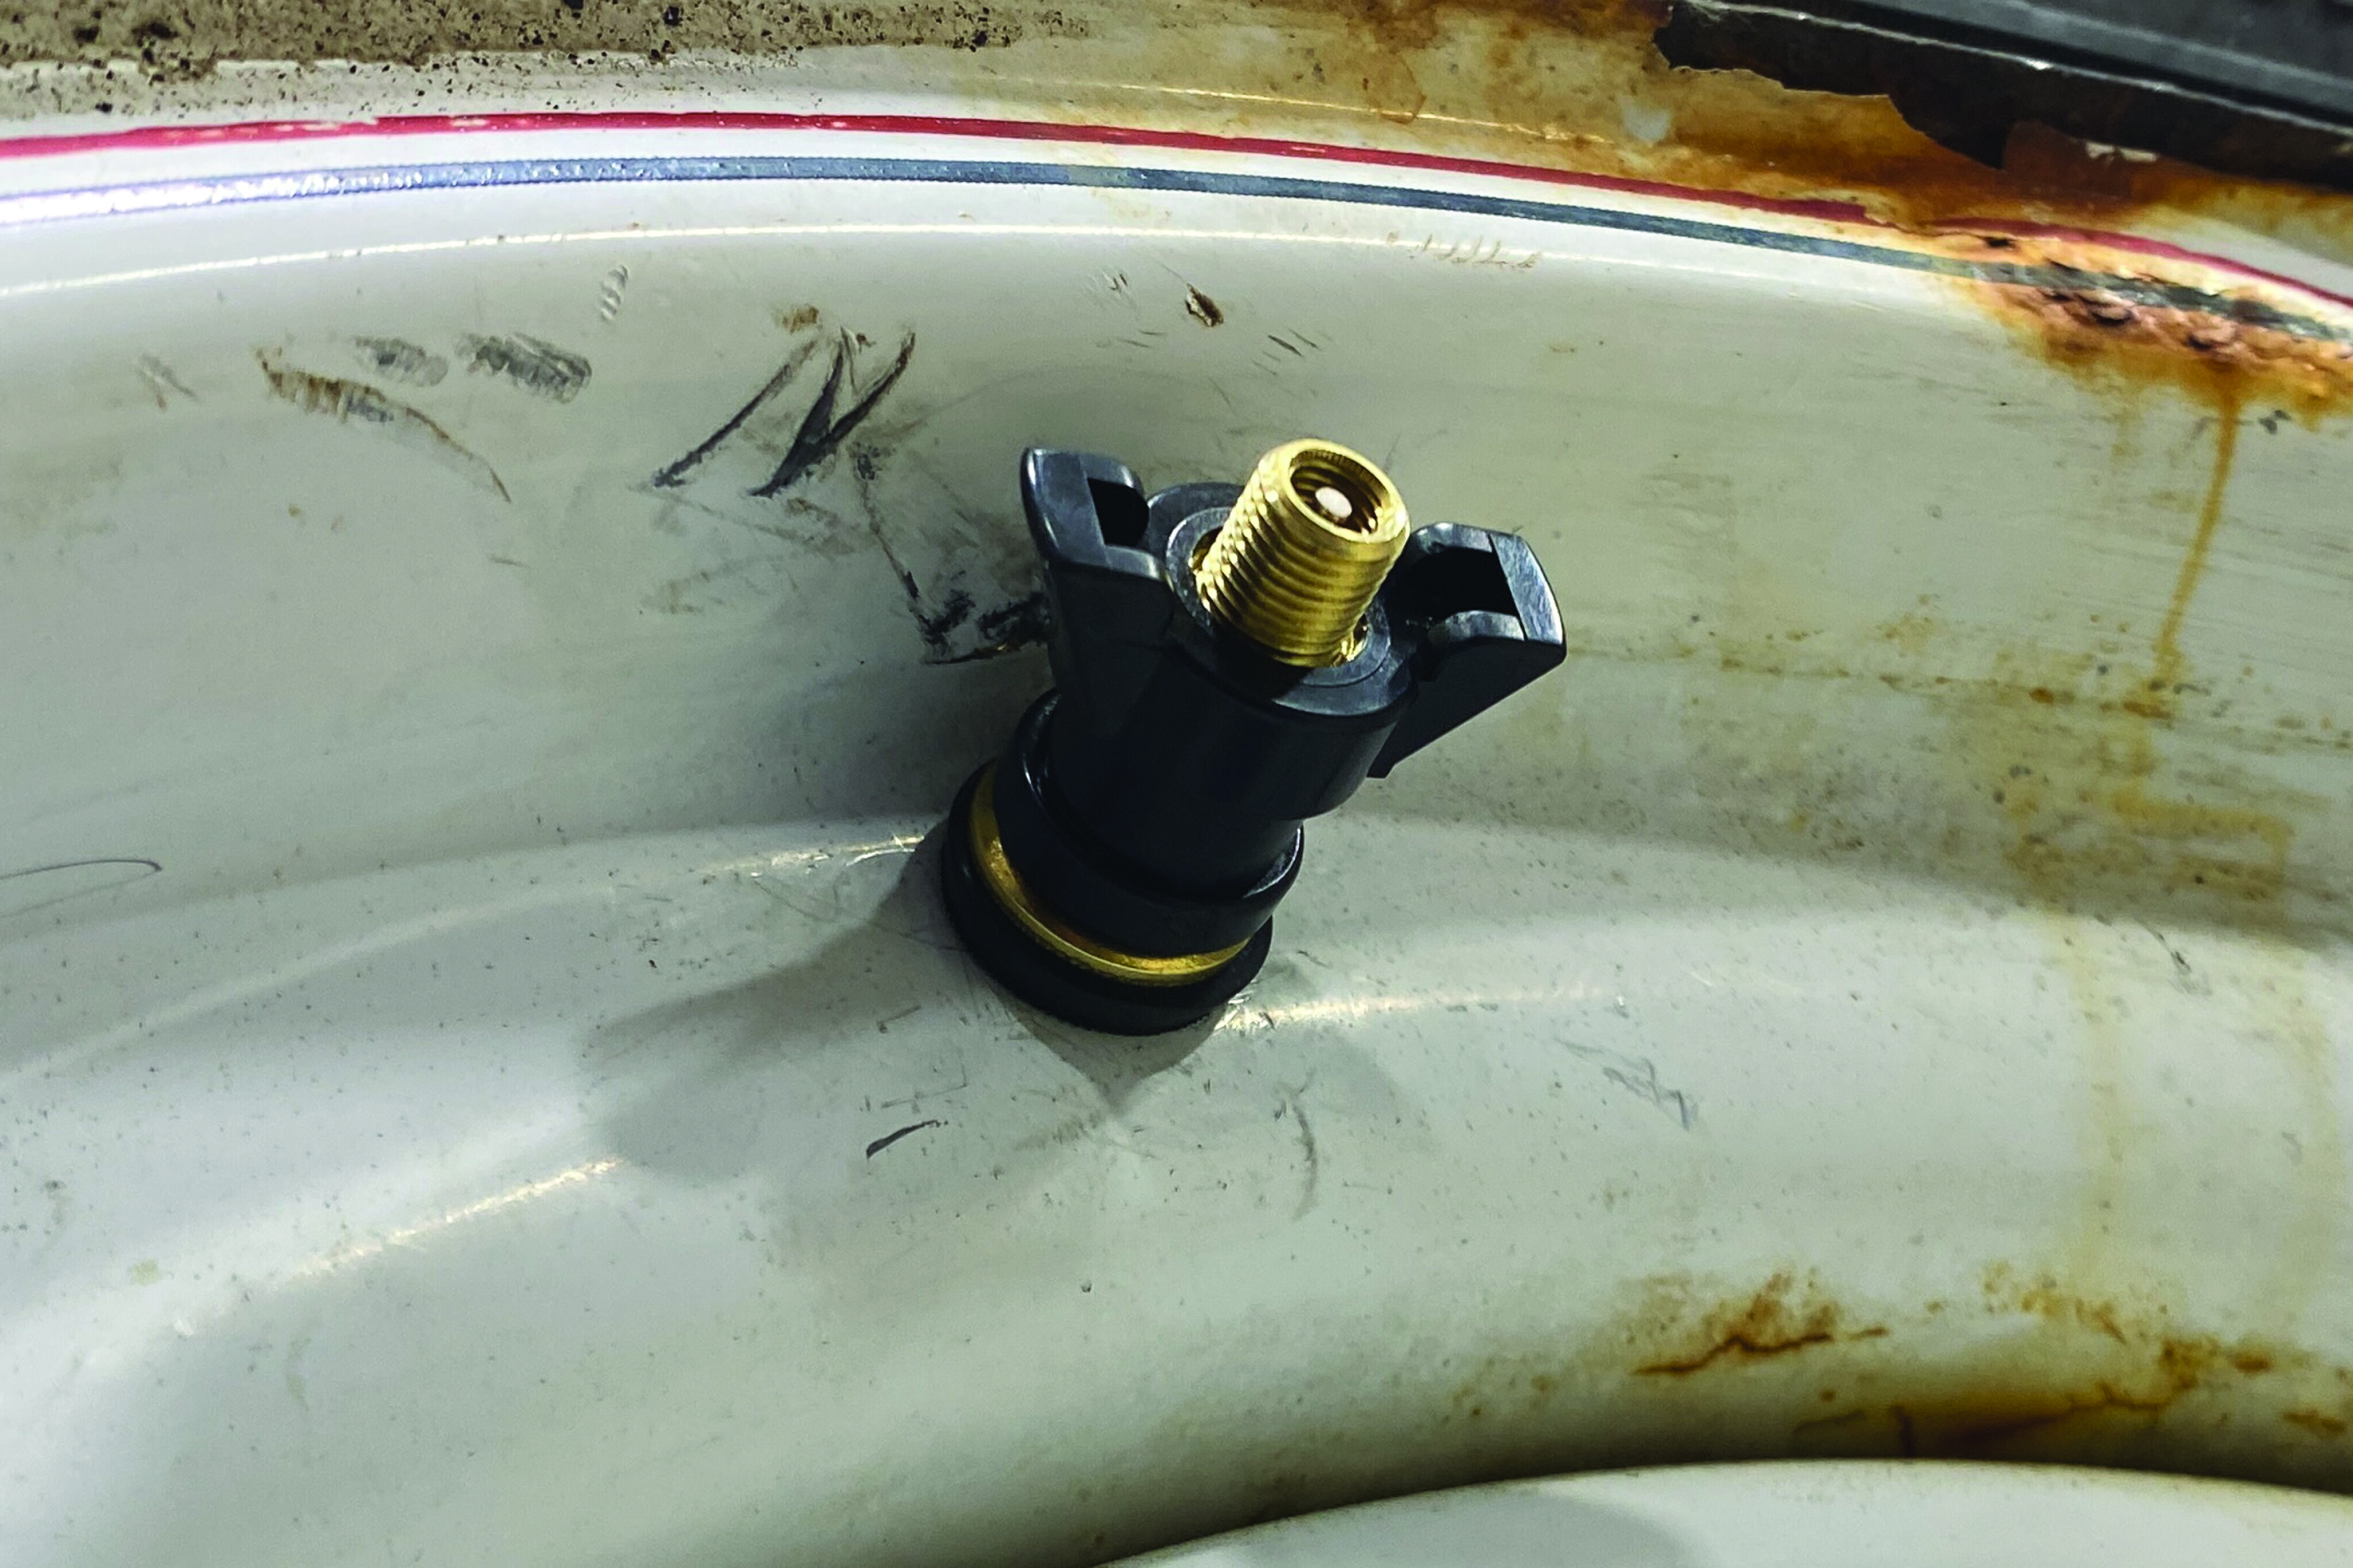
Left to right: Colby Valve (2X), Power Tank temporary stem, and generic valve stem.
Valve Stem Woes
35
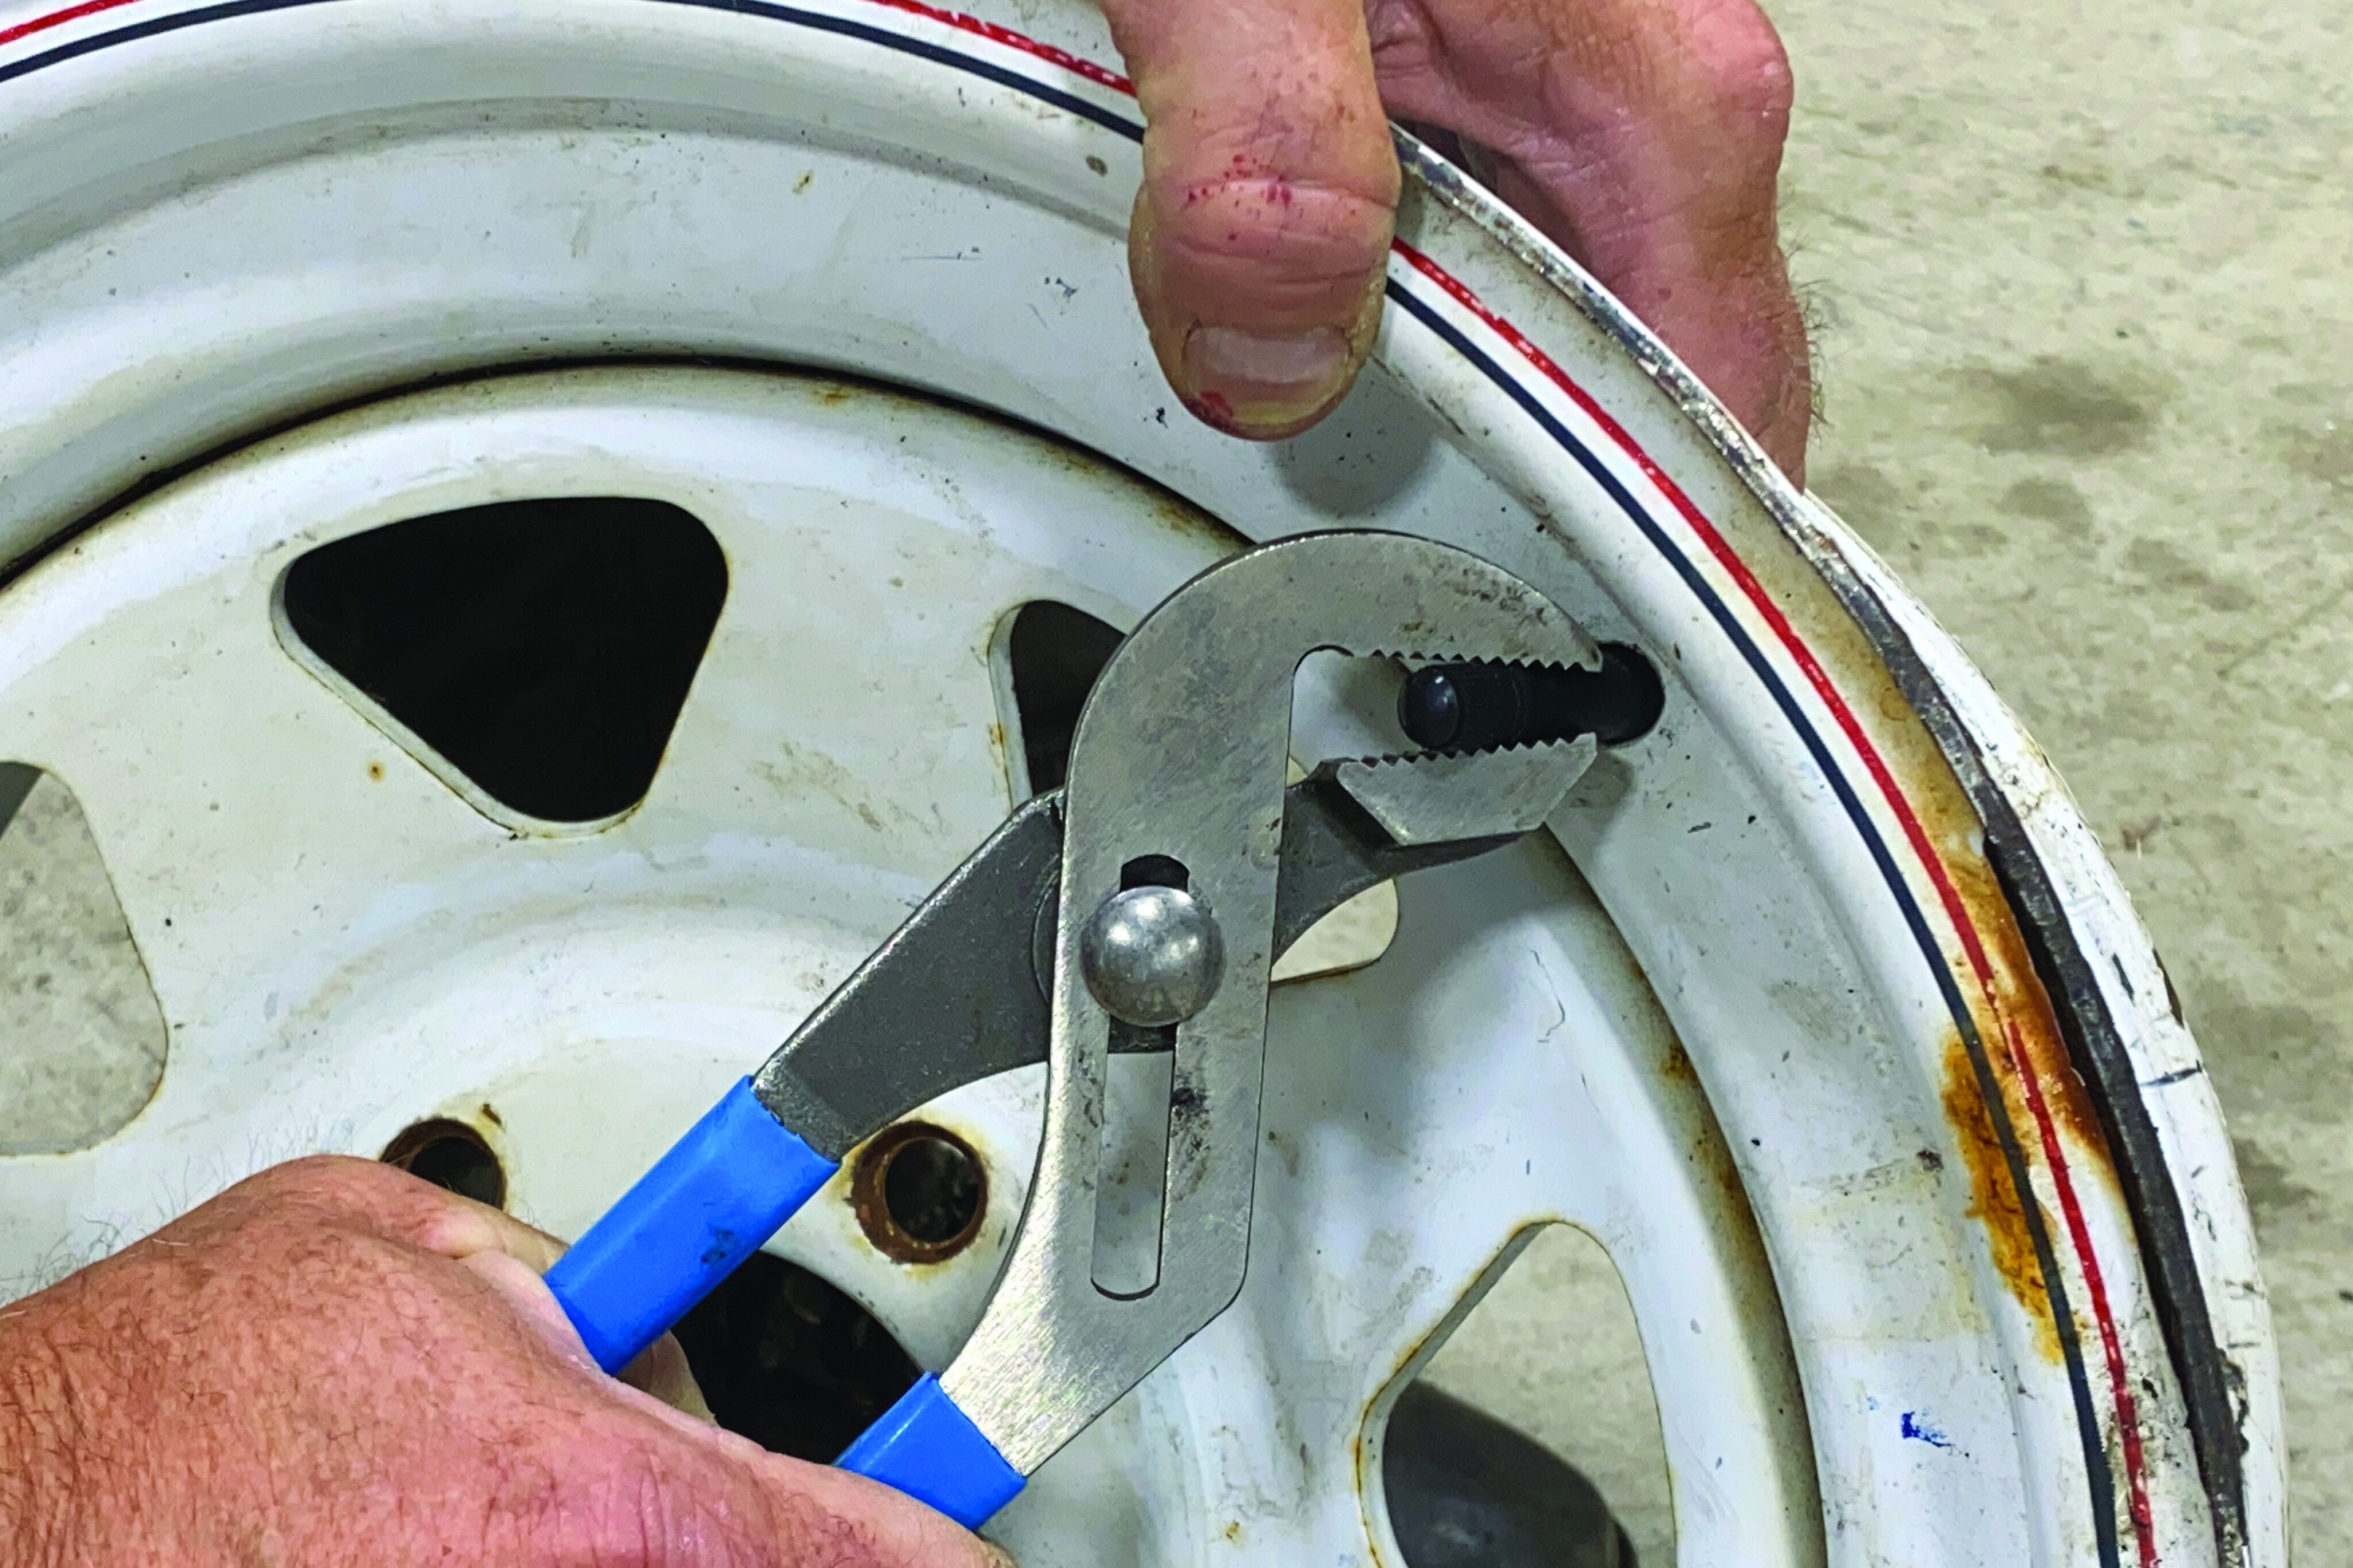
Replacing a broken valve stem requires unseating the bead on at least one side. After removing the damaged stem, slip a hand inside the rim and insert a new stem. Grab it from the outside with pliers (be sure not to grab the threads) and pull it through until the rubber shoulder fully seats in the opening. A metal stem will be the same process, but you’ll need a deep socket to tighten the exterior nut.
35
Emergency stems are a great option for a temporary fix without dismounting the tyre. One is provided in Power Tank’s kit, but I prefer the Colby Valve offered by GlueTread. Installation involves cutting the damaged stem off and pushing any residual into the tyre. Fully insert the Colby Valve, spin the wing nut down tight, air up, and you are back on the trail.

35
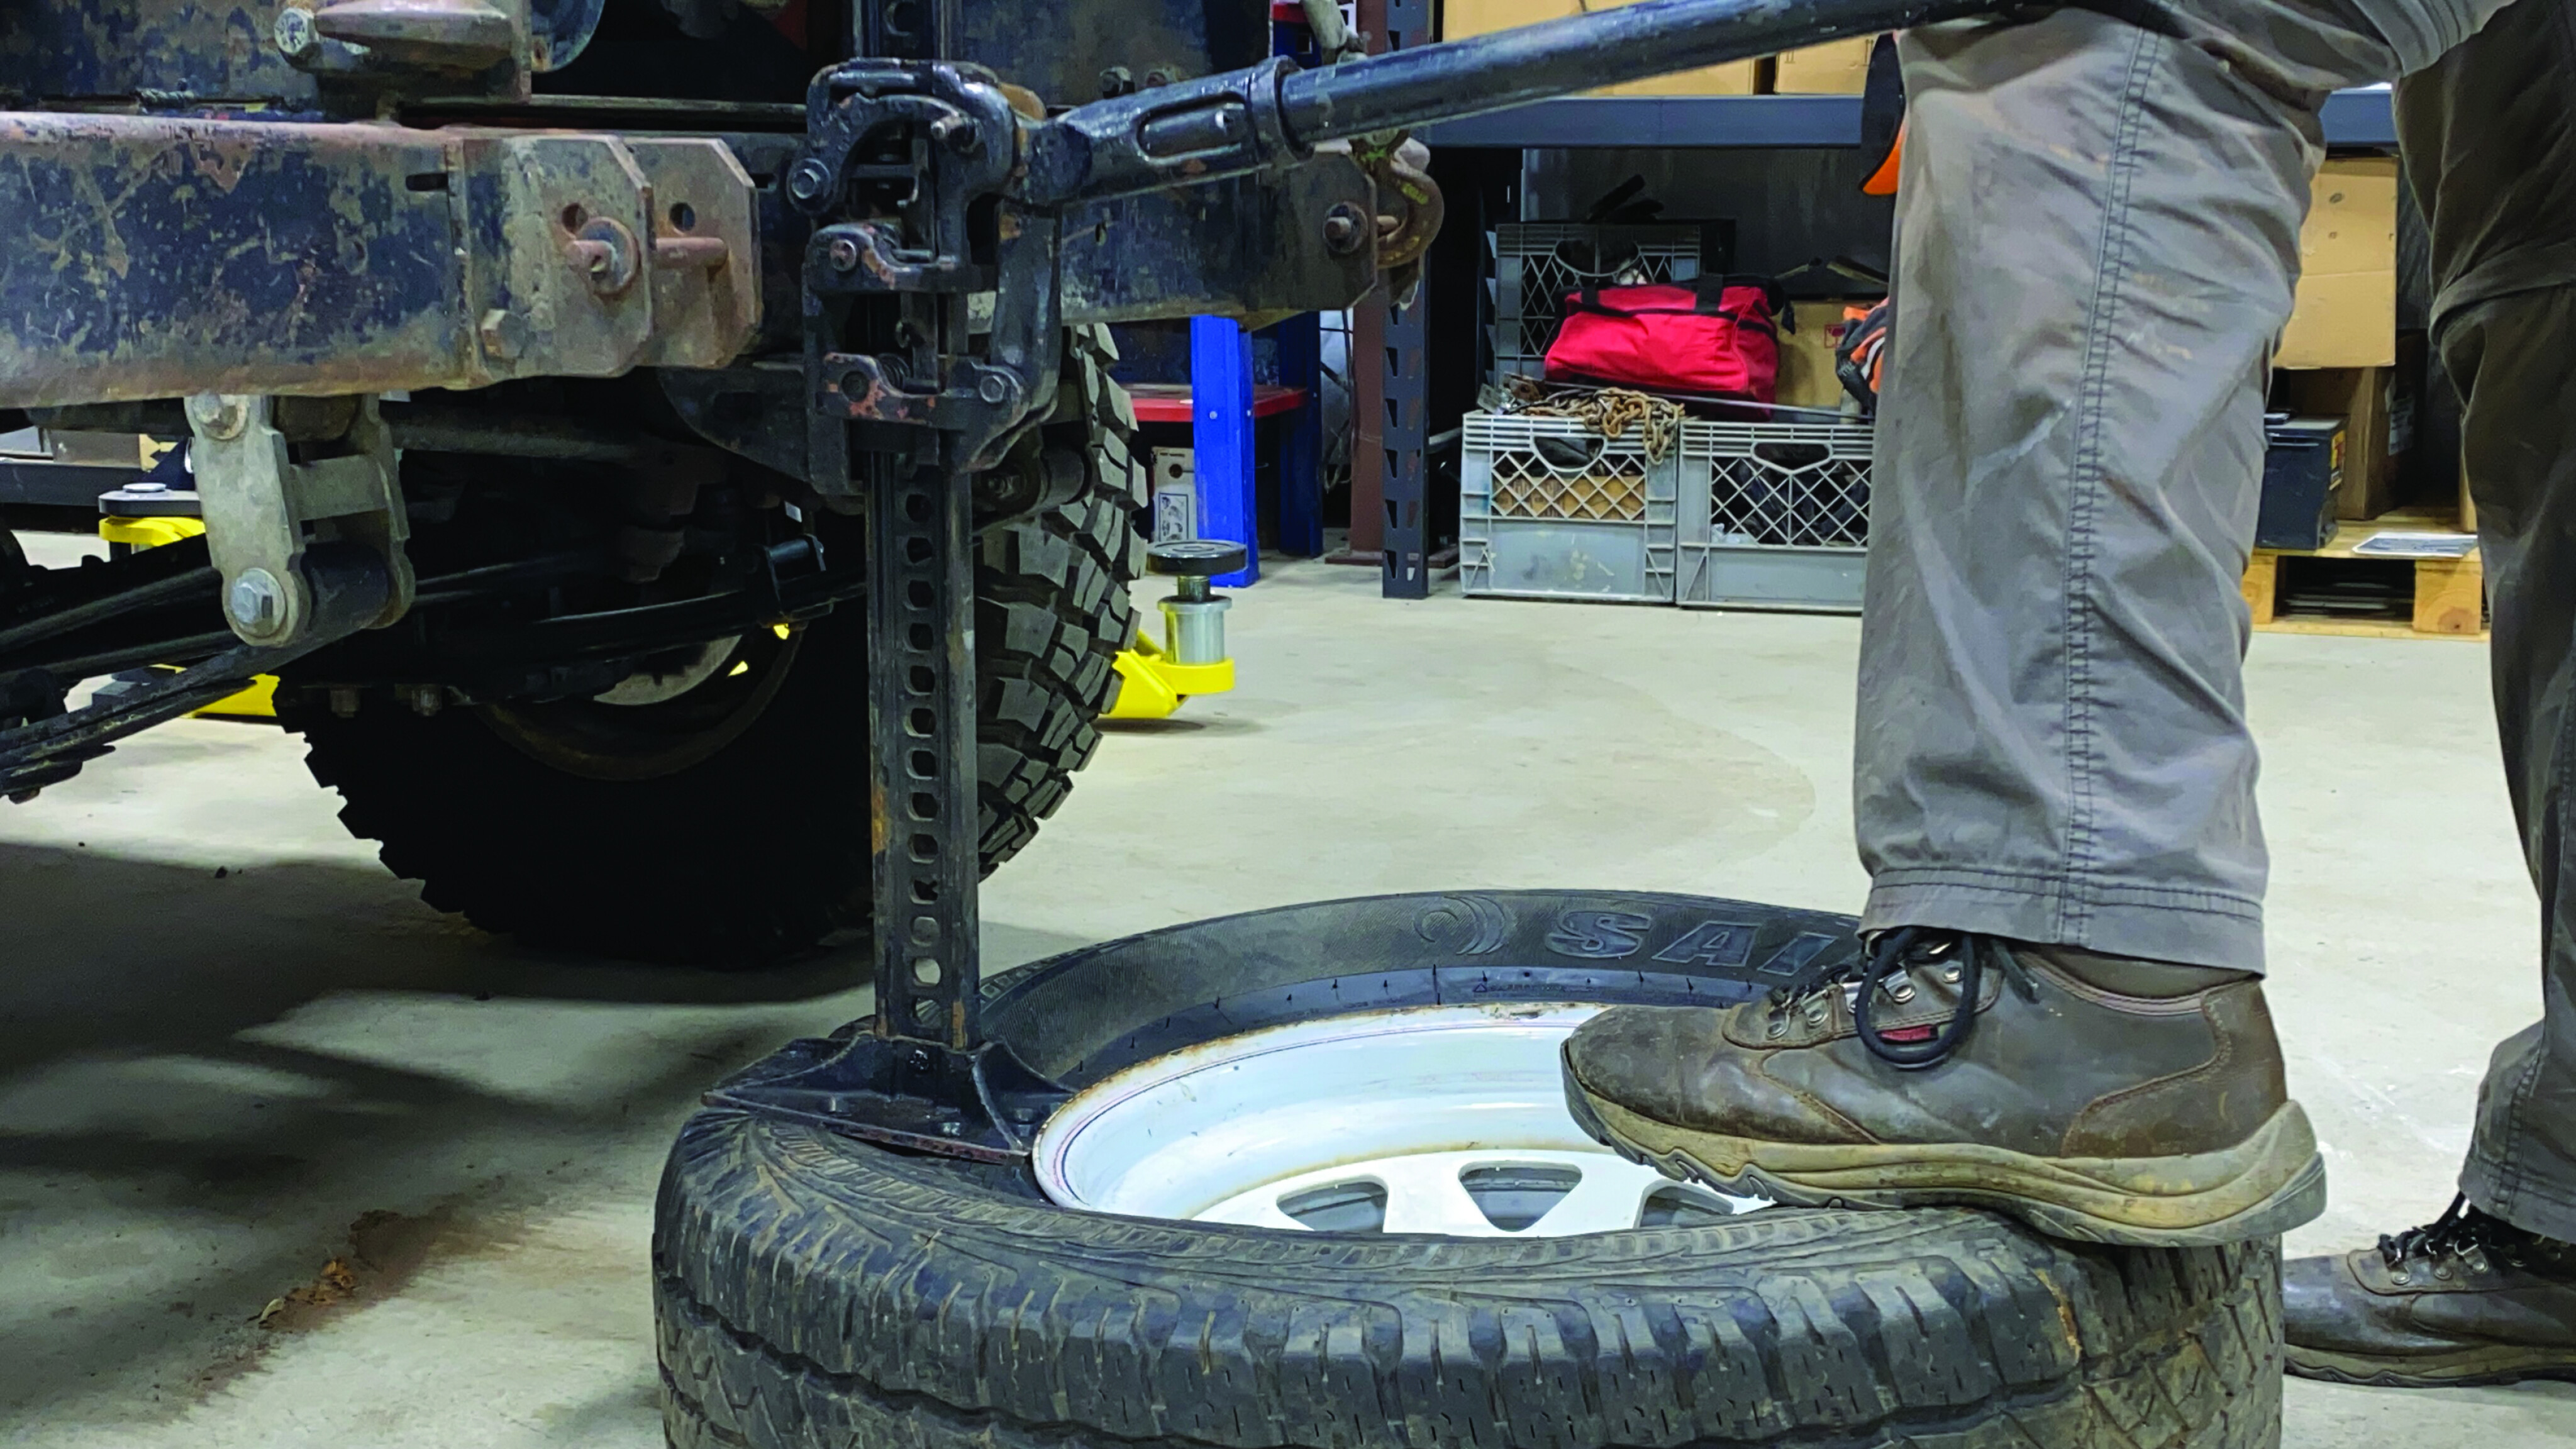
Tools for dismounting a tyre include a Hi-Lift jack, Tyrepliers and tyre spoons.
The R & R
That broken stem or a puncture that requires more than plugs to fix will necessitate dismounting the tyre from the rim.
Tools needed are a set of Tyrepliers or a Hi-Lift jack, and tyre irons, also called tyre spoons. You can get by with just the spoons and a Hi-Lift jack, but Tyrepliers makes the job much easier. Before you start, be sure the tyre is fully deflated and put a chalk mark on the tyre where the valve stem is.
Matching these marks when remounting will help to keep it semi-balanced. Also, have a squirt bottle of water or Campsuds on-hand to keep tyre/bead contact surfaces lubricated.
35
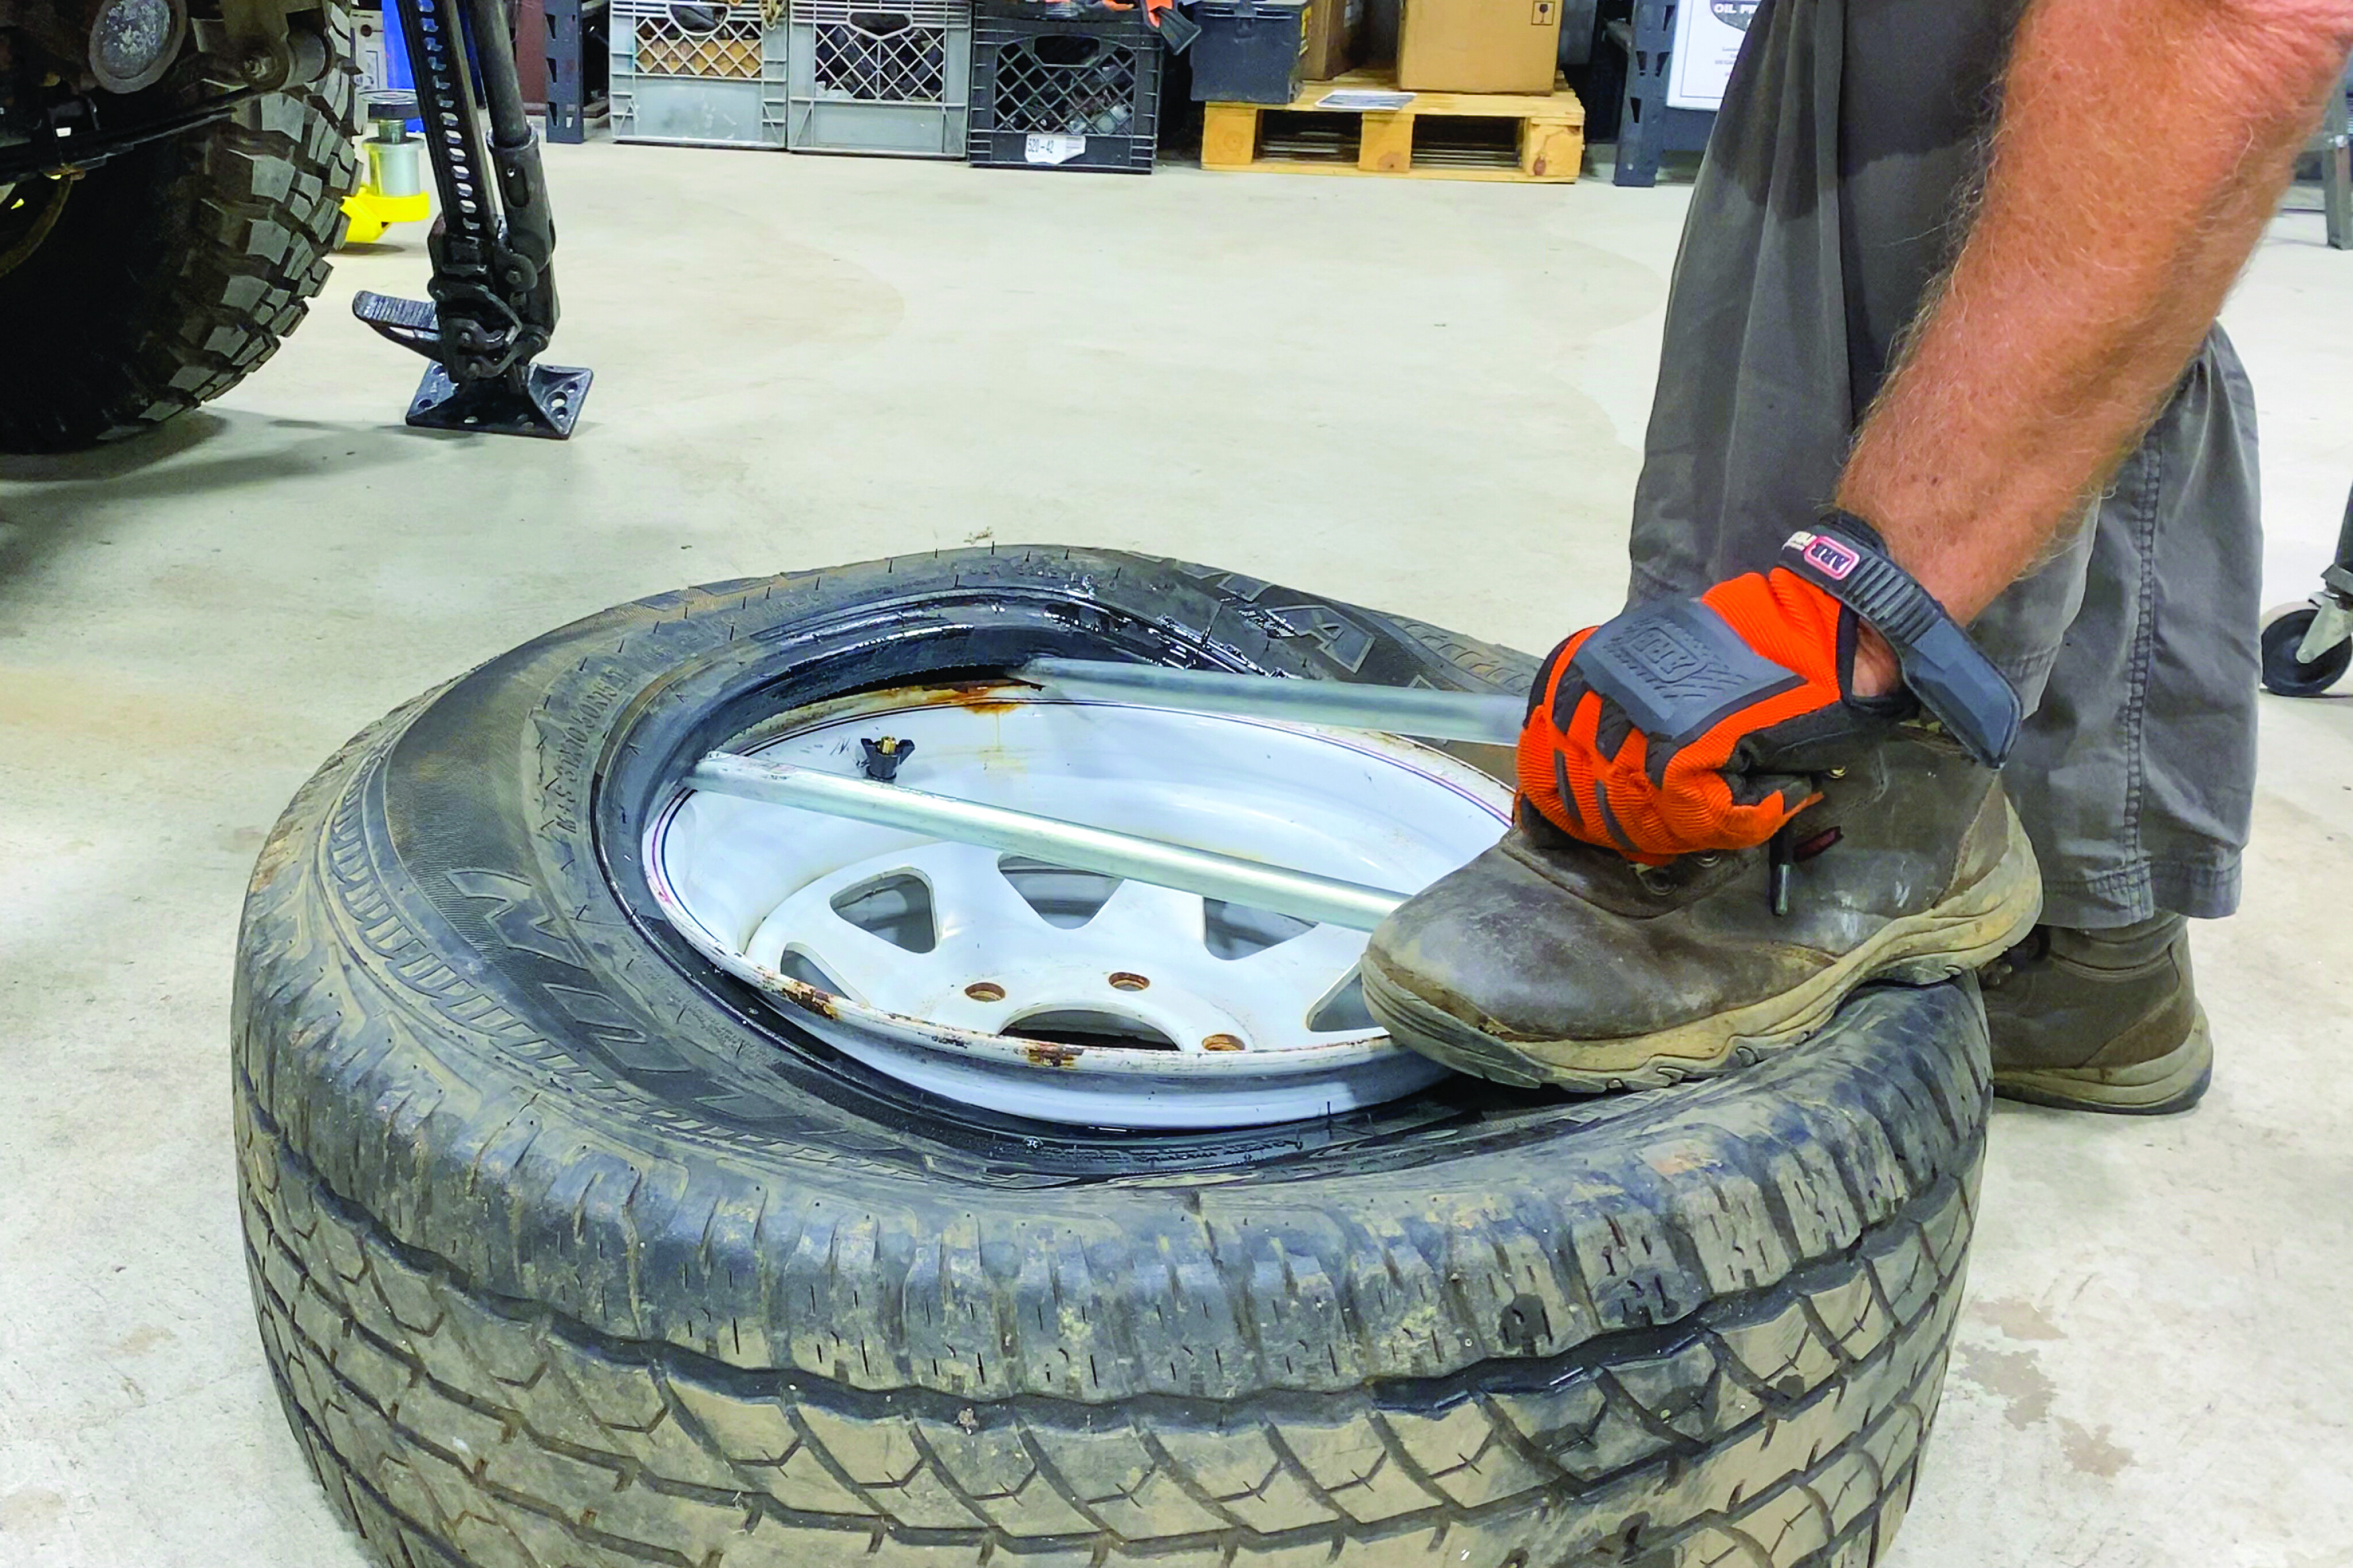
To break a bead with a Hi-Lift, place the wheel directly below a bumper with a suitable port for the jack’s nose. Set the jack’s foot on the tyre against the outer edge of the wheel and crank the lever. Pour water in the gap for lubrication, reposition, and repeat.
35
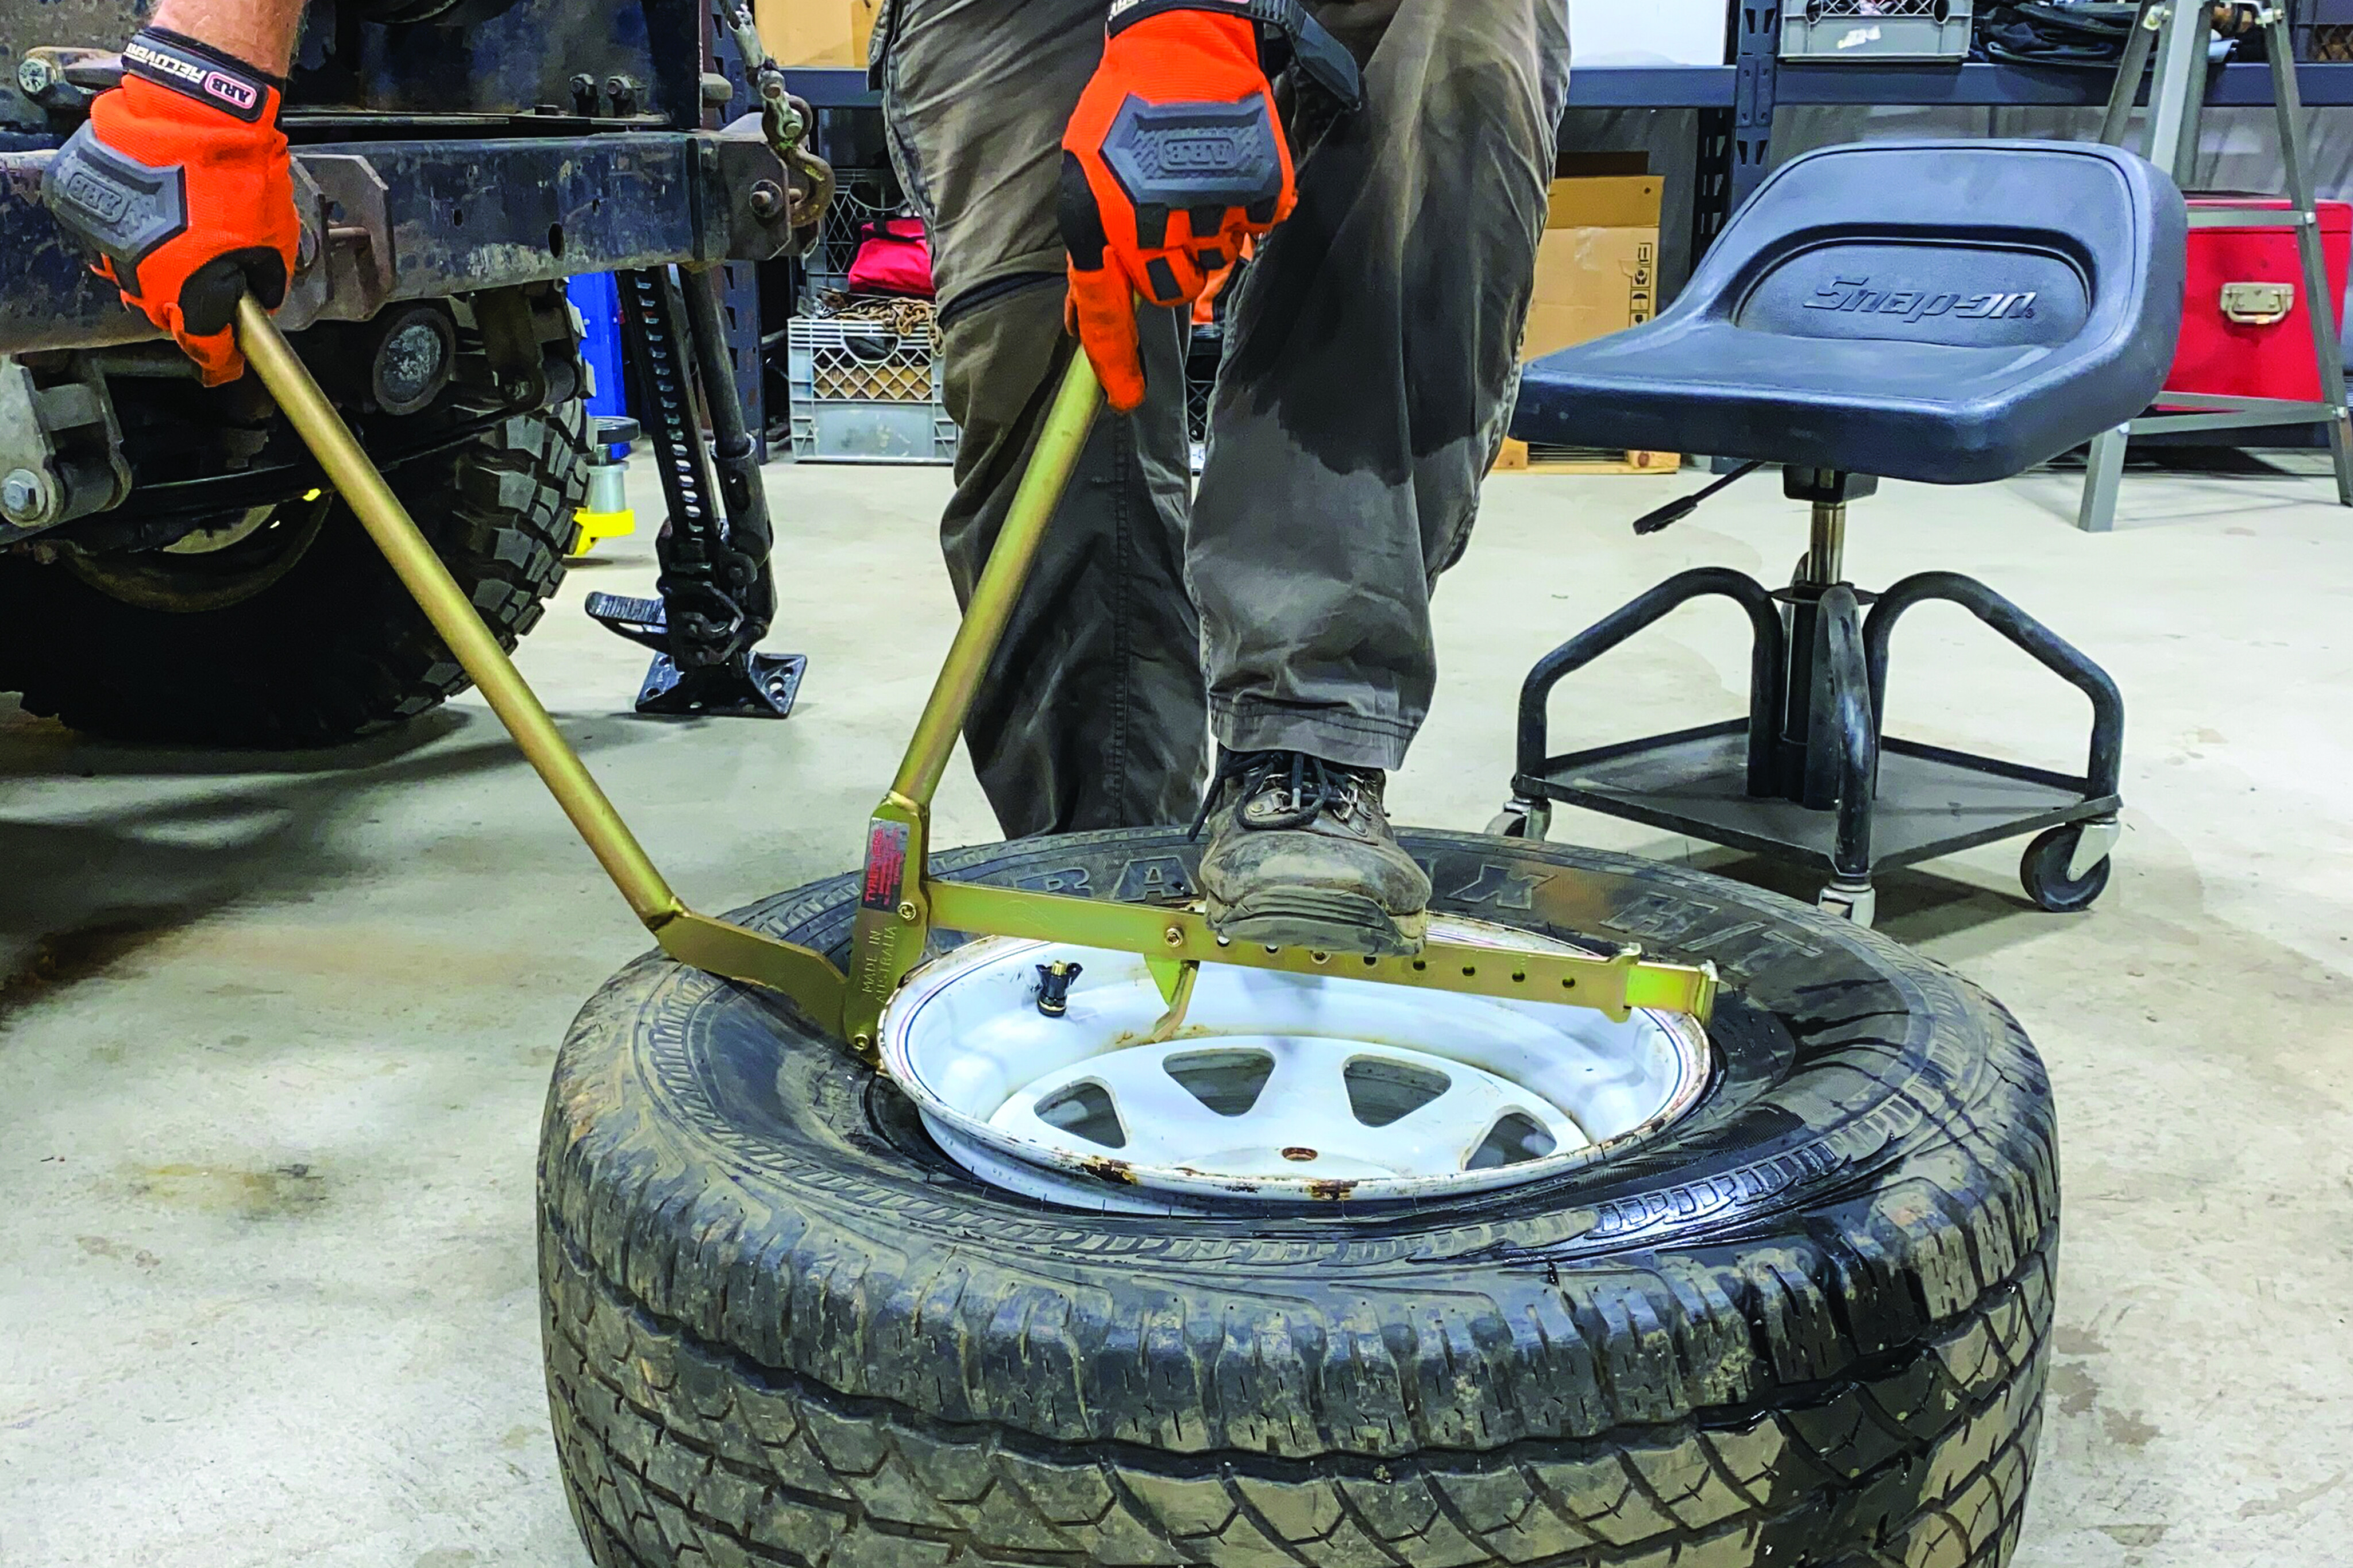
Tyrepliers consist of three articulating ‘arms.’ The base arm has a single claw on one end, a double claw on the other, and adjustment points allowing it to work with rims between 13 and 18 inches. Place the single claw between the tyre and rim opposite the valve stem and give it a whack with a mallet, enough for the claw to catch the rim’s lip. Put your foot on the base arm, then repeat the process with the double claw. The two round arms will be near vertical. Keeping pressure on the base, grab both handles and pull them apart like a wishbone, the outbound lever doing most of the work. With a section of bead separated from the rim, move the operation 30 degrees left or right and repeat. Success… now flop the wheel over and do the other side.
35
Dismounting the tyre requires several large pry bars or tyre spoons. Lay the tyre on the ground and slide one iron between the tyre and rim. Step on the opposite side with enough weight to press the bead into the well of the rim (narrowest part). Pull up on the inserted iron until the bead rolls over the rim’s edge, then shove another iron in a few inches to the side. Work your way around a few inches at a time. Make sure to keep a tight grip on them. If they take to the skies, they can break a jaw.
TIP: Lubricating the tyre/bead interface with soapy water will make dismounting and mounting much easier.
35
The Extreme Outback kit includes patches from mini to massive.
We Don’t Need No Stinking Patches?
35
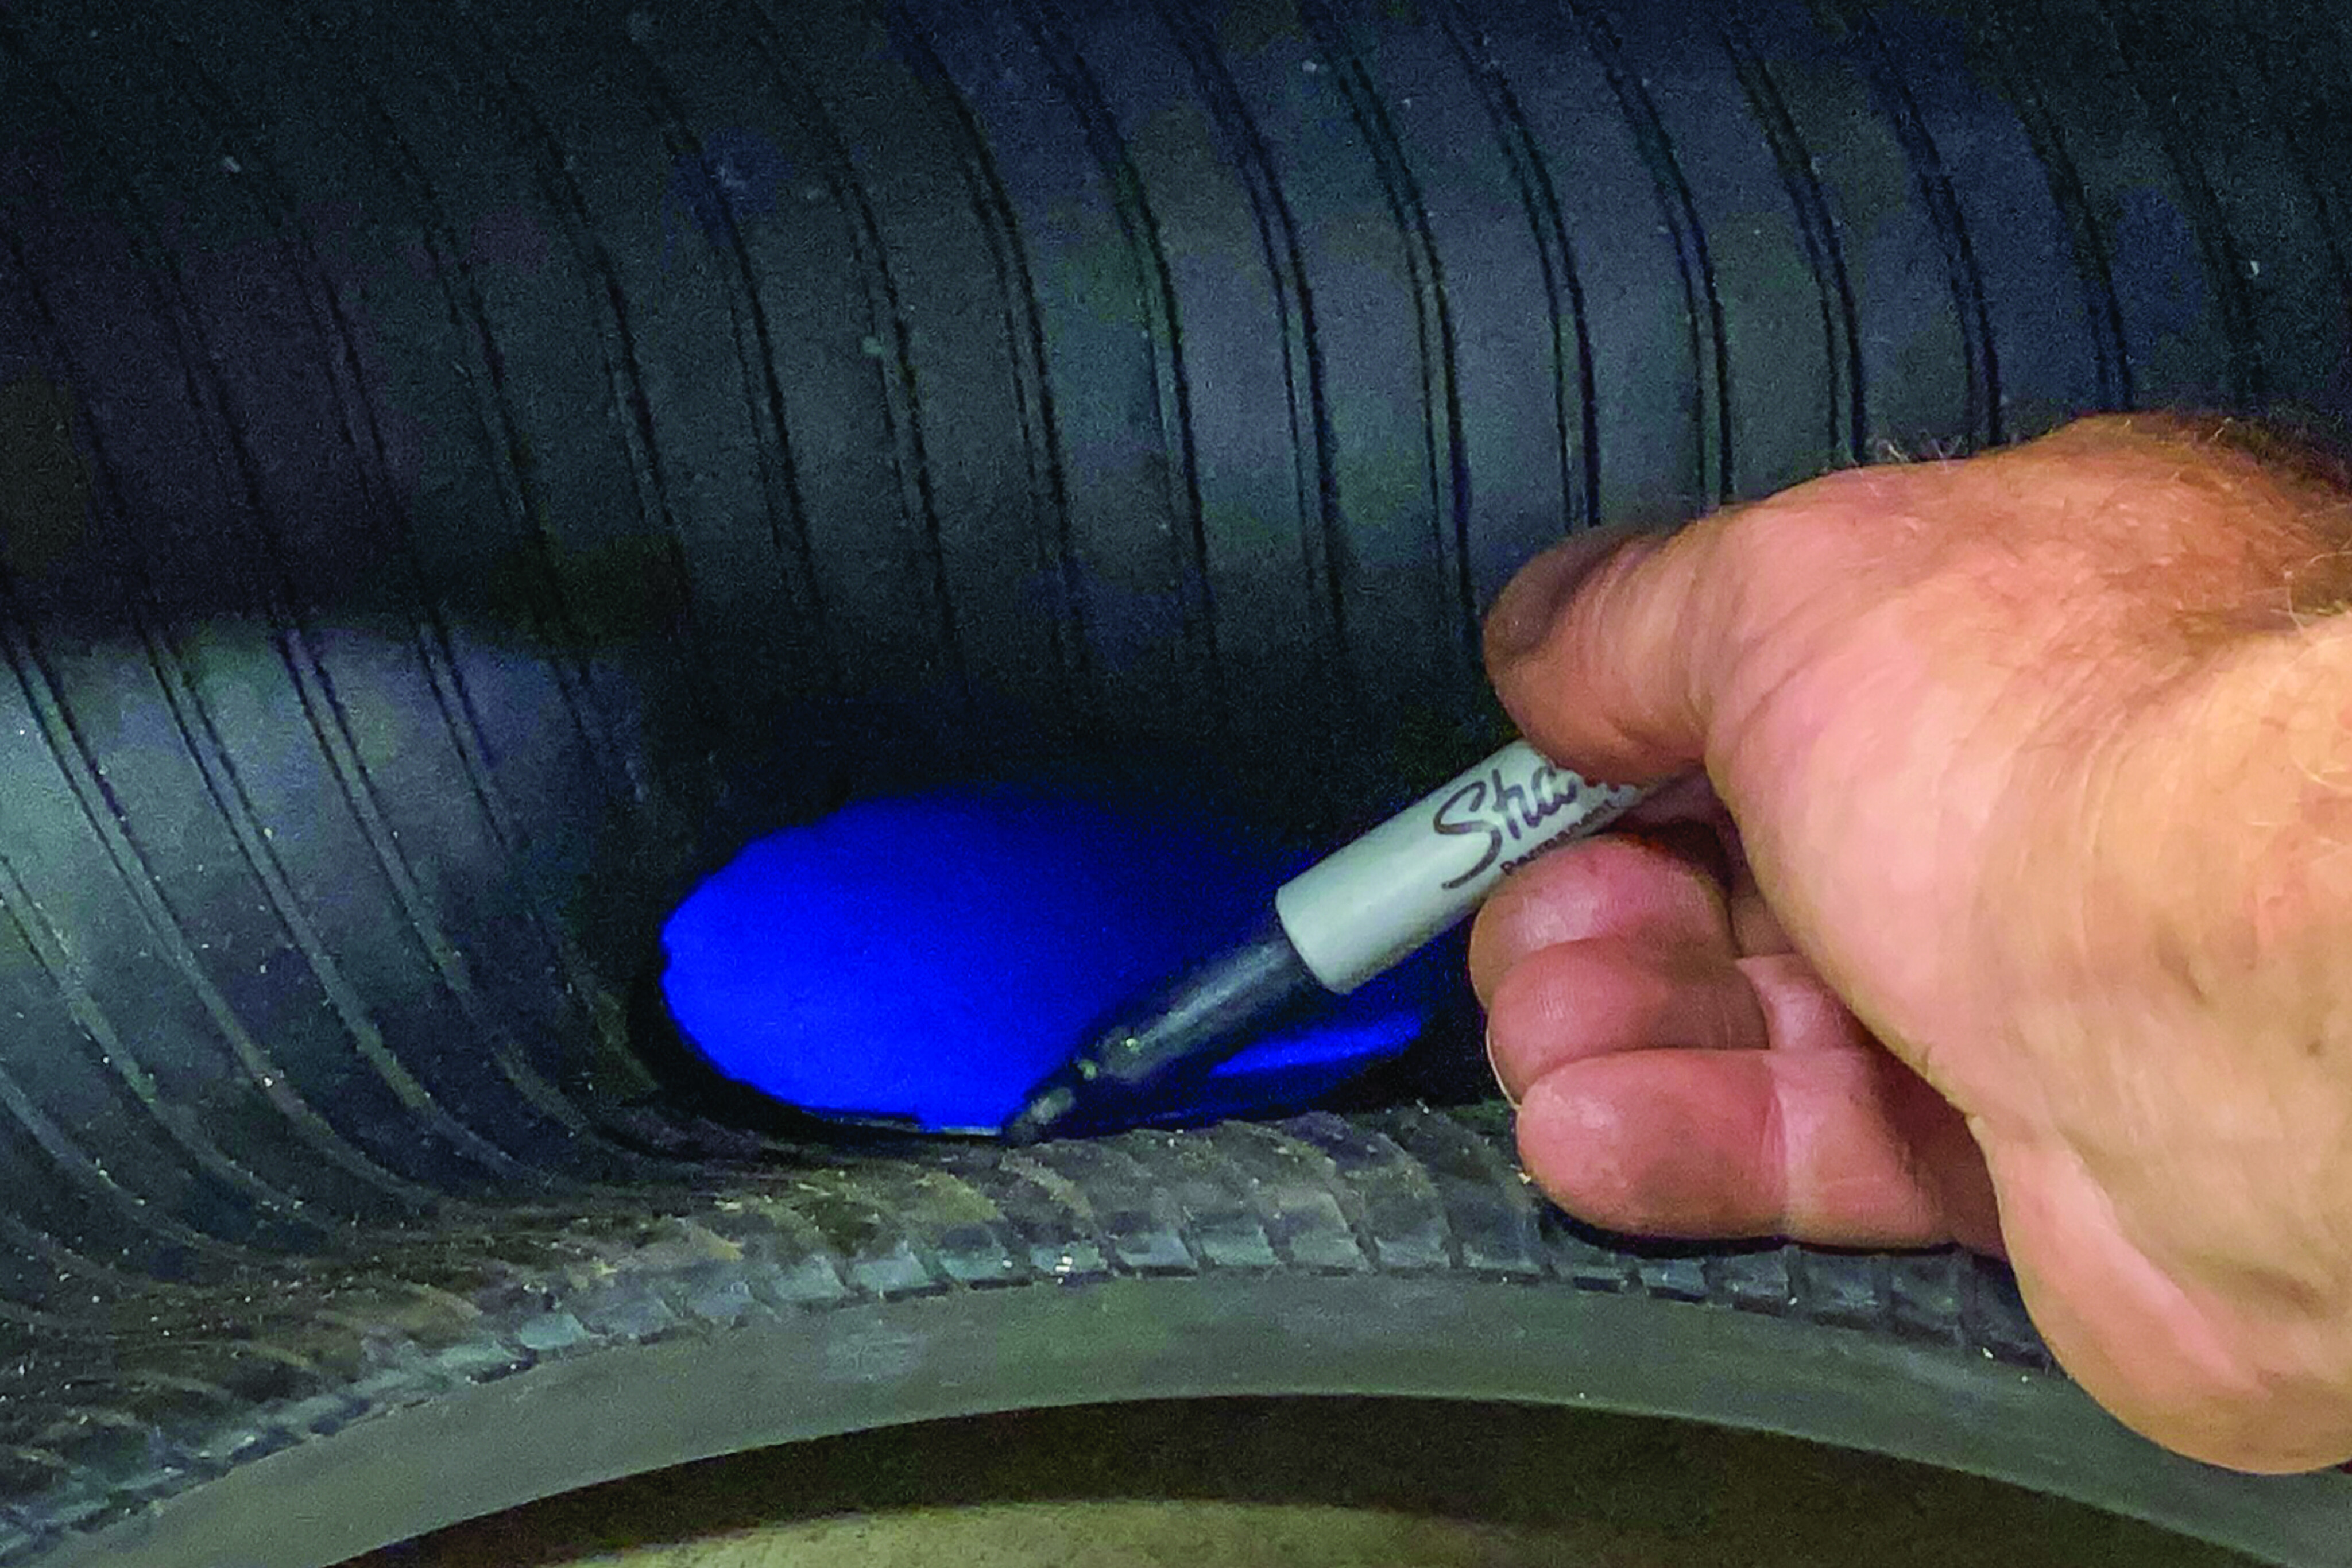
Although I’m a big fan of plugs, installing an internal patch is a better option (this is what tyre shops do). After removing the tyre from the wheel, identify the damaged area, clean it with brake cleaner, and mark its footprint with a Sharpie (permanent marker).
35
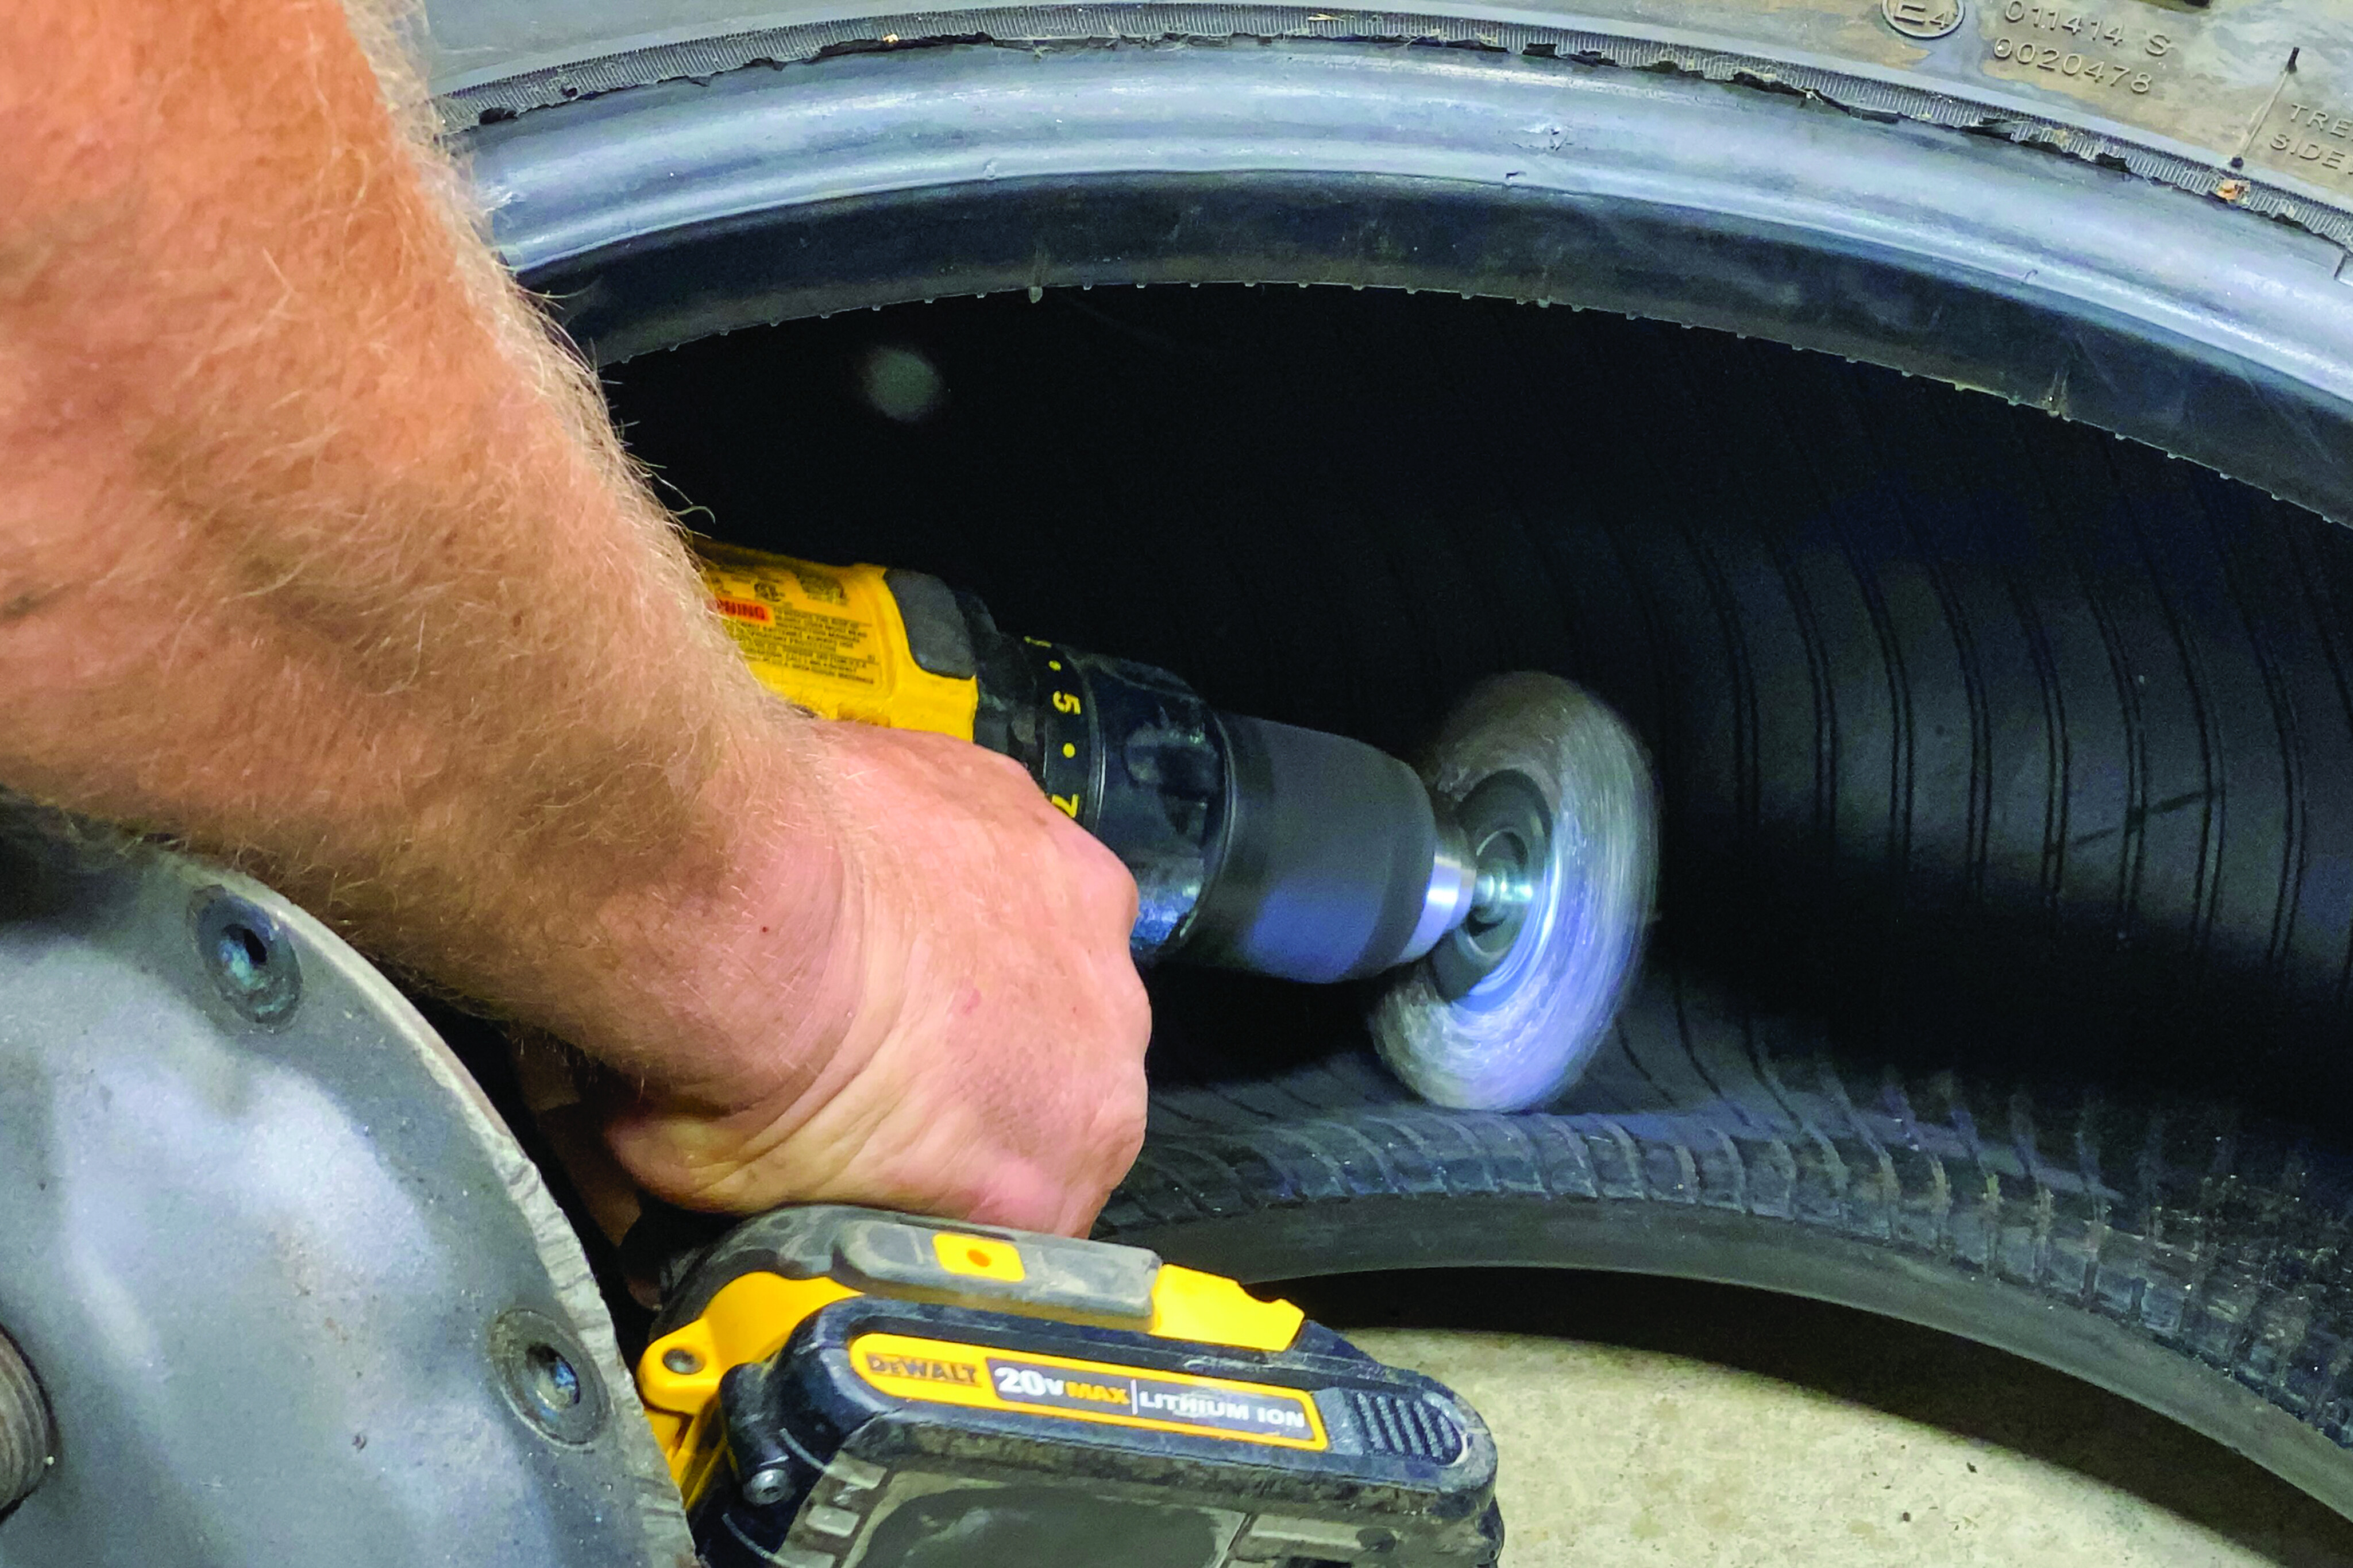
Use a buffing tool, wire wheel or heavy-grit sandpaper to remove the membrane liner. The membrane keeps air inside the tyre (rubber is porous) but must be removed where the patch will be placed.
35
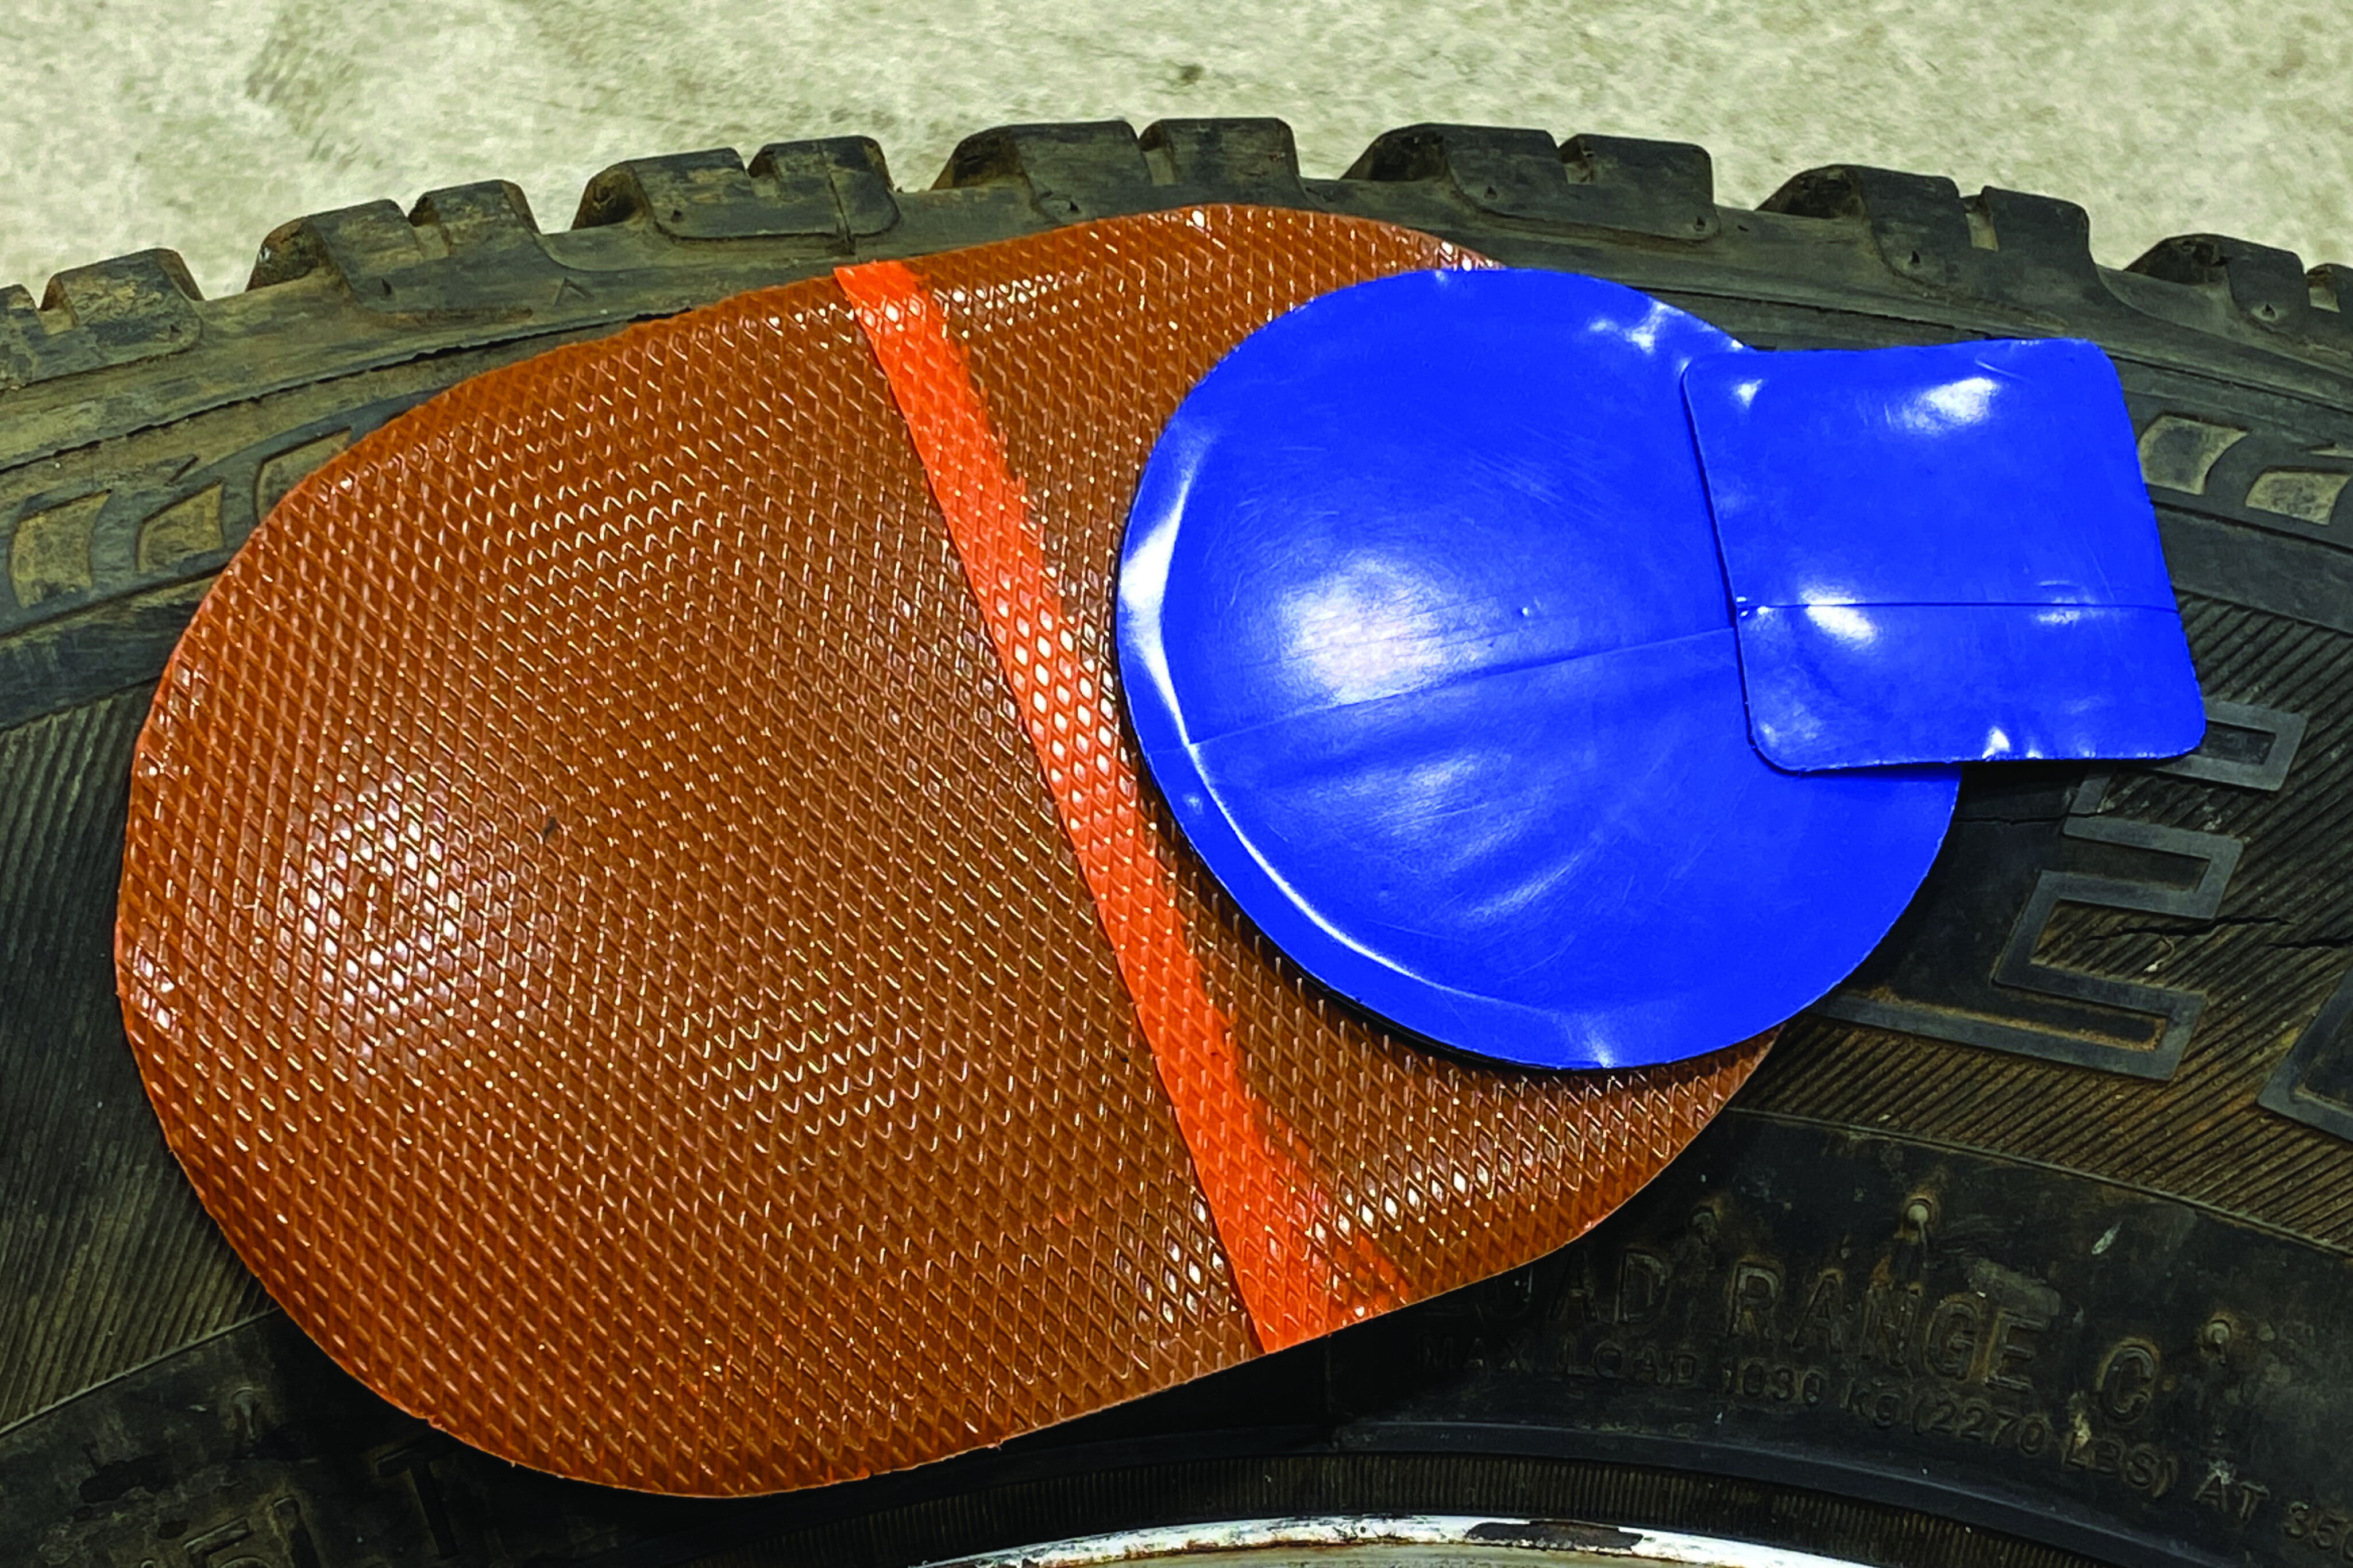
Select a patch large enough that it will extend an inch past the damage (this is a scenario where bigger is better). Apply a liberal amount of rubber cement to the patch’s contact side and let it sit until tacky.
35
Put the patch in place and aggressively ‘stitch’ it with the roller tool. Work from the center out, then side-to-side and diagonally. Don’t be shy, as without proper adhesion the patch will likely fail. It will cure in about 15 minutes, and you are ready to remount the tyre.
TIP: Be sure to fully remove membrane from patch area prior to applying a patch.

35
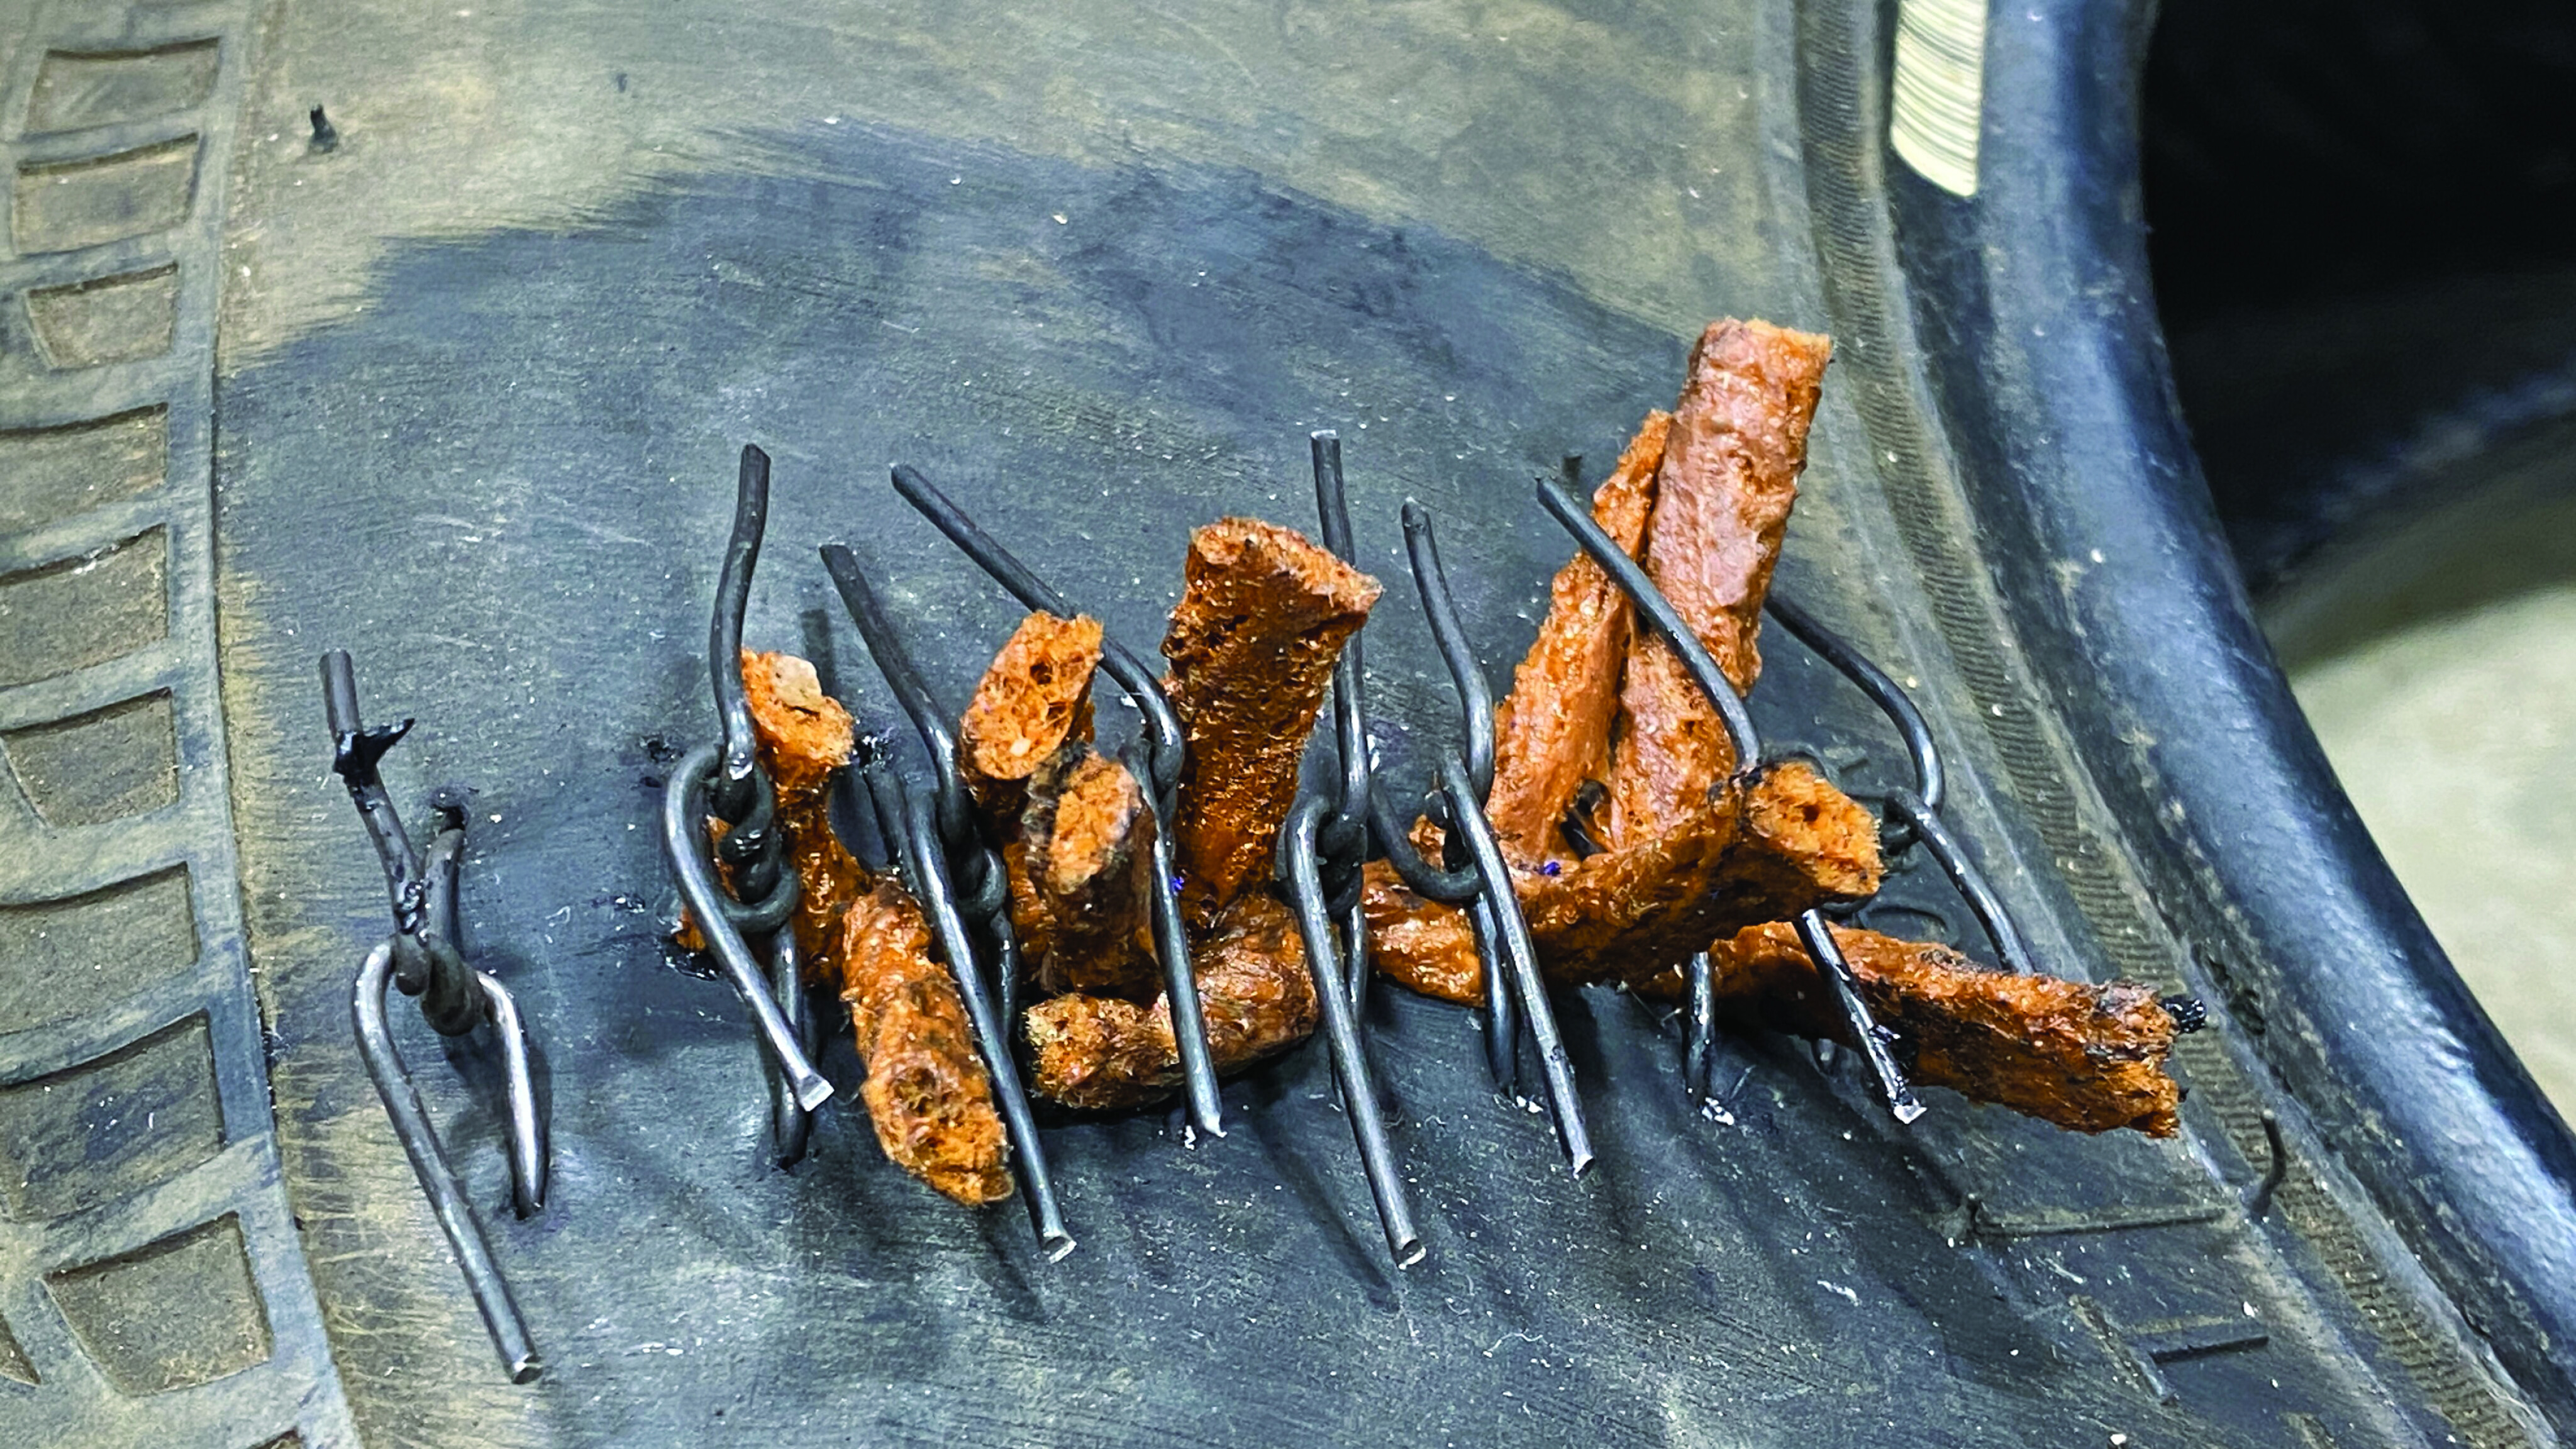
Supplies needed for stitching a major gash include wire or thread and needles, pliers, silicon, and a large quantity of plugs.
Life Support
If welding with batteries is the Holy Grail of backcountry repairs, stitching a torn sidewall is a close second.
The Extreme Outback and Power Tank kits come with thread and stainless-steel wire respectively, but surgery can be accomplished with bailing wire, plugs and silicon. For this exercise we cut a 75mm slice in the sidewall, and the repair process is akin to suturing a laceration in the skin… but with a little less finesse.
35
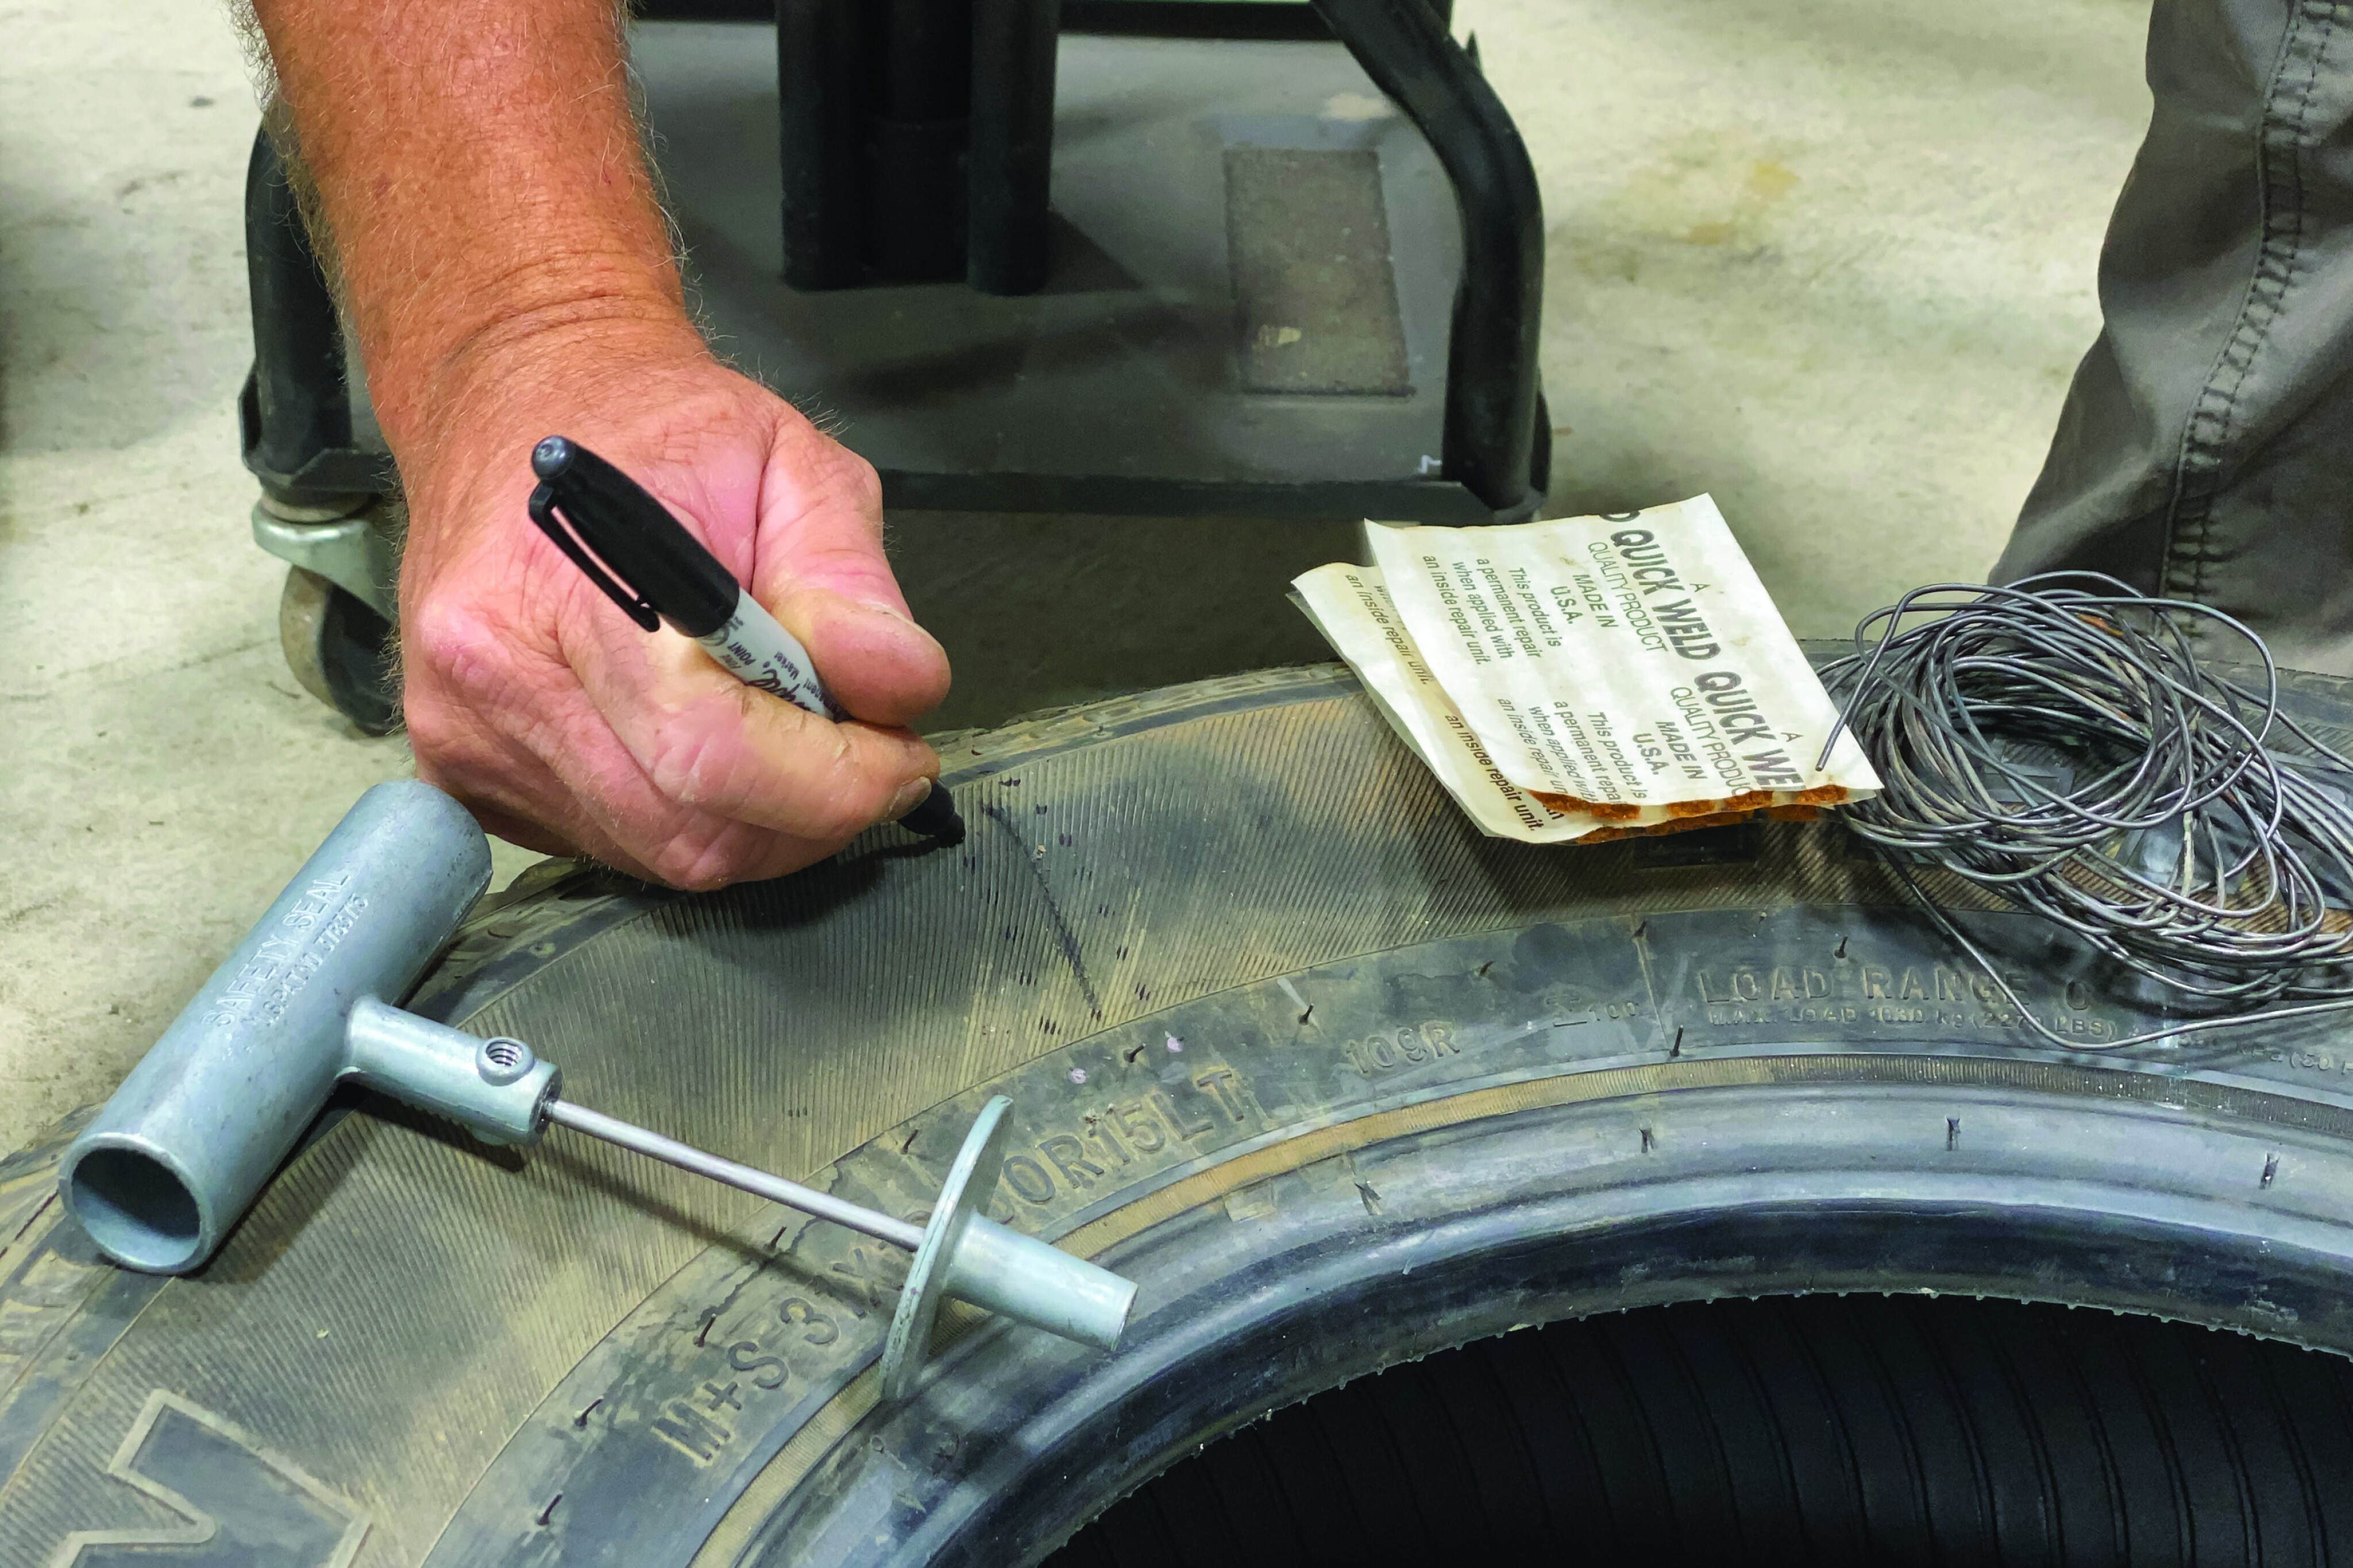
First create a line of evenly spaced holes on each side about a half inch from the damaged area and extending 15mm beyond each end. Not too close to the cut or the stitches might tear through. This can be done with the awl on your Leatherman, but I’ve found it much easier to drill holes with a 5/64 bit (I carry a 20V drill in my kit). As with the patching process, be sure to remove the membrane from the repair area.
35
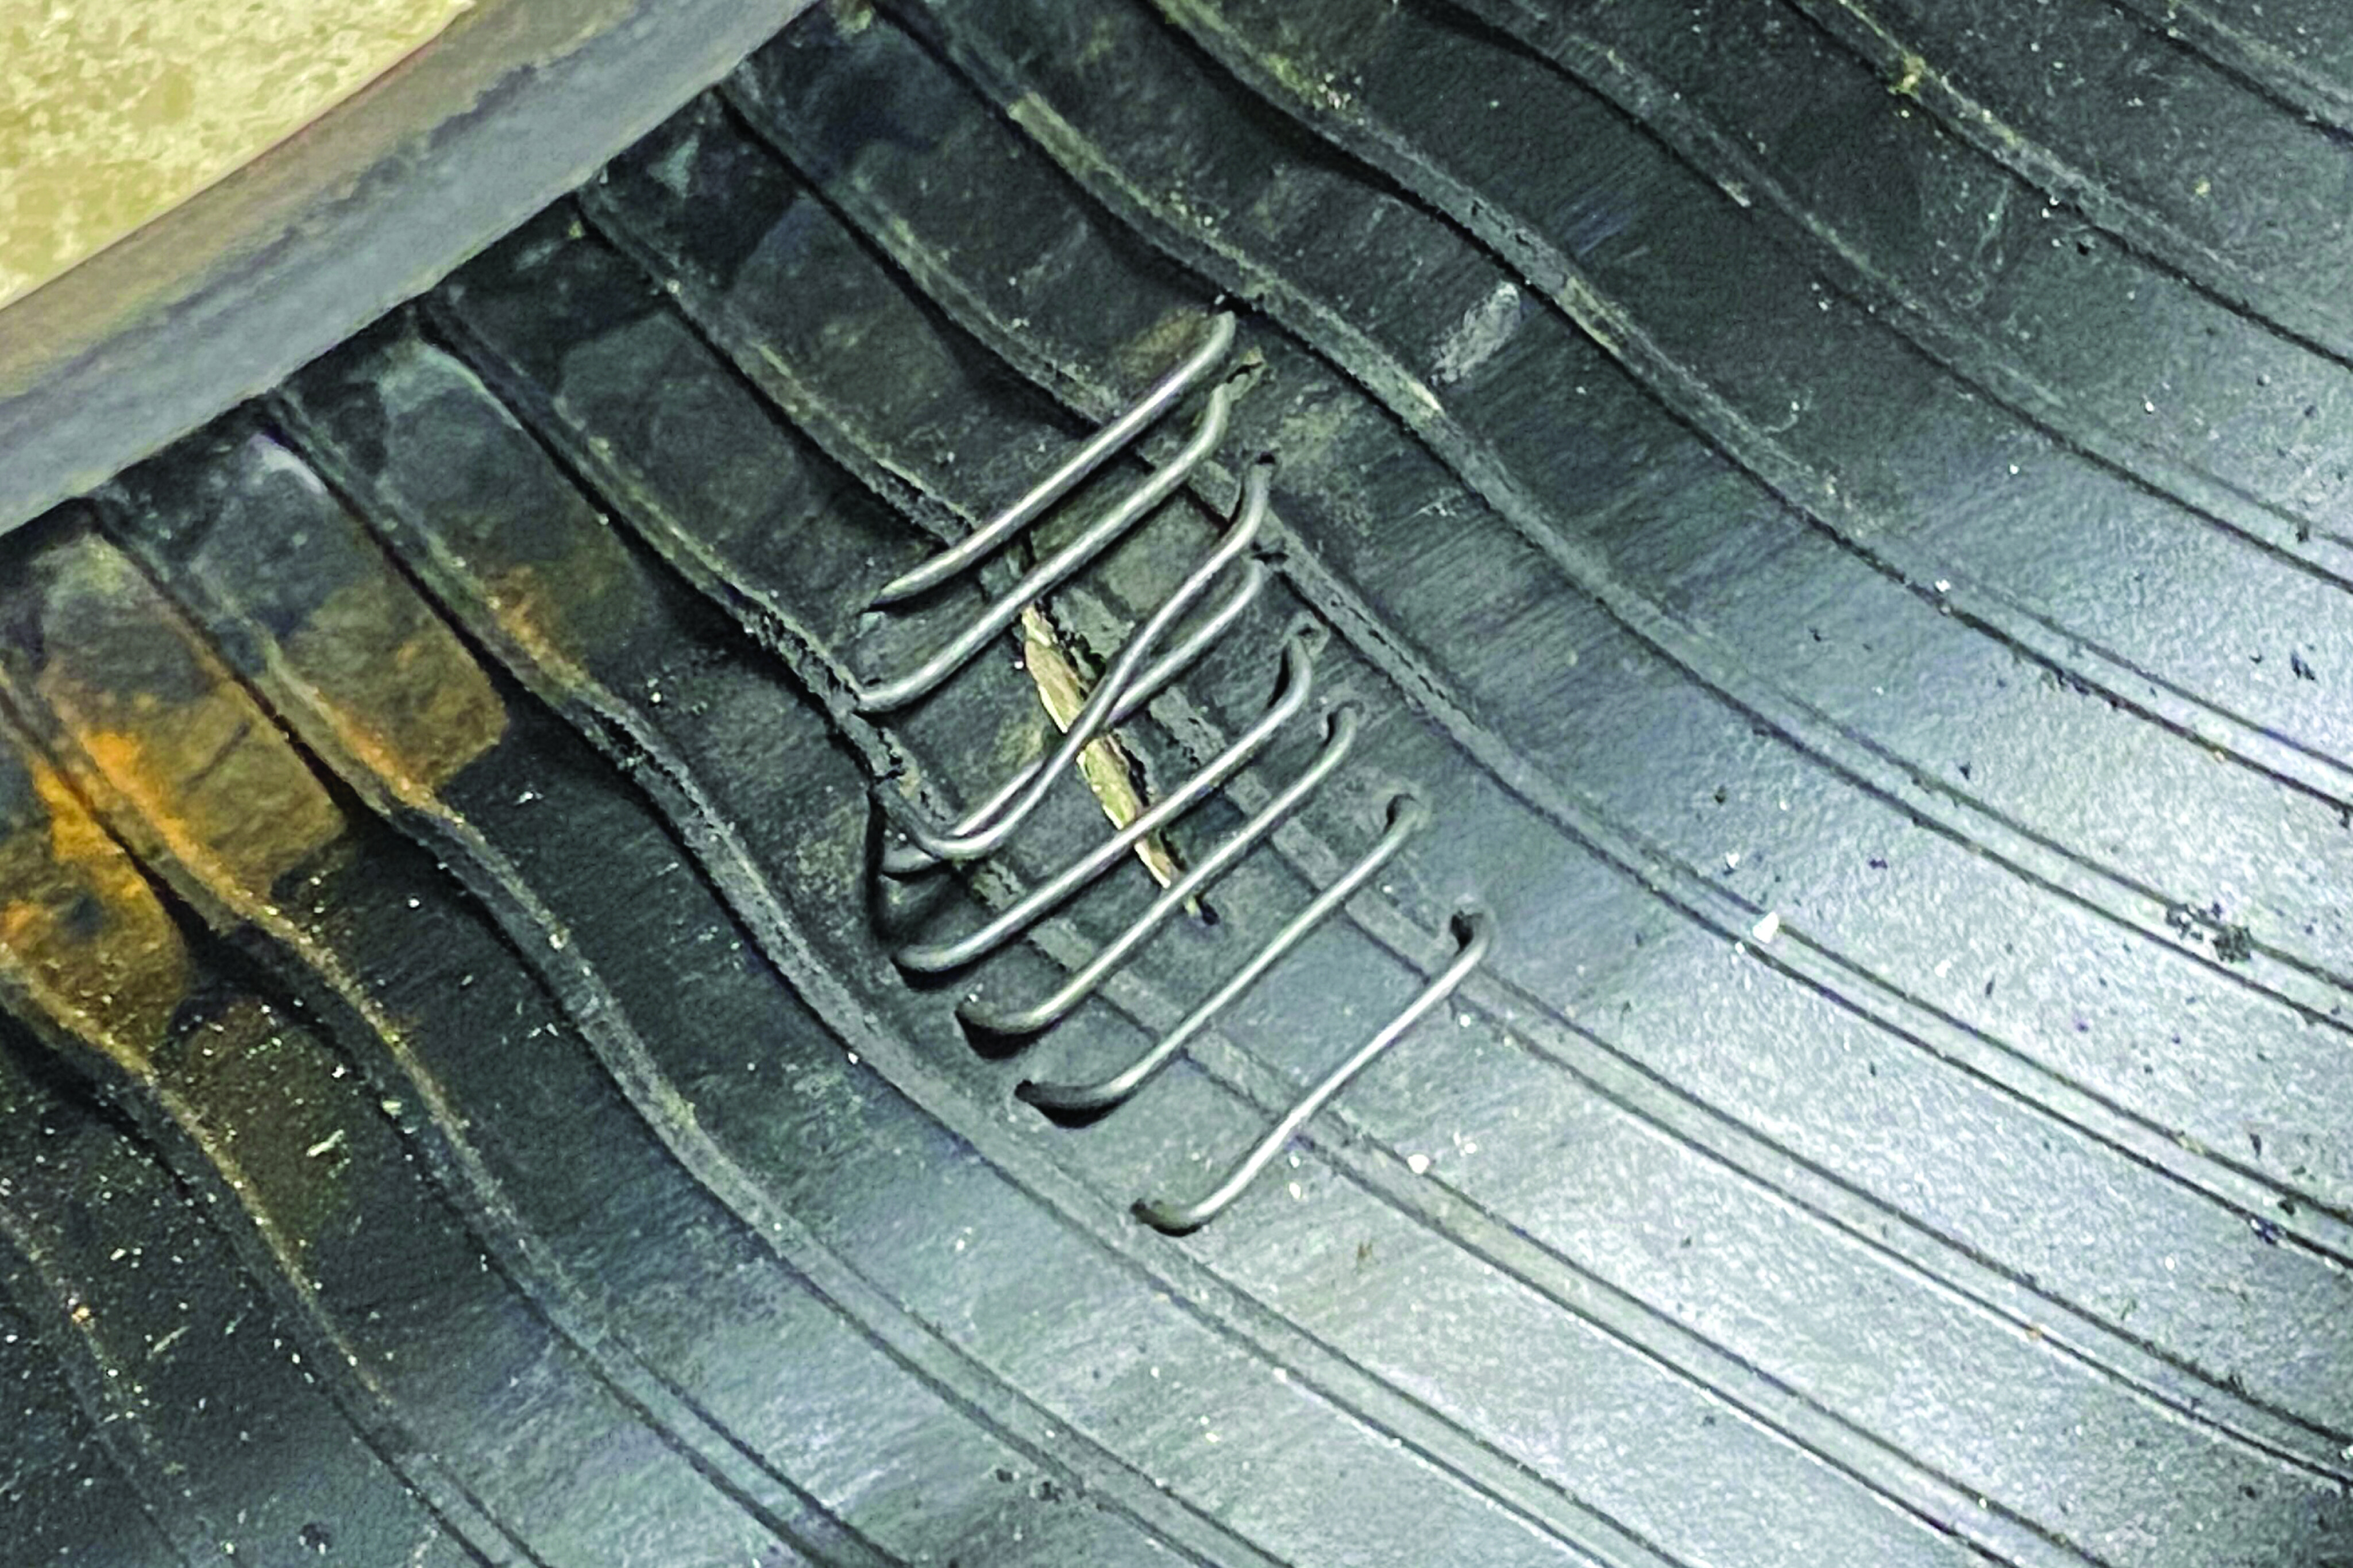
Sutures should be 10-15cm in length and bent in a U-shape like a staple. Starting nearest to the tread block, push a suture through from the inside, then twist the ends tight to pinch the opening.
35
Insert a gaggle of plugs along the full length of the cut. They should be close together but not so much that the area is deformed too much. The last step is to apply a heavy layer of RTV silicon over the suture holes and the base of the plugs. Depending on ambient temperature, it will take several hours to a day to cure.
35
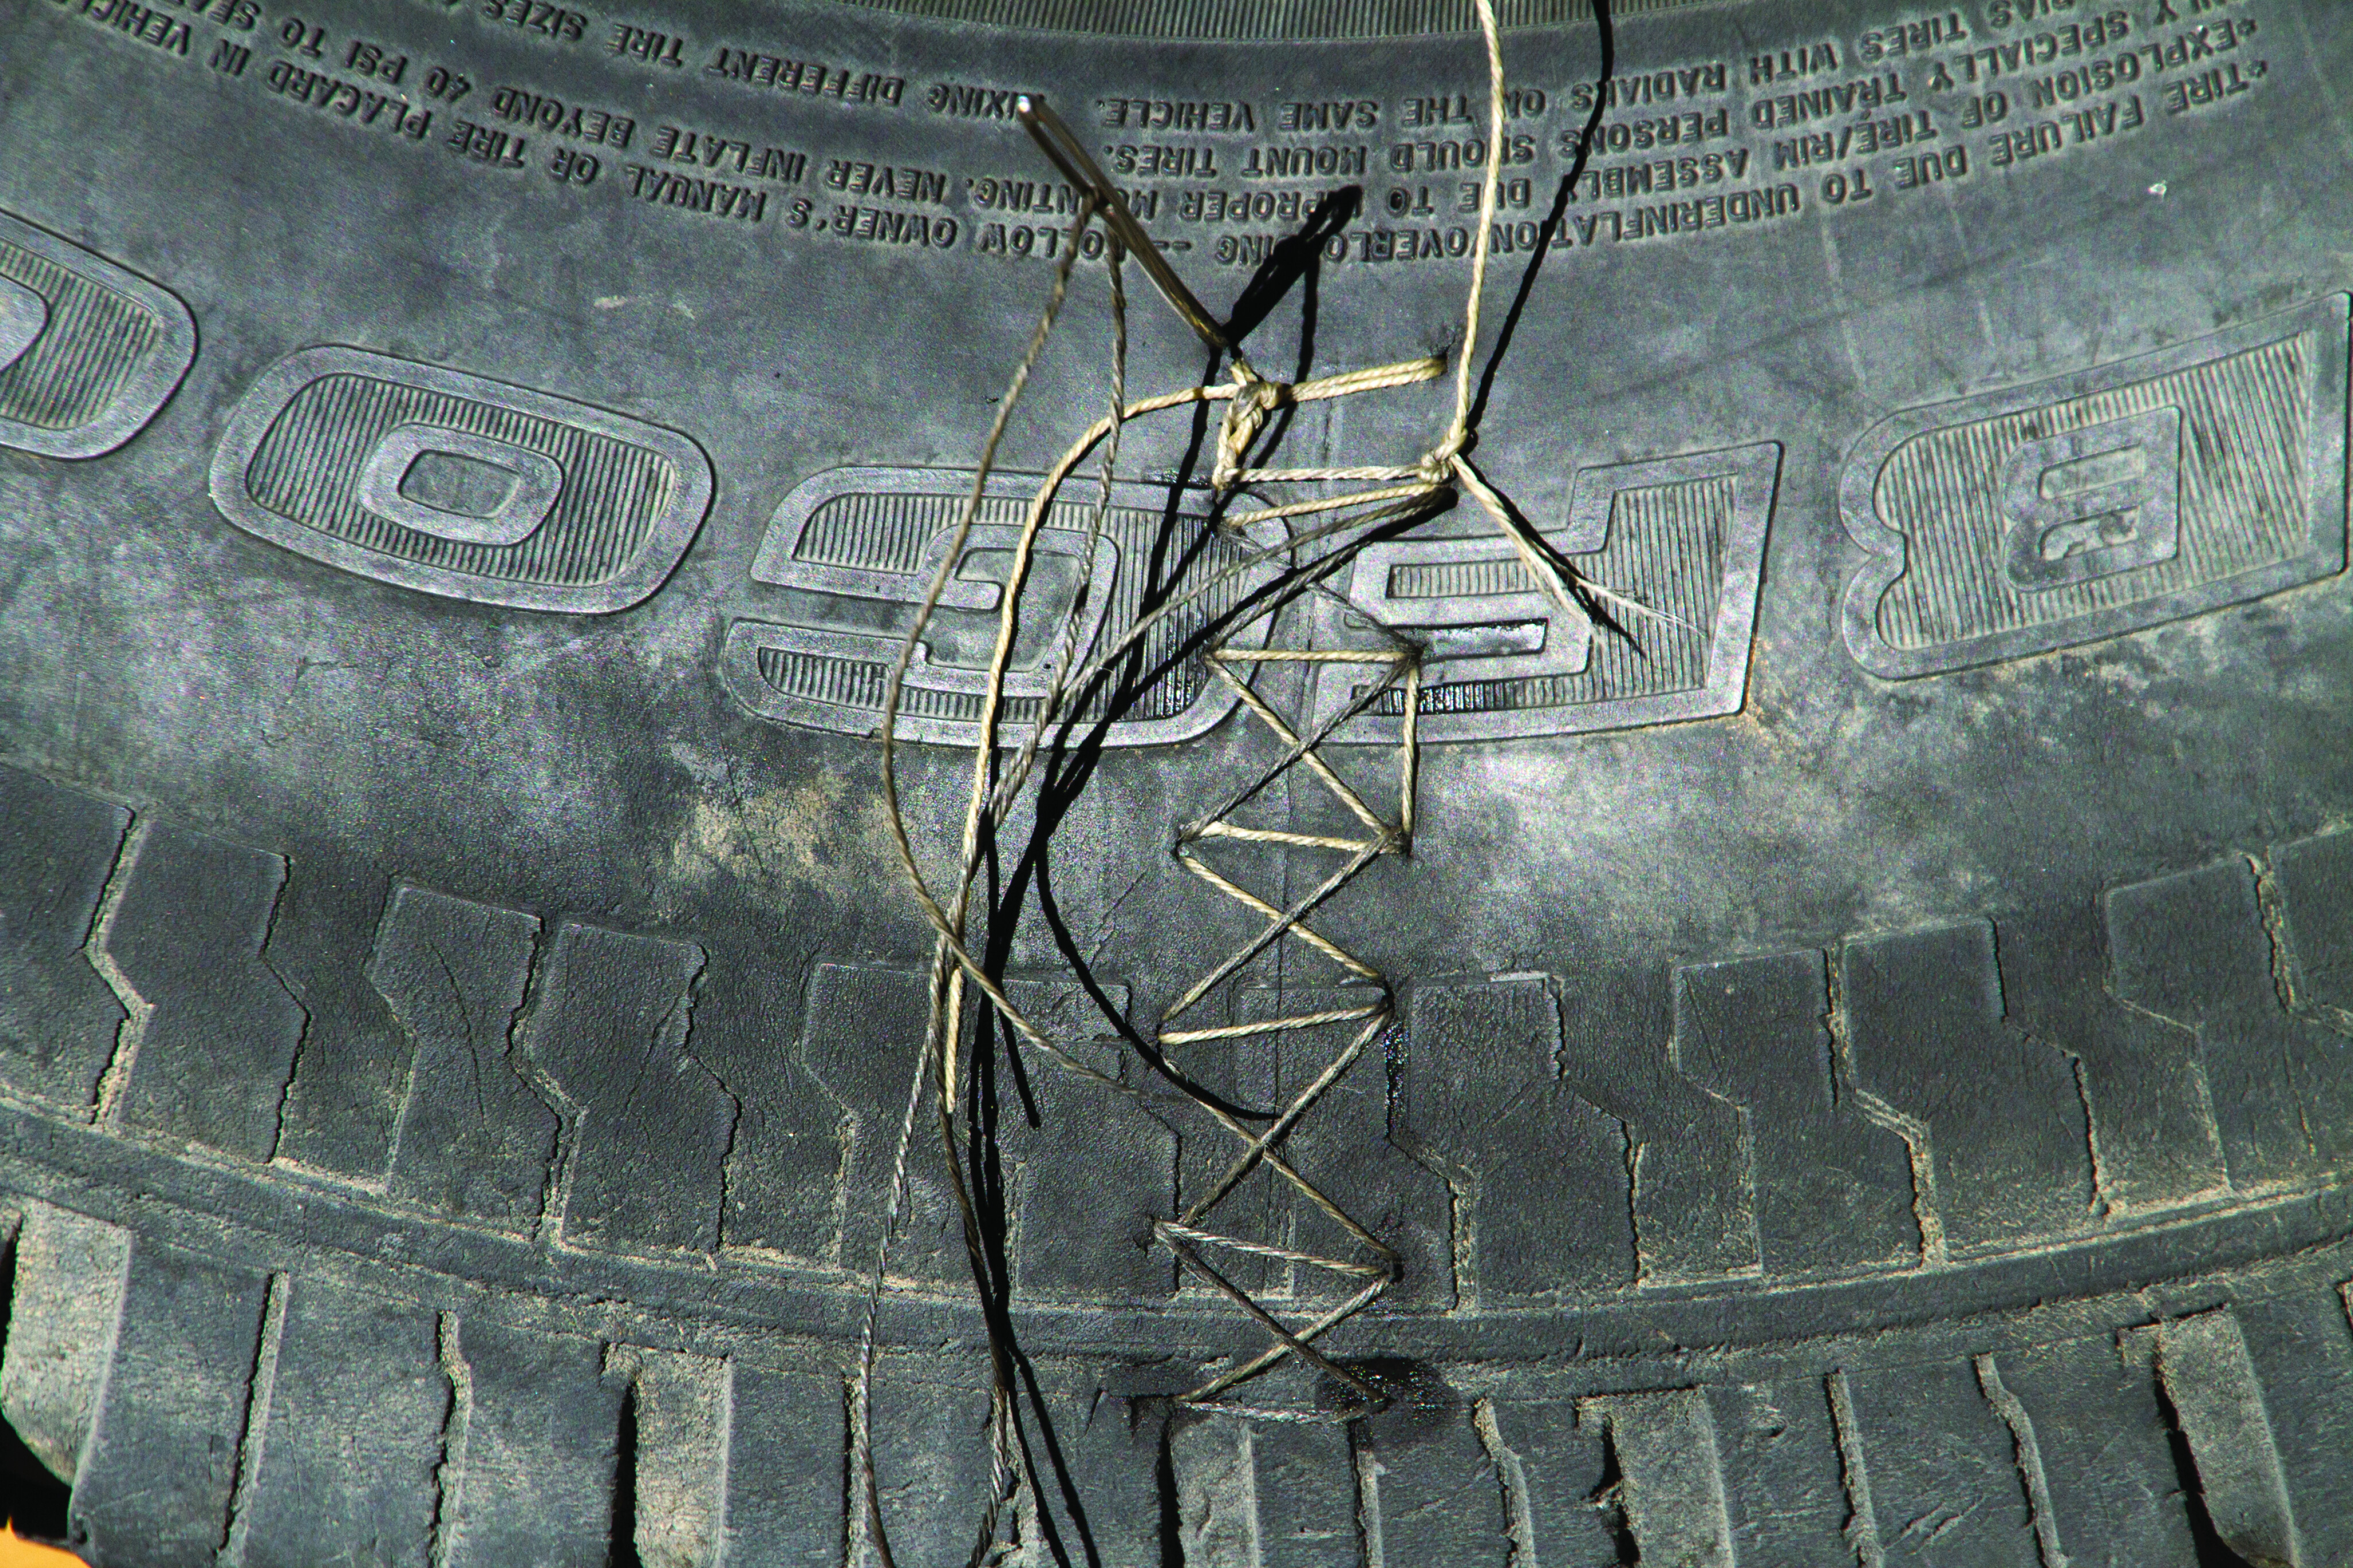
If stitching with thread, it should be a continuous work of art, starting from one end and working your way to the other in a perpendicular and diagonal pattern, tying it tightly off at the end. Due to the low profile of thread, a large patch should be used on the inside if available.
Whichever method you use (wire or thread) sidewall flex can be detrimental to this repair.
Reinflated to the point that flex under a load is limited, but not the point that the repair area bulges too much (pressure will depend on tyre, wheel diameter, vehicle weight, etc.).
So it holds air under a load (it will probably have slow leaks), great, now swap it out for your spare. This Frankenstein fix will not be pretty, but at least you will have a usable spare if things go pear-shaped… again.
If you must use the repaired tyre, avoid rubbing it against rocks, tree branches or anything.
TIP: Shoulder and sidewall repairs are not permitted for vehicles driven on public roads.
Super Glue?
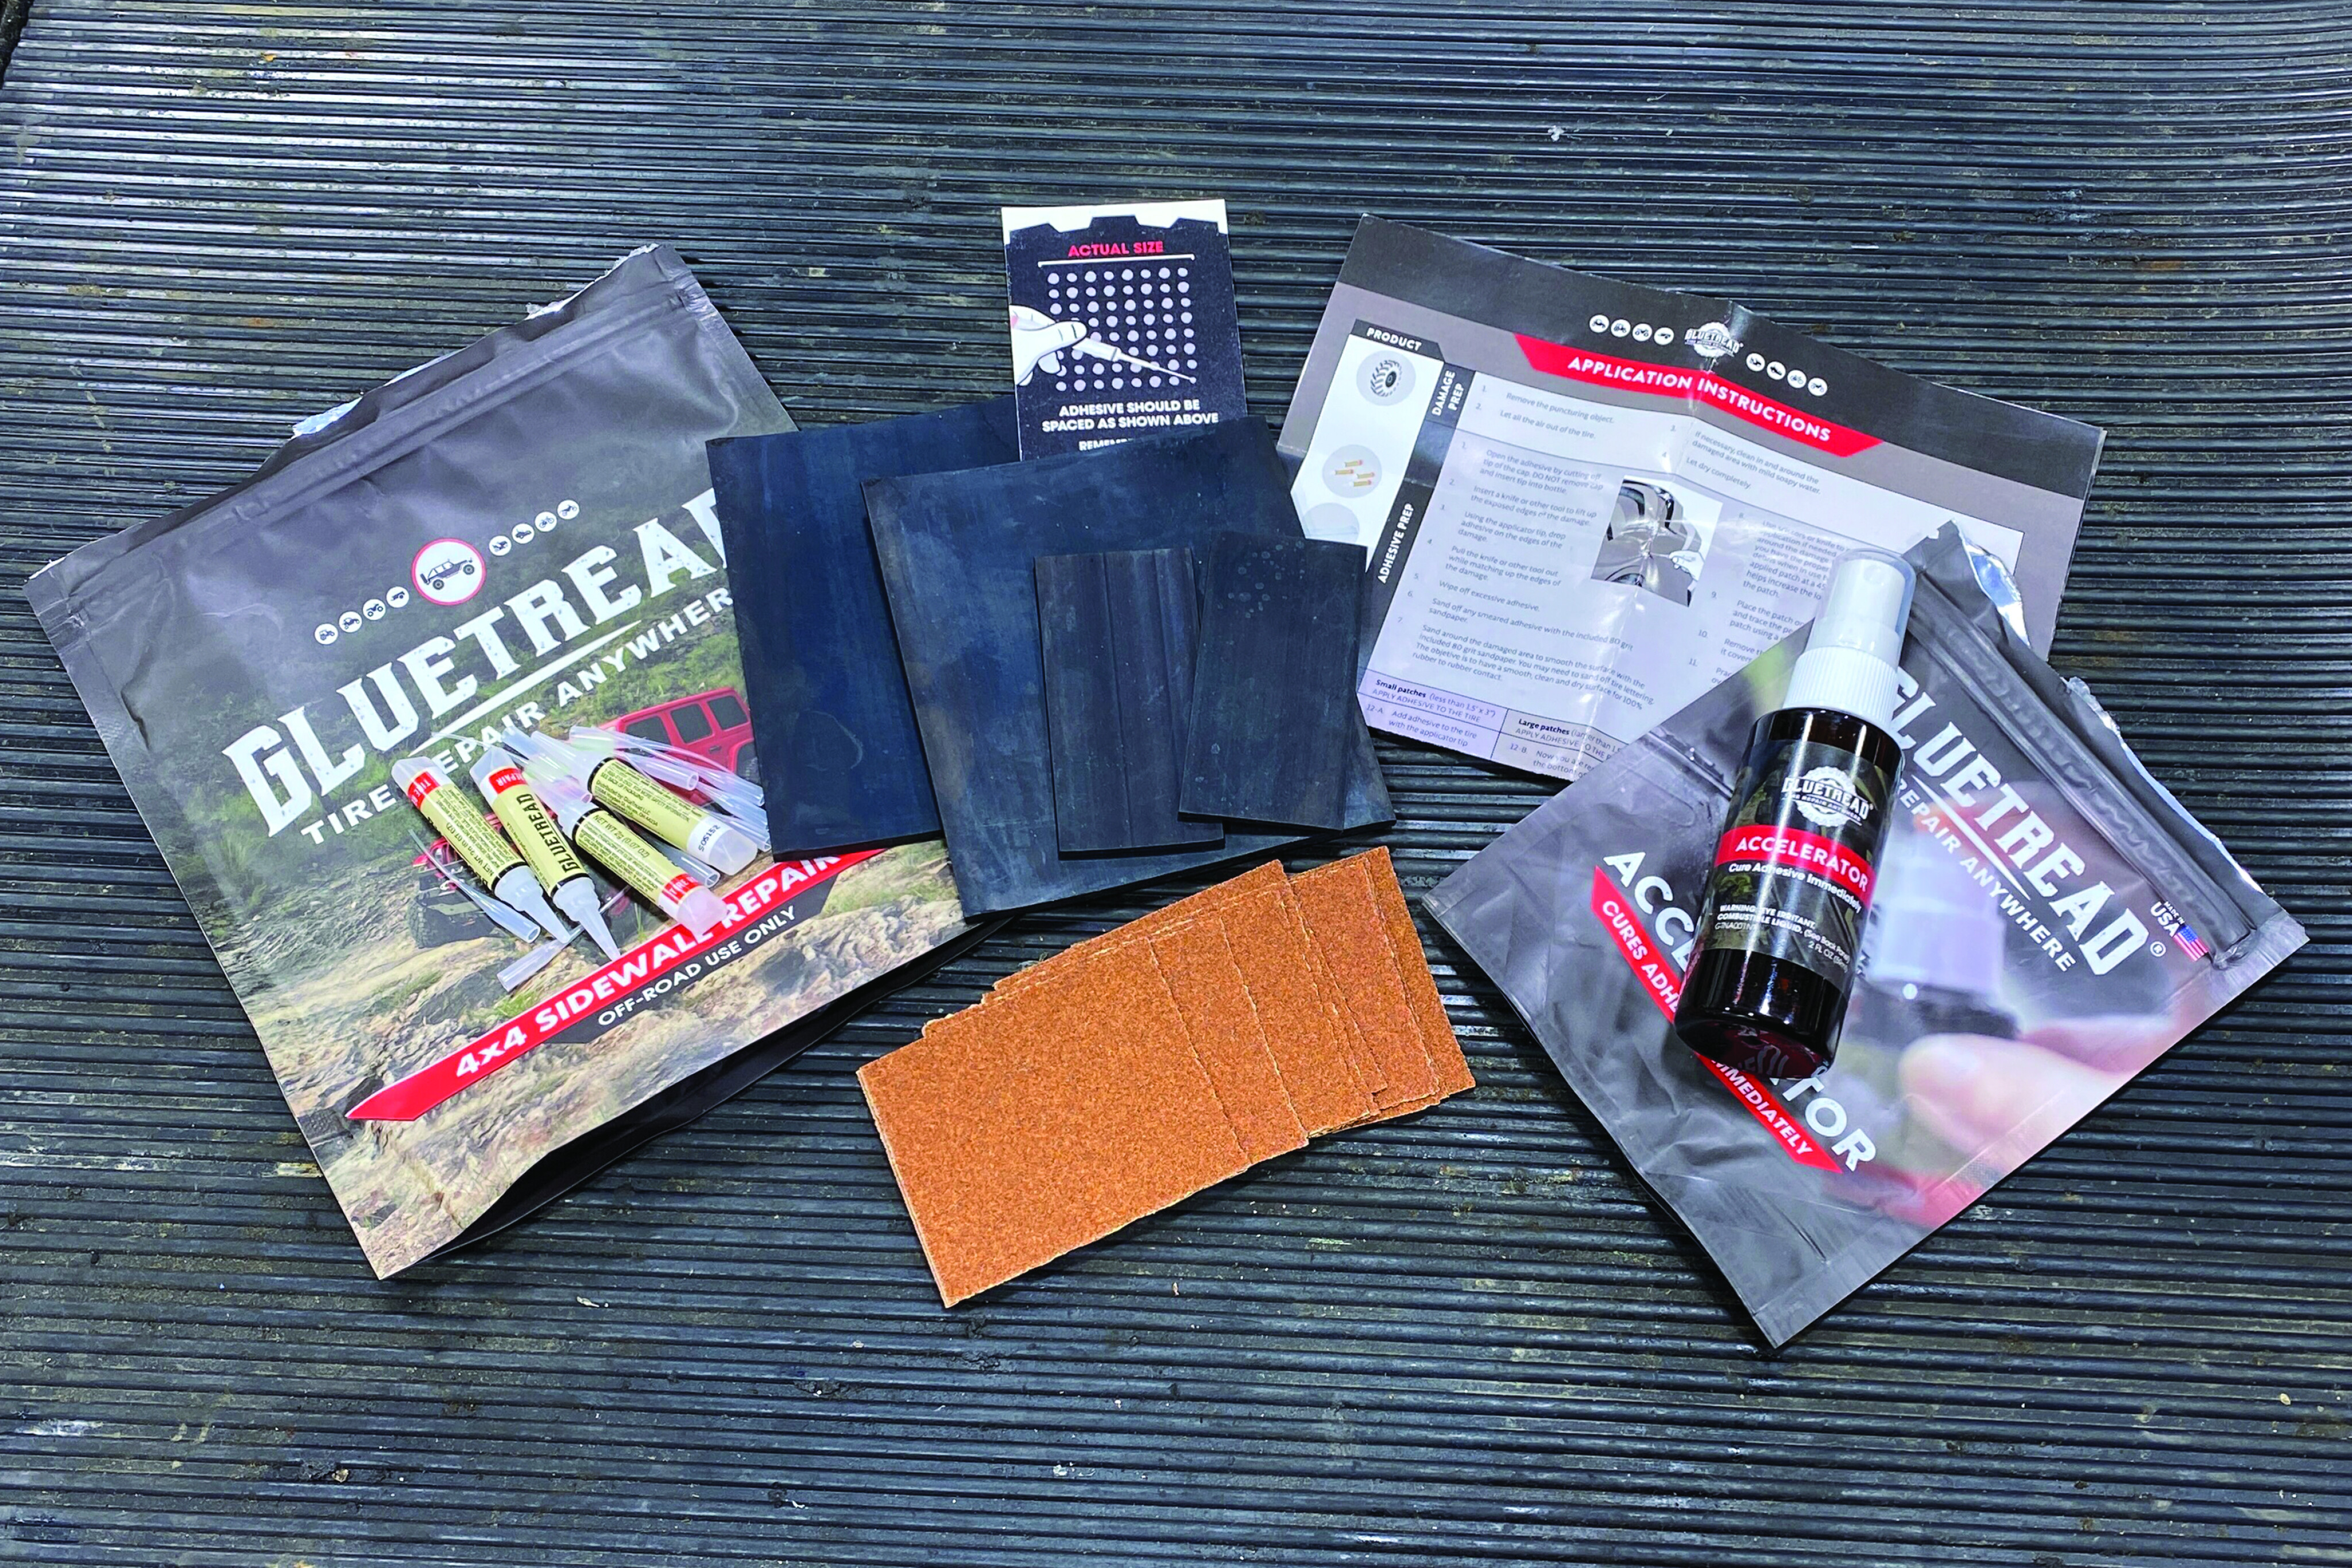
35
I met the GlueTread crew at SEMA, and while I was skeptical about super gluing an external patch for trail use, I listened to their pitch. Well, I’ve not trail-tested this product, but my mate Tyler Laursen (of MORRFlate Systems) recently slashed all four tyres on his rig, repaired them with GlueTread, and drove the Rubicon Trail. Well, this stuff might make all that work we just did dismounting tyres a thing of the past.
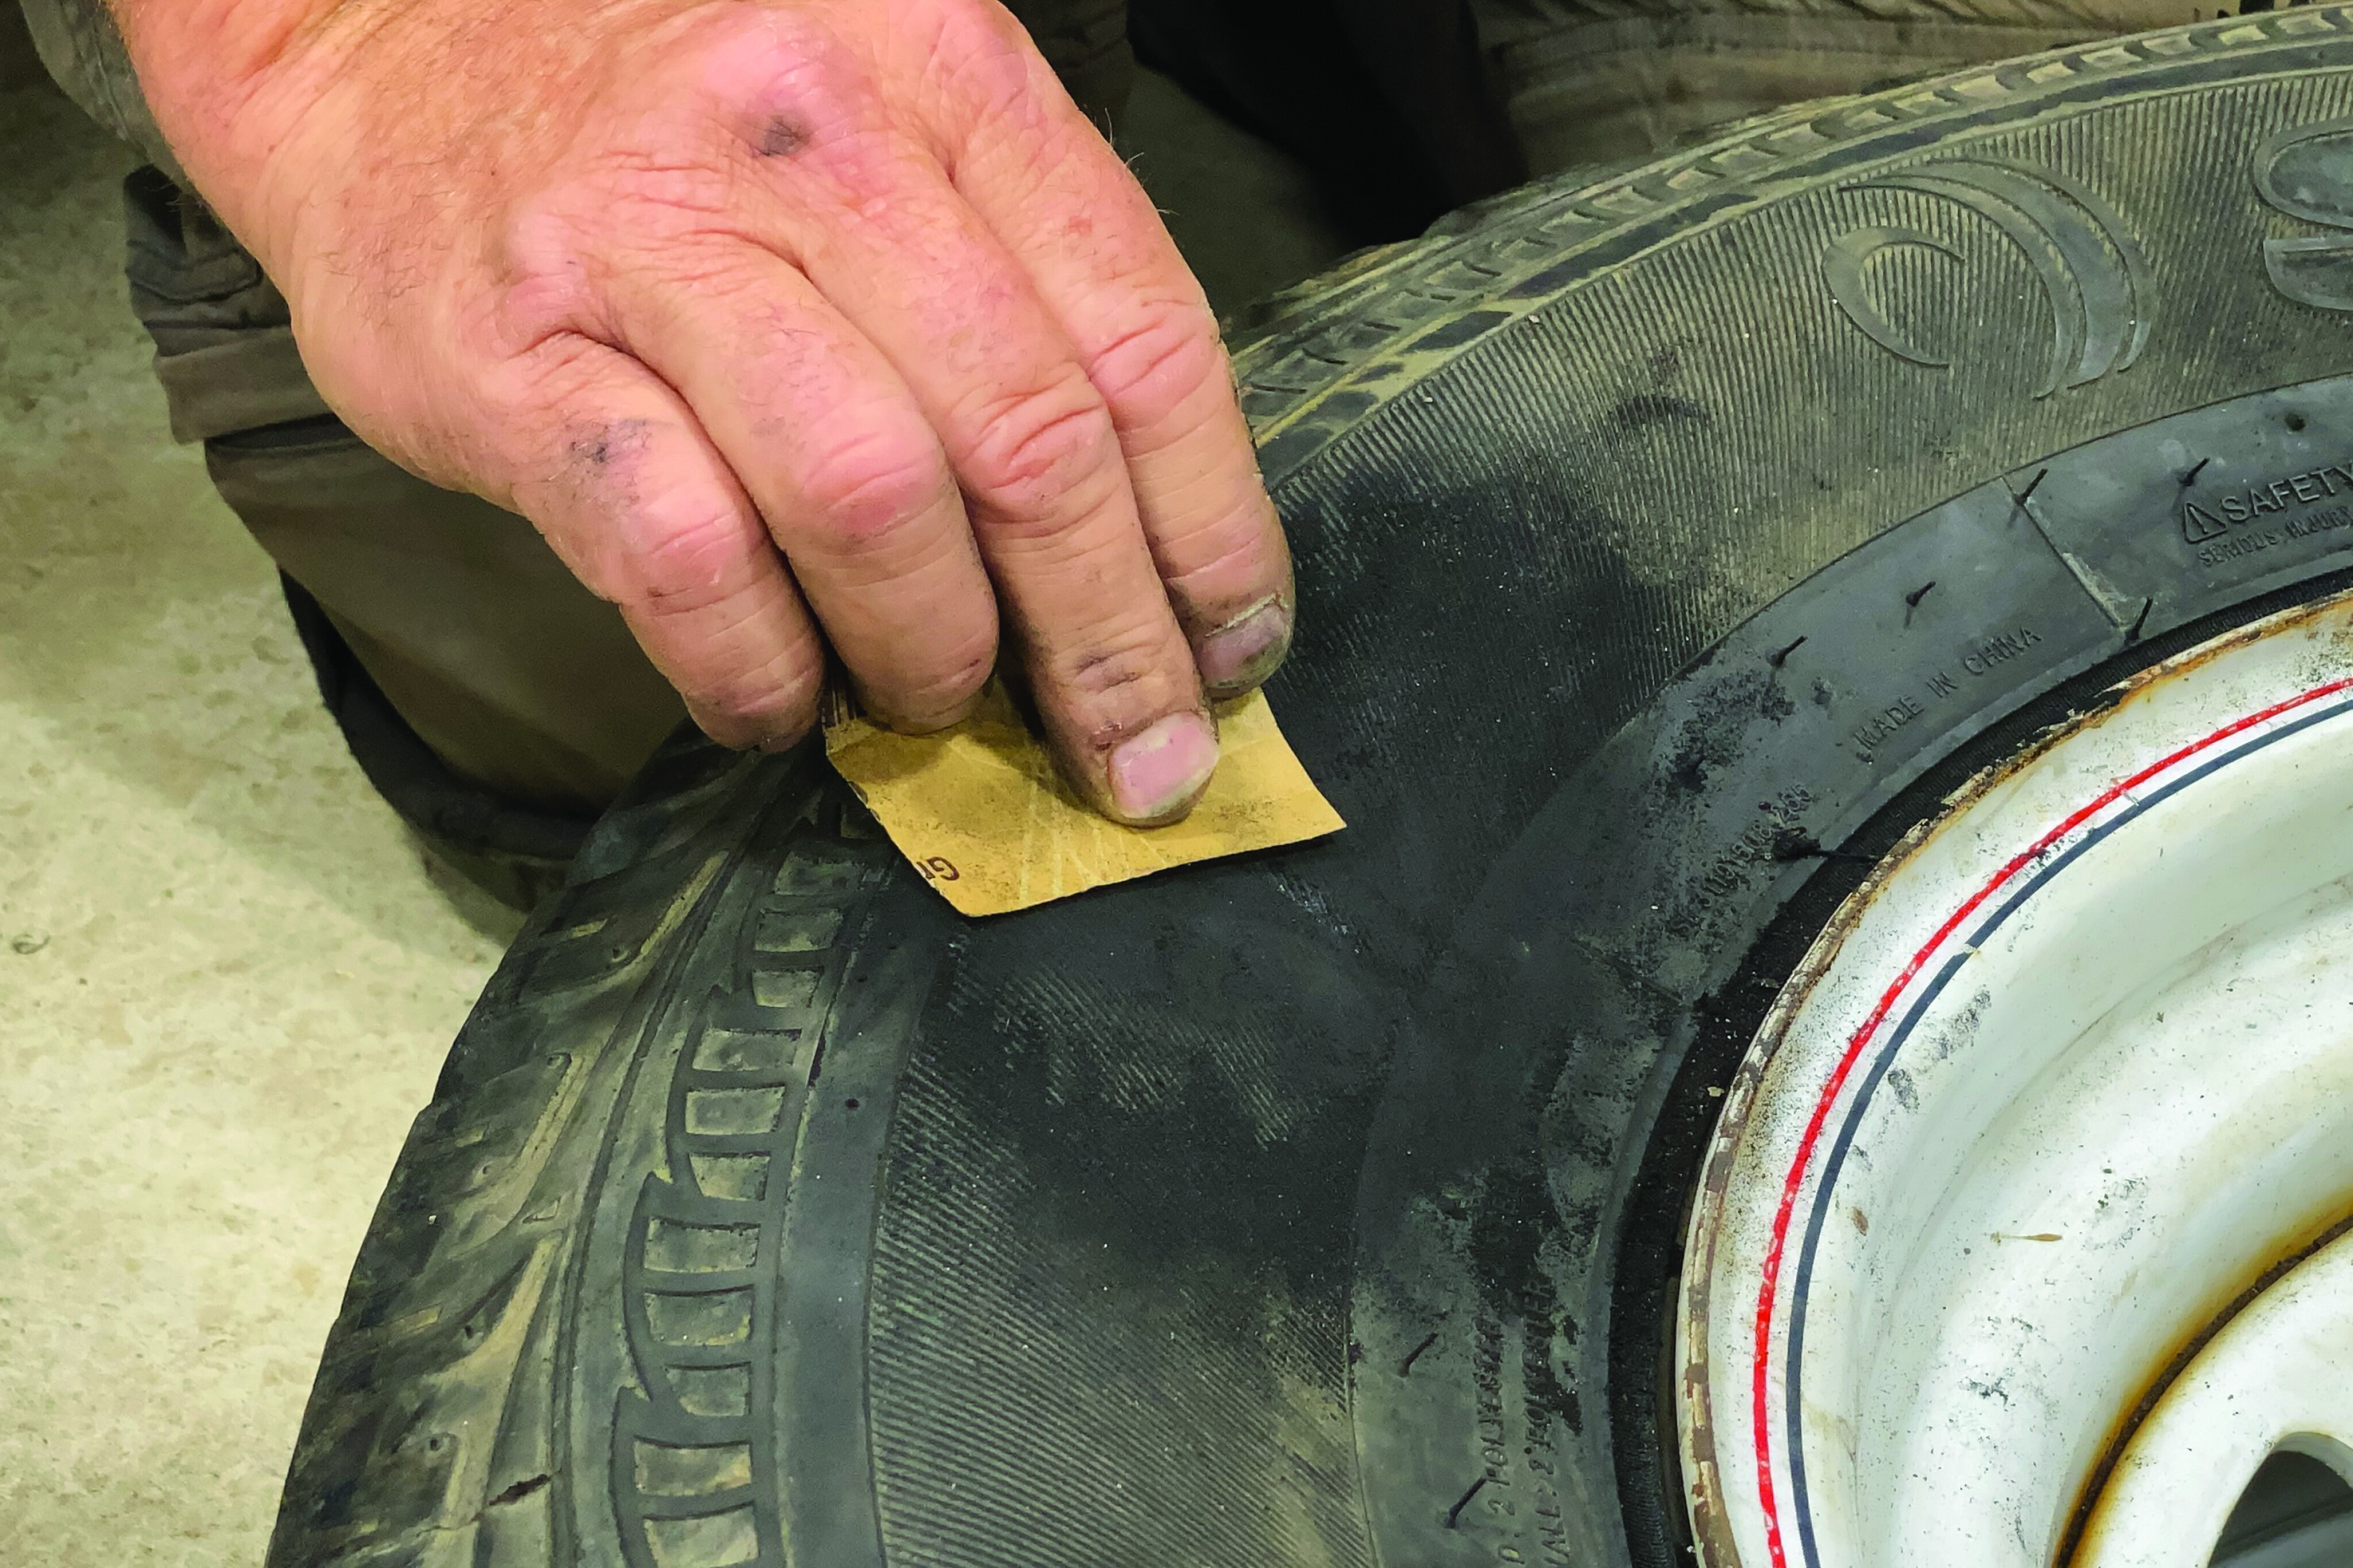
35
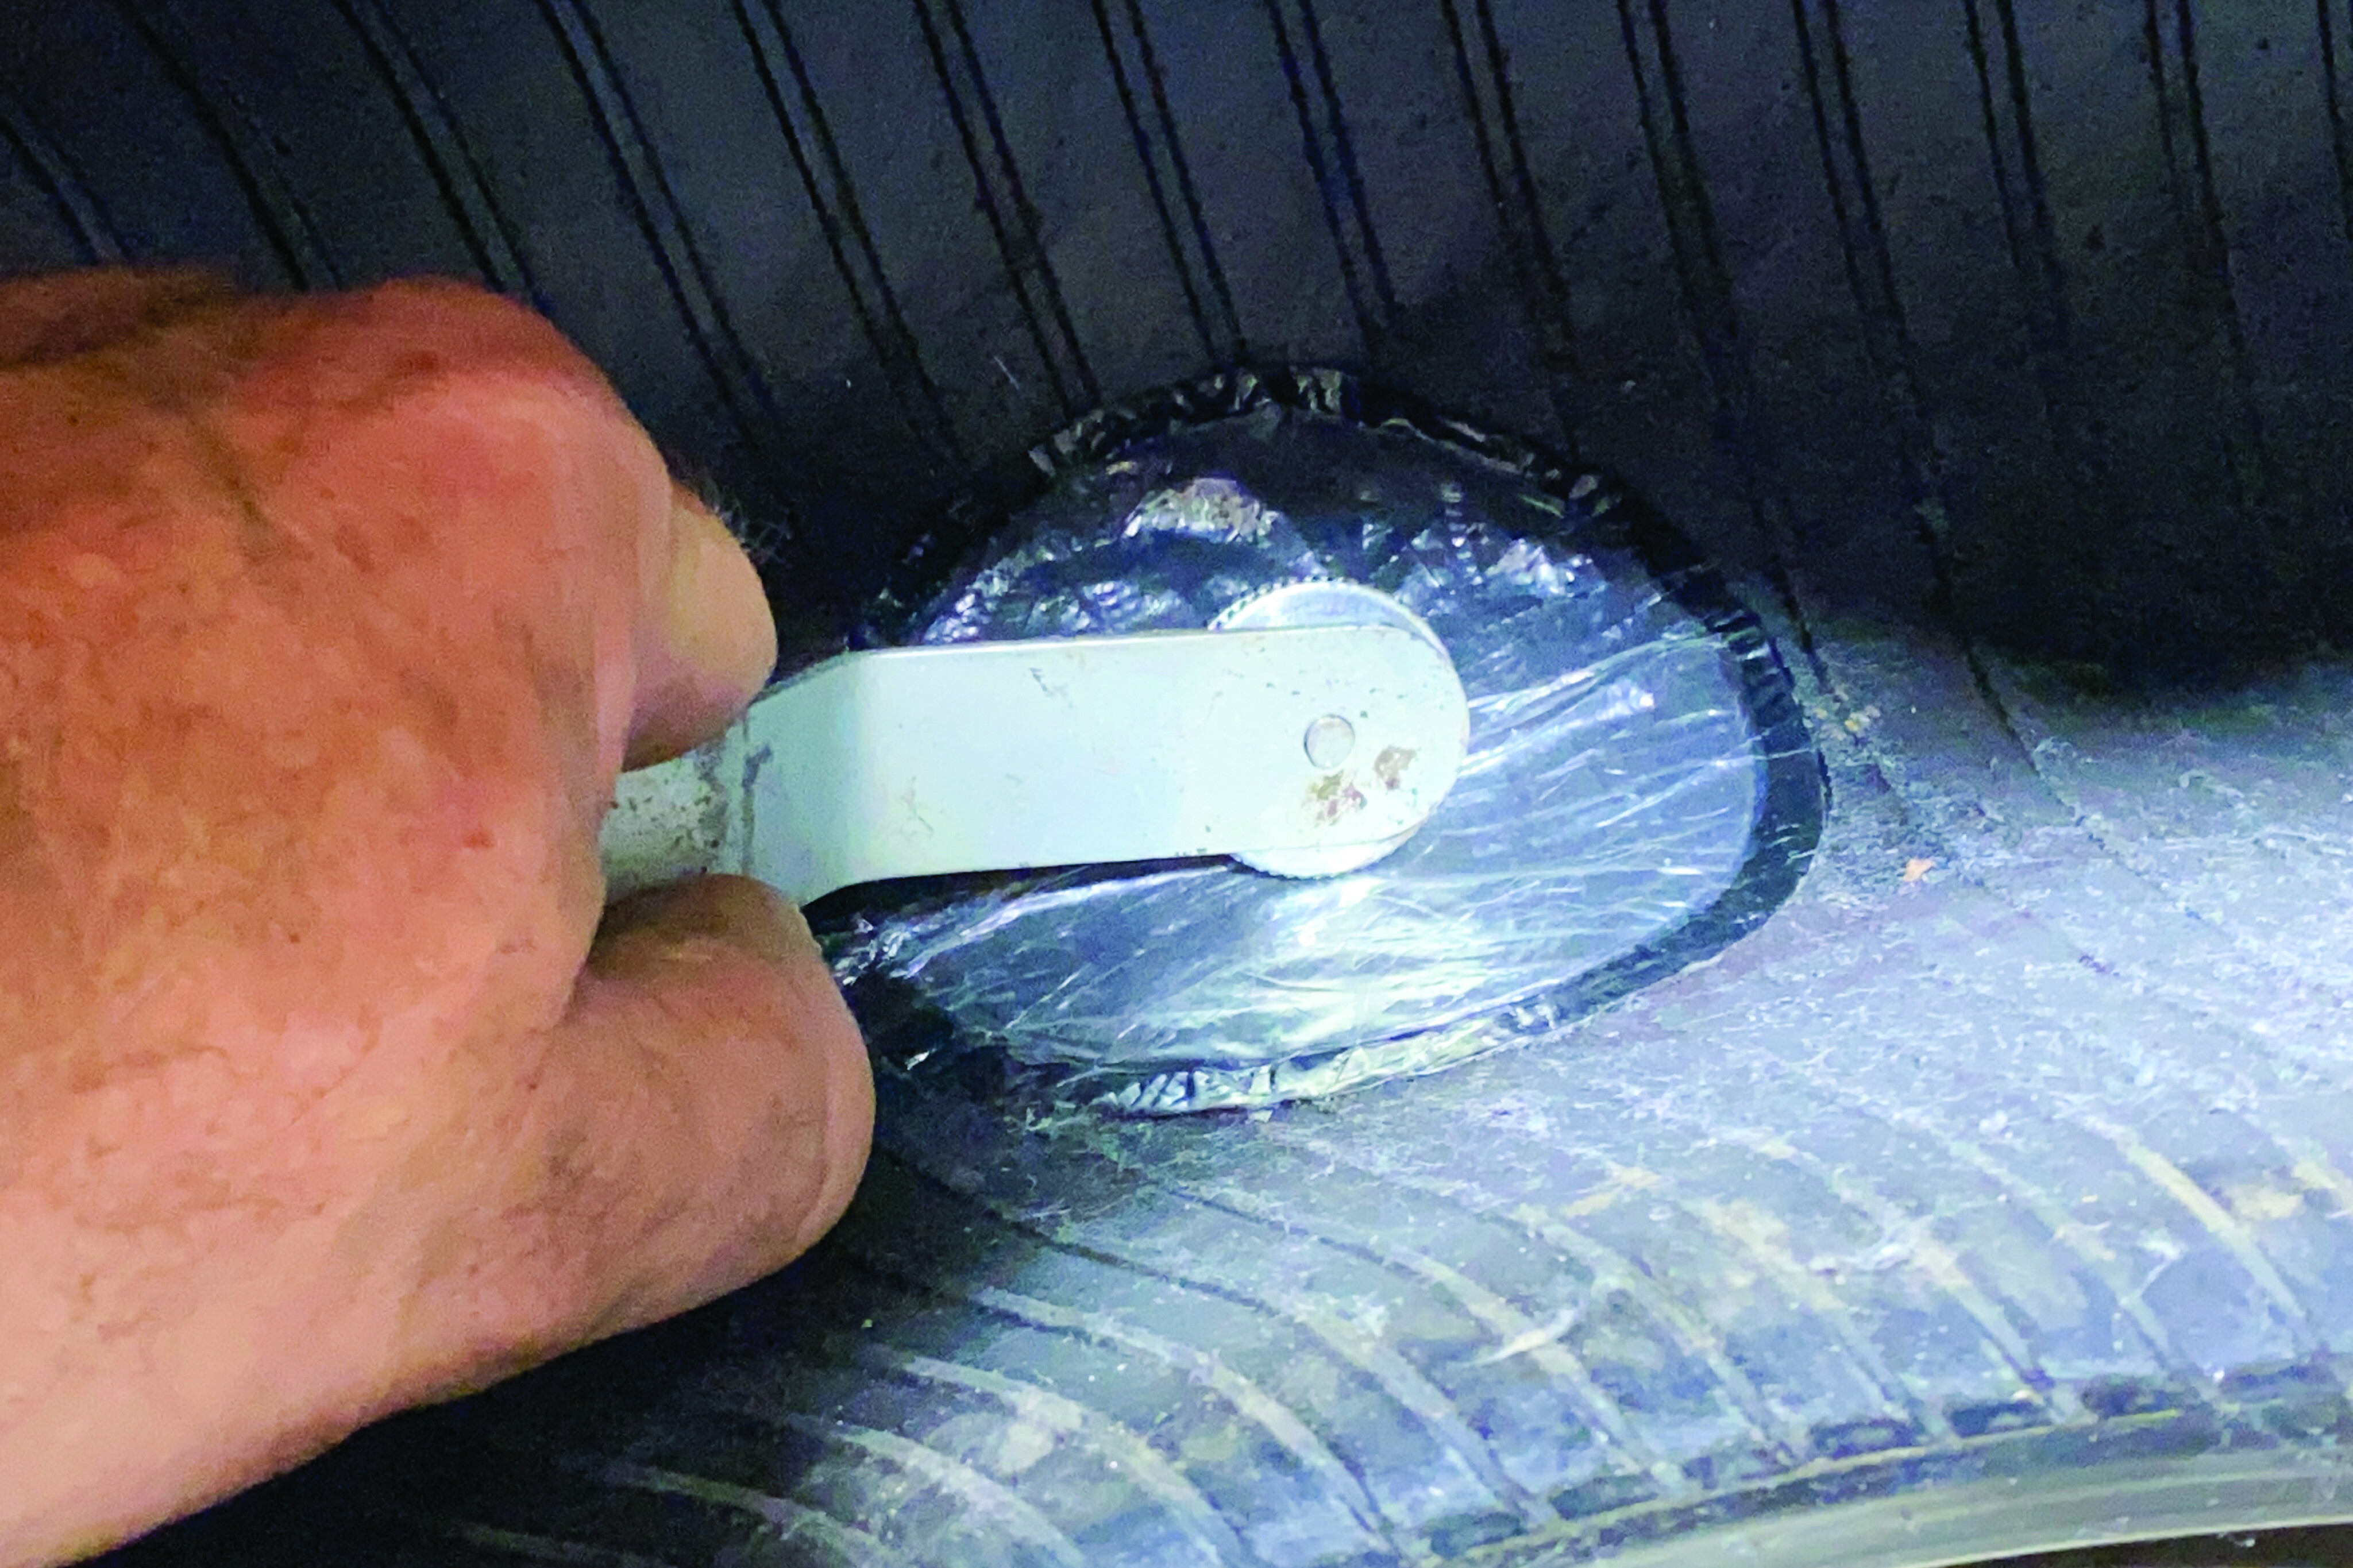
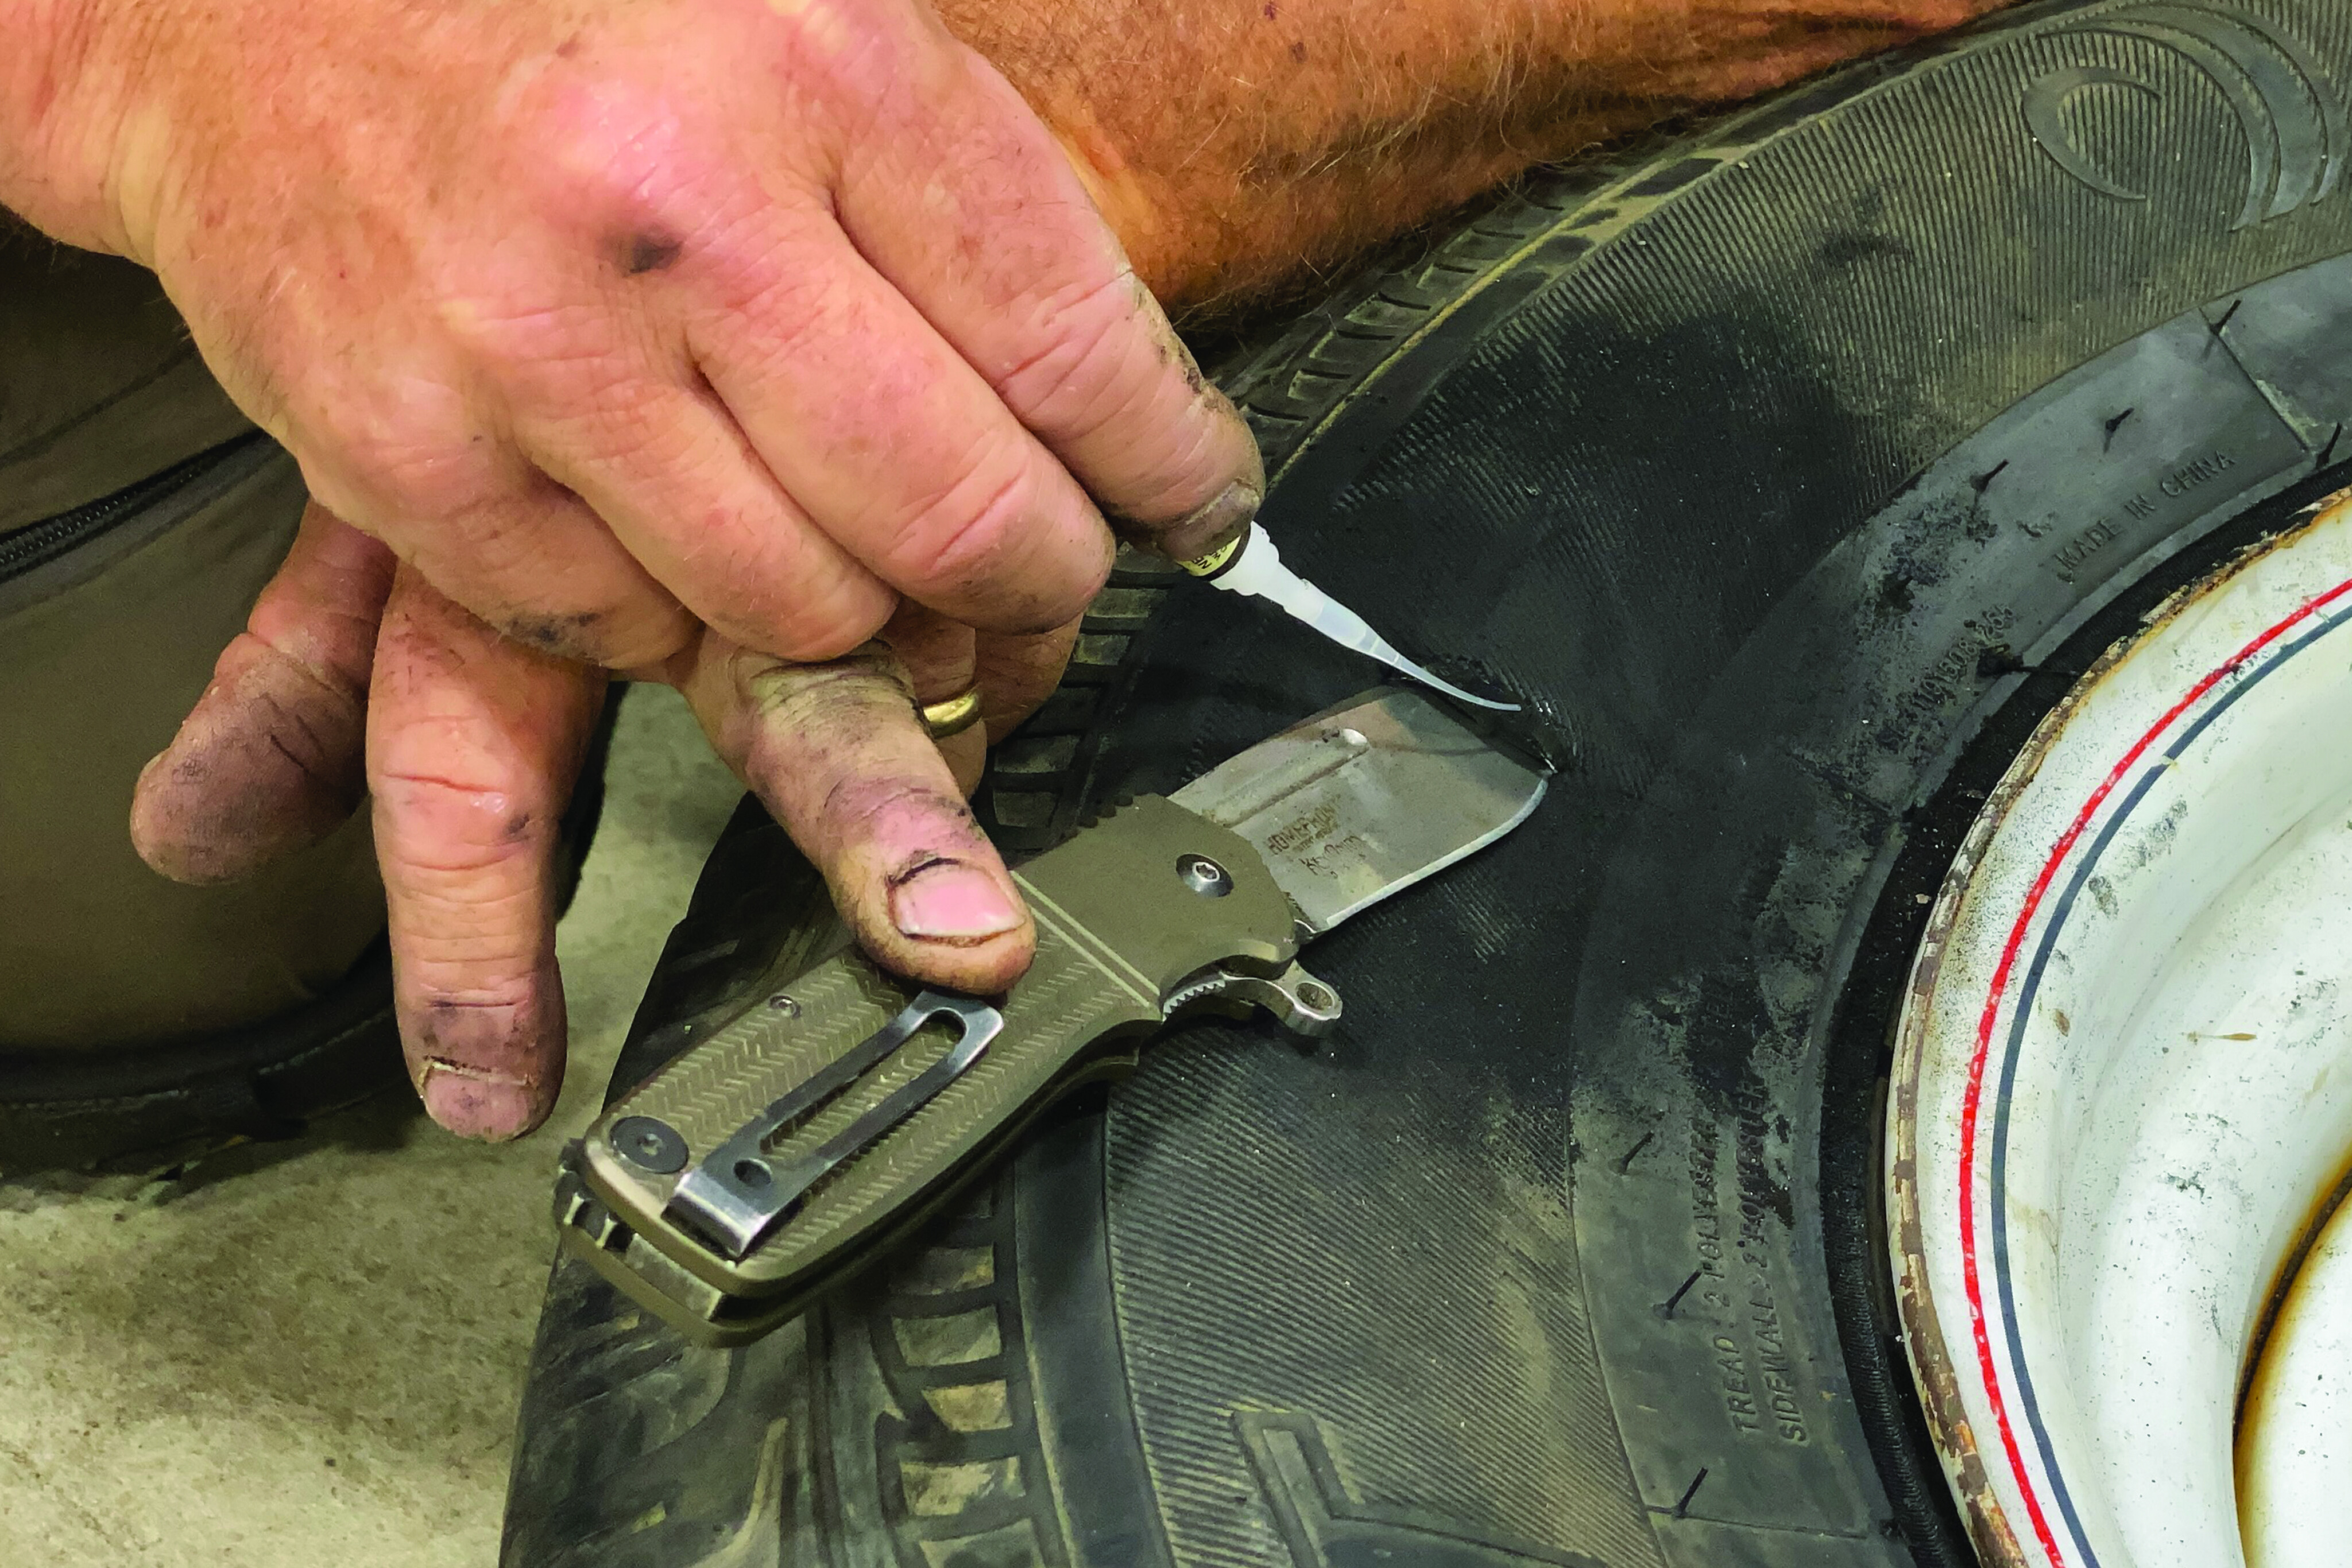
Identify the slice or damaged area, thoroughly sand around it with a wide margin, clean the surface and let it dry. Put an appropriately sized patch in place and mark around it with a Sharpie.
35
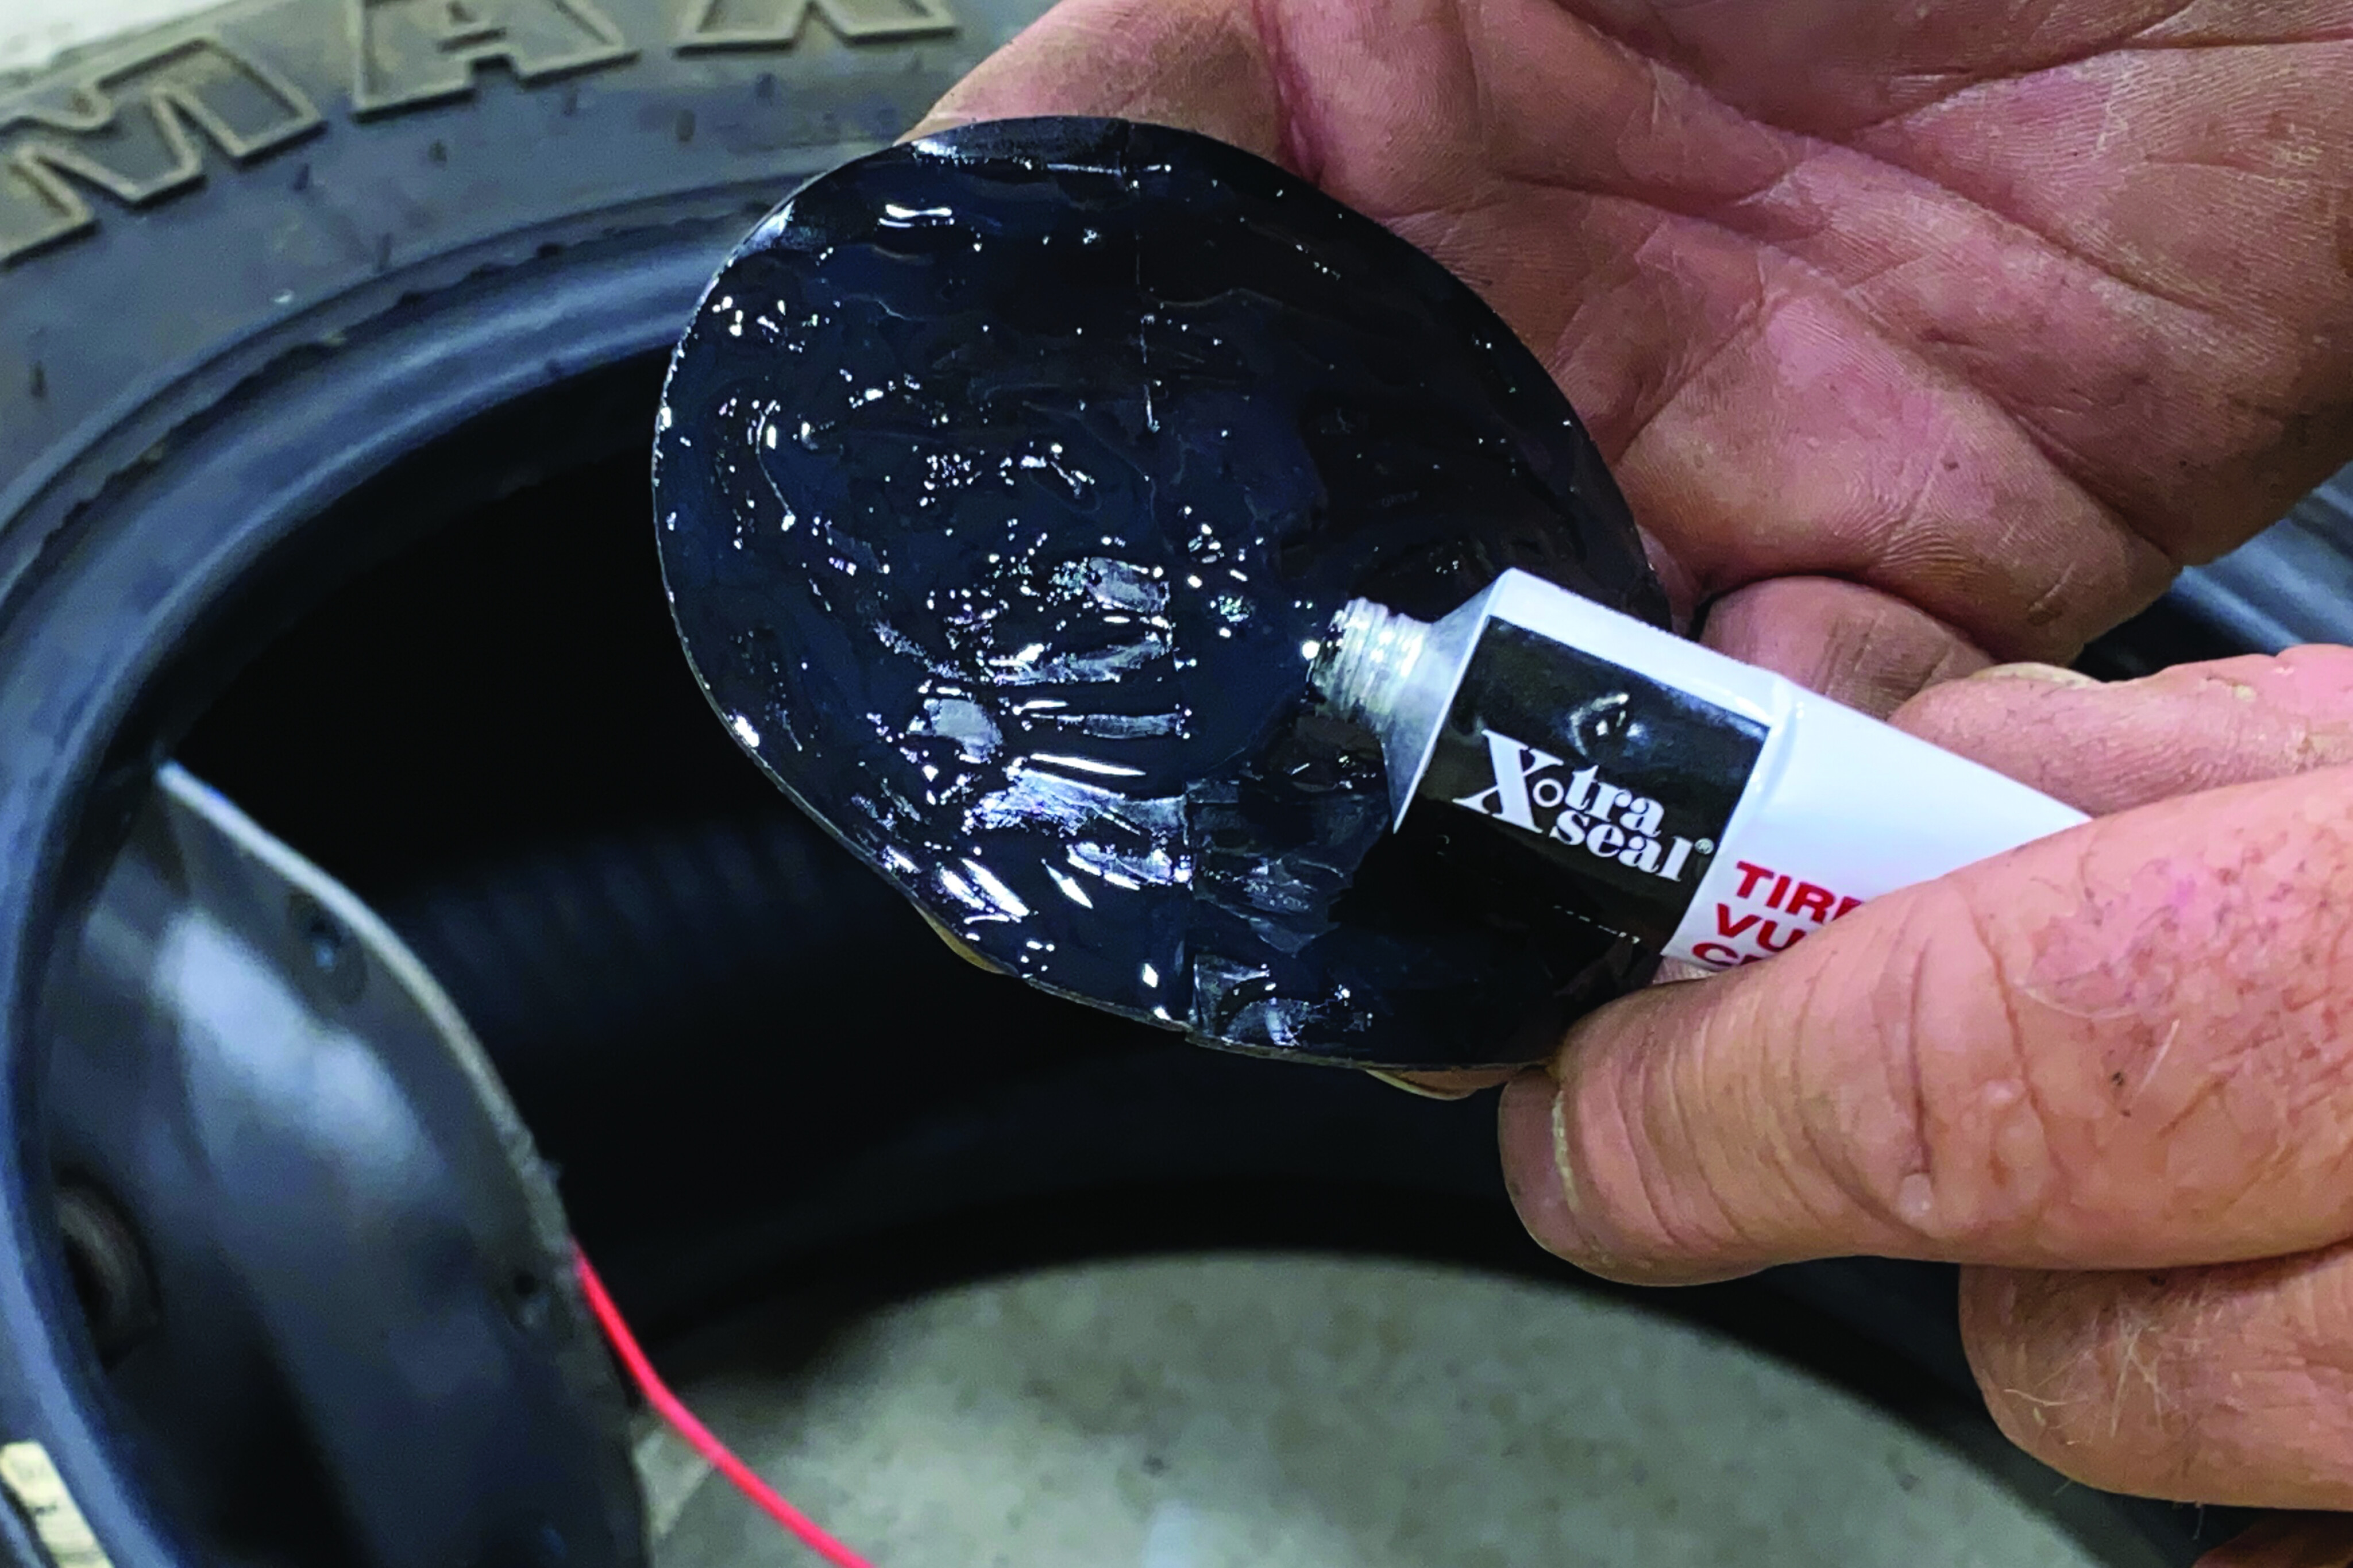
Open the gap, apply GlueTread adhesive to both surfaces, and make sure the surfaces are pressed together when done. It will cure in 60 seconds, then sand off excessive adhesive.

35
Drip adhesive per the provided diagram, apply the patch, and press firmly for 60 seconds. Adhesive should be slightly oozing from the edges. Give it a good spray with the accelerator bottle and allow one minute to cure. Done!
Practice makes perfect
Next time you head bush, make sure you are prepared for the most common of all track fixes.
I suggest getting the gear, grab an old tyre from behind the shed, punch a few holes in it and practice. You may never run into a renegade pushrod in the middle of the desert, but if one bushwhacks one of your tyres, at least you’ll know what to do.
Resources
Extreme Outback Products: www.extremeoutbackproducts.com [↗]
Safety Seal: www.safetyseal.com [↗]
ARB: www.arb.com.au [↗]
Power Tank: www.powertank.com [↗]
Hi-Lift: www.hi-lift.com [↗]
GlueTread: www.gluetread.com [↗]
The legal disclosure
In the name of safety (and to keep the attorneys happy), all of the repairs shown here are temporary fixes – just enough to get you out of strife. Once you’re out of the bush and back in civilisation, have a qualified tyre shop determine if your repaired tyre is toast or roadworthy. Failed brakes, steering and tyres can kill a fella… don’t take chances.
Please enable JavaScript to view the comments powered by Disqus.
COMMENTS